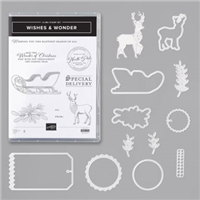
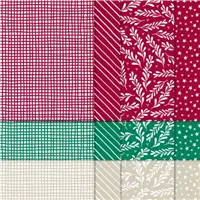
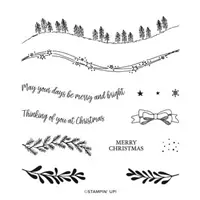
I have a two for one project to share with you today. The stamp set is a beautiful one and is on the Retiring List. It is the Wishes & Wonder Bundle. I paired it with another favorite, the Classic Christmas Designer Series Paper.
This is a quick card to make, which is my favorite kind. I used two different pieces of the Classic Christmas Designer Series paper to create the front panel. I then cut a tag using the Dies from the Wishes & Wonder Bundle. The stamped “postage” is from the stamp set. The circle and scalloped circle are also fro the dies. I finished it off with strips of each of the DSP pieces along with a Whisper White Seam Binding Ribbon at the top.
To pair with the card, I made a gift tag to match.
The sleigh is from the stamp set as well! I used the same tag die but made it to open. I folded the card stock in half with the fold on the left side. I layed it on the die with that fold just up against the INSIDE of the left cutting edge. This way it cuts everything but that side. Here is an open view.
I used the same stamps from the card to add to the sleigh. The inside stamps are from the set as well. I think these would make a great addition to a gift.
Measurements:
card base is 4 1/4 X 11
White is 4 X 5 1/4
DSP is 3/4 X 5 and 2 7/8 X 5
Folded Tag is 4 1/2 X 3 3/4
Thank you for stopping by today. I hope you have a wonderful weekend and please return on Monday.for more new projects.
I have the Retiring List here as well. Click on the picture and it will open to the three pages. It has been updated to show that individually purchasing the bundle pieces is cheaper than the bundle. Some of the dies are 30% off.
HOST CODE
My December Host Code is: 4QDB2ZYE Please use this code for orders under $150.00. I will have a small perk for those with orders over $50.00
After quite a lot of Christmas cards, today’s project is a Thinking of You type card. A dear young lady injured her leg and I wanted to let her know I was thinking of her. She loves nature and animals, so this card is right up her alley.
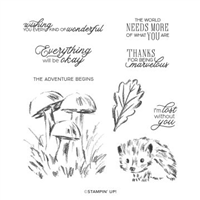
Isn’t this little guy adorable? I am not totally sure what he is, but I think a hedgehog??? I just love the expression on that face. I cased the stamped area from the Annual Catalog where the Walk In The Woods stamp set is shown. Sorry, I don’t have it in front of me to say the page number.
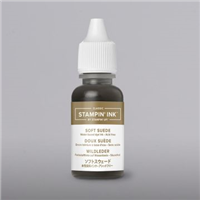
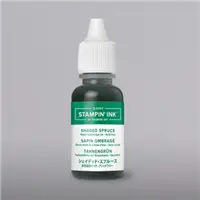
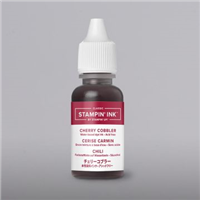
I wanted to try some more watercoloring with these images. I used my H clear Stamping Block and just a drop of the ink refills. The new Water Painters are awesome to use! I added a bit of water from the painter and mixed with the color I was using each time. The coverage is wonderful. For the grass and leaves, I began with Shaded Spruce and moved to Old Olive. The mushrooms are Soft Suede, Sahara Sand and Crumb cake. The tops are Cherry Cobbler. For Mr Hedgehog, I also used the Sahara Sand, Crumb Cake and Soft Suede.
The cut of the card is a little different and I apologize for not showing the inside. I had written inside before I thought that I had not taken pictures. Duh!!! You can see from how the stamped layer hangs over the front Shaded Spruce, that I have cut the top layer of the card. I cut off about 1 1/2″ I believe. I added a piece of the Classic Christmas Designer Series Paper, I love those little trees, to the inside to show where the front layer is cut off. The Whisper White layer to write on is still plenty large enough for a sentiment and writing.
The front sentiment, which I love because it is a little bit different, is from the Walk In The Woods stamp set. I didn’t show it, but the inside was a sentiment from the Life Is Beautiful set.
I have added the Retiring List from the current Mini Catalog. Simply click on the picture of the list and it will open to the three page list. This list has removed the stamps in other than English as well as the bundles. It is cheaper in this sale to purchase those bundled items separately. If you do place an order, please use my December Host Code. It is further down just above the supply list, and on the right side column if you are viewing on an ipad or larger device.
.
Thank you for stopping by today. I hope you enjoyed taking a break from Christmas Cards and will return tomorrow for , you guessed it, another Christmas Card!!! Hugs to you all!
HOST CODE
My December Host Code is: 4QDB2ZYE Please use this code for orders under $150.00. I will have a small perk for those with orders over $50.00
Hello, welcome to the Stampin’ Pretty Pals’ Blog Hop! This month our Design Team created projects showing “My Favorite Things” from any of the two current catalogs or the upcoming catalog in January. We hope you enjoy and will be inspired by them! Don’t forget to leave comments! We love hearing from you. At the end of my post, you will find the full line-up to help you “hop” along from Pal to Pal.
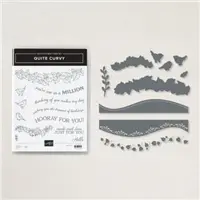
I Love Christmas. I love everything about it. And of all of the stamp sets and paper from Stampin’ Up! this year, I believe my favorite pair is the Curvy Christmas and the Classic Christmas Designer Series Paper. These two products are only for a limited time, and I have thoroughly enjoyed them.
Since I use DSP on most of my cards, you know I love Stampin’ Up!’s Designer Series Paper. But these designs on the Classic Christmas DSP are among the top for me. To celebrate that, I used four different pieces for this card. It may be a tad on the “busy” side, but it makes me happy!
The stamps are all from the Curvy Christmas stamp set. I had to re-curve them to fit the curve of the die I used. The Die is from the Curvy Die set. (It along with the Quite Curvy Stamp set will be in the next Mini Catalog. However the Curvy Christmas and Classic Christmas DSP are only available through the end of the year.) Since the stamps are photopolymer, the curving is a simple matter to achieve.
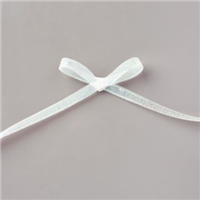
The bow was a last minute touch that I am crazy about! I even used it on yesterday’s card as well. You can see that card HERE. The bow does not have a matching die, but is very easy to fussy cut using our great Paper Snips. My finishing touch was to add Wink of Stella to the bow and the stamped stars across the top.
Thank you for visiting today! I would love to read your thoughts on my layers of DSP happiness. 🙂
More inspiration awaits! Use the Blog Hop Line-up below to visit the rest of this month’s Design Team. My fellow Pals are excited to show you what they’ve created! Mark your calendars for our next blog hop on January 13th when our theme will be Time to Sale-A-Brate. Participants will showcase tags or 3D items that will be great for gifts for any occasion. Don’t miss the fun! Until then, please stay safe and have fun in your craft room.
Before I get to today’s card, I wanted to share the Year End Closeout Sale with you. I am sure you have seen the retiring lists. The one I am sharing is a paired down version. This one does not include bundles and other languages. The bundle products are less when purchased individually. And this way makes it easier to find. Just click on the picture below and it will open up to a three page spread. Remember, all of these items are while supplies last. So if you really want something, this may be the last chance. Or give a wish list to a family member or friend and have them contact me. I would be thrilled to assist them in a gift for you.
Now for today’s card. It is a quick Christmas card using the Curvy Christmas stamp set.
The gorgeous Designer Paper is from the Classic Christmas DSP and is part of the special Curvy Christmas Suite.
All of the stamps are from the Curvy Christmas stamp set. It is only available through January 4th. The three Fir boughs are stamped using Shaded Spruce Ink. The bow is stamped using Cherry Cobbler Ink and then colored with Cherry Cobbler Blends. There is not a die for the bow, so I fussy cut it with my handy Paper Snips. It is really easy to cut. You can see the flyer I have at the bottom of the post.
The sentiment is also from the stamp set. But the oval backgrounds are a sneak peek of an upcoming punch. It is the Double Oval Punch. Yes, you read that correctly!! The scalloped oval and the plain oval are both on one punch. I love punches for quick cards and this is a must have to me. This punch will be available in the January – June Mini Catalog.
Thank you for stopping by today. Please come back tomorrow for another new project as part of the Pals December Blog Hop. There will be a lot of great projects shared.
HOST CODE
My December Host Code is: 4QDB2ZYE Please use this code for orders under $150.00. I will have a small perk for those with orders over $50.00
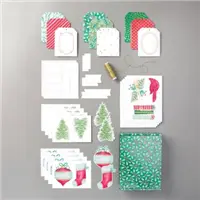
Yesterday I shared the “surprise” background I got from coloring a Square Vellum Doily using the upcoming Blending Brushes. Today I am sharing the card I was trying to make at the time. It has a few of the same elements of yesterday’s card, but looks totally different. Consider this as a “2 for 1” idea.
Looking at this card now, it’s sort of hard to see the doily and compare to yesterday. In case you missed yesterday’s card, you can see it HERE. I have gone from clean and simple to many layers!
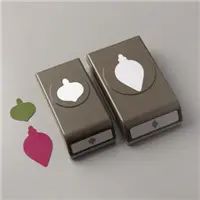
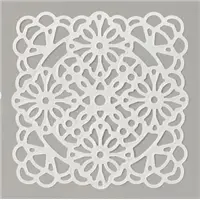
I wanted a lot of texture on this card. I used the Square Vellum Doily, although I have it positioned as a diamond, and colored it with the Blending Brushes using Cherry Cobbler Ink. I also punched three ornaments from the Red and Green Foil sheets using the Gleaming Ornaments Punch Pack. This is two different size ornaments.
I also added the ornament from the Tag Buffet Stamp Set. I stamped it in Cherry Cobbler Ink and colored it with Cherry Cobbler and Shaded Spruce Stampin’ Blends. The “believe” is stamped in Cherry Cobbler also.
The background is a piece of the Green Foil that I embossed using the Hammered Metal Embossing Folder. For more texture, I added a piece of the Wonder Of The Season Designer Series Paper underneath everything. The finishing touch is the Snowflake Splendor Ribbon made into a huge double bow. I wanted a bit of layering and dimension and definitely achieved that! This is not a card to be mailed however due to the bow.
Thank you for stopping by today. I hope you have a wonderful weekend and come back on Monday for another new project.
HOST CODE
My December Host Code is: 4QDB2ZYE Please use this code for orders under $150.00. I will have a small perk for those with orders over $50.00
In trying to add some texture to card, I used the Blending Brushes that will be in the upcoming January – June Mini Catalog. I was going to use the brushes to color one of the Square Vellum Doilies with Cherry Cobbler Ink. I had a great unexpected result. Naturally I turned that into a card as well.
This card was a variety of “accidents” that ended up being great finds. I did not necessarily intend for the Whisper White card layer to be under the doily as I was using the Blending Brush. After a few strokes with the brush I happened to notice that it was clearly leaving the blank image underneath. Then I became careful in holding the doily in place.
The second surprise find was from the swipes of the Blending Brush. To achieve a smooth, less brush strokes, look you begin your strokes off of the intended area. That leaves the harsher and deeper color off your project. What I noticed from those strokes was the dark and light lines you see on the card. It reminded me of a beautiful sunset streak of color.
When I finished with the coloring of the doily and removed it from the card stock, I realized the negative area was much prettier than the colored doily! I still used the doily, and you will see it on another card later. But I was so excited about my accident, that I wanted to finish it first.
To keep this a simple card to showcase the background, I used the Christmas Gleaming Punch. I punched an ornament from the Red Foil and then embossed it with the Hammered Metal Embossing Folder. I tied a bow with the Snowflake Splendor Ribbon and added a sentiment trimmed with the Banner Pick A Punch.
Thank you for stopping by today and I hope you liked this surprise card as much as I do!
HOST CODE
My December Host Code is: 4QDB2ZYE Please use this code for orders under $150.00. I will have a small perk for those with orders over $50.00
The content in this blog is the sole responsibility of Jackie Beers as an Independent Stampin' Up! Demonstrator. The use of and content of classes, services or products offered is not endorsed by Stampin' Up!

 The sleigh is from the stamp set as well! I used the same tag die but made it to open. I folded the card stock in half with the fold on the left side. I layed it on the die with that fold just up against the INSIDE of the left cutting edge. This way it cuts everything but that side. Here is an open view.