My favorite colors from Stampin’ Up! are the Brights Collection. The Ocean Friends Suite is full of the Bright colors and feeds my need. Plus these papers just make me Smile!
And this one is a Fun Fold as well.
STAMPS
There are two different stamp sets used on this Fun Fold card. Both of the sentiments are from the Pattern of Friendship stamp set. The front sentiment is a definite favorite of mine. Cards should make us Smile, and this sentiment really does for me. And the inside Bubble looking font of Happy Birthday is from the same set.
To add some additional “sea” or “ocean” to the inside of the card, I added the bubbles around the sentiment. These are from the Ocean Friends stamp set. The bubbles paired with the starfish DSP and did not leave the inside as plain.
PUNCH
The fun sentiment layer on the front is made using the awesome Sweetest Star Punch. I really love this punch and was so happy it carried over. You may remember it from the Fall Mini Catalog. It was a bundle with a Mr. and Mrs. Claus stamp set. To create my focal layer, I stamped two of the stars and layered them on top of each other but spread out. It was easier to stamp the sentiment after punching out the star. Since the stamp set is photopolymer I could see placement perfectly. And much simpler than stamping and then trying to get it positioned where I wanted it when trying to punch.
PAPERS
These bright colors from the Friends of the Ocean Designer Series Paper are what created the card. I love the mix of Brights in the starfish piece. And I am old enough to remember when orange and pink were first paired together back in my younger days. I loved it back then as well as now. Both of these papers are from that DSP.
The card base is pulled from the DSP. I used Pumpkin Pie as the color. Lemon Lime Twist and Summer Splash are the two star colors. The card base is 5 1/2 X 8 1/2 and scored at 1 1/2 and 5 3/4 to make the fun fold. The smallest section is the bottom and I used Tear & Tape to close the edges. A gift card will fit in here as well as the sentiment layer.
The front DSP layers are placed on a Basic White layer that measures 5 X 3 3/4. To add this to the front of the card, I added my glue to the card front. This ensured I would not have too much glue and glue my card shut!
EXTRAS
The bling and ribbon are the two Extras today. It was used to join the two patterns of DSP together after adhering them to the Basic White base. Plus it gives a grounding spot for the star.
I chose the Sunny Day Iridescent Dots for my bling. There are three different colors in two different sizes on the package. I scattered all three colors around the card. These are also part of the Friends of the Ocean Suite of products.
HOST CODE
My FEBRUARY HOST CODE is S2EYAW9N. Orders of $50.00 or more will receive an appreciation gift from me. I appreciate you choosing me as your demonstrator!
Thank you for stopping by today. I hope you enjoyed today’s project and will come back. I do read and reply to all of the comments individually. They mean a lot to me. Please reach out if you have a question.
Smile and Keep On Stamping,
Jackie
New Scrapbooking Catalog
The newest addition to Stampin’ Up! is an Online catalog of Scrapbooking products. You can see the catalog by clicking the photo below and save it to your computer.
Online Exclusives
New Online Exclusives have dropped. There are Halloween, Fall, Christmas, and many that are great year round. Of course the new Designer Series Papers and Embellishments are fabulous as well!
You can go directly to these in my Online Store by clicking HERE
The card today is a mix of Floral patterns from the Unbounded Beauty DSP. I have paired it with a wonderful quad fold layout. It looks very elaborate, but is easy to create. Stand by for all four photos!
Above is the fully closed card. Next is the first flap open.
Next is with both front flaps open.
And finally to show there is still the regular inside of the card. So plenty of room for your thoughts and signature.
STAMPS& DIES
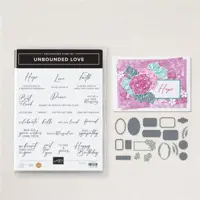
This fold allows for several locations to add a sweet sentiment. All of the ones I used are from the Unbounded Love Bundle. There are two sentiments and on the smaller of the front flaps, I added a die cut leaf from the Bundle. It was fun deciding on placement for the different stamps and papers.
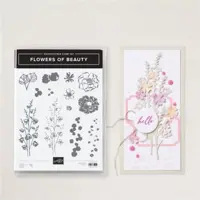
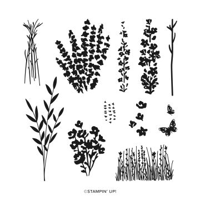
The stamping is all done using the colors of the paper. For the sentiments I went with Petunia Pop for the pop of color. And for the foliage images I used Summer Splash. These images are from the Flowers of Beauty Stamp set.
PAPERS
These beautiful papers are all from the Unbounded Beauty Designer Series Paper. I love how well they all work together. The smaller bouquets on the front flap are fussy cut from one of the sheets, in addition to the solid pieces.
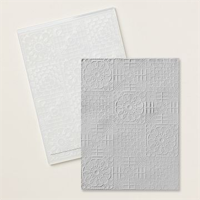
The gorgeous blue / green is Coastal Cabana. I liked the light and bright of this pairing. For the front flap I added texture using the Cute Crochet Embossing Folder. These sweet designs in the paper paired perfectly with the floral images of the papers.
EXTRAS
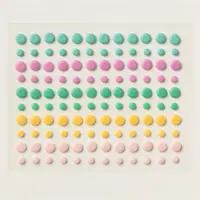
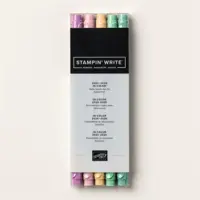
To add some “stand out” detail to the fussy cut florals on the front flap I used the Coastal Cabana Stampin’ Write Marker to go around the edge of the cut outs. It helps the White to blend better onto the Coastal Cabana. And for the bling, I went with the InColor Resin Dots. There are a couple of different colors of these dots passed around the card.
The Unbounded Beauty DSP, Unbounded Love Bundle, the Flowers of Beauty stamp set, and the In Color Resin Dots are all from the Unbounded Beauty Suite of Products. This is a double bundle suite and is fabulous.
MEASUREMENTS
To create this card only takes a few extra score marks and extra pieces of cardstock. The card base is 4 1/4 X 11 scored at 5 1/2. The front top left flap is 4 X 31/2 and scored at 1/2″ on the 4″ side. And the bottom right flap is 3 1/2 X 3 scored at 1/2″ on the 3 1/2′ side.
The flaps are added to the card base prior to the large piece of DSP. Fold on the score lines and then align the flap score line with the edge of the front of the card base. Space the two flaps evenly from the top and bottom of the card.
The DSP and Basic White pieces are all 1/8″ smaller than the base they are on. The largest DSP on the card base is 4 1/8 X 5 3/8. The large flap is 3 3/8 X 3 3/8 as is the Basic White on the reverse side. For the smaller flap you need 2 7/8 X 2 7/8 of DSP and Basic White.
HOST CODE
My FEBRUARY HOST CODE is S2EYAW9N. Orders of $50.00 or more will receive an appreciation gift from me. I appreciate you choosing me as your demonstrator!
Thank you for stopping by today. I hope you enjoyed today’s project and will come back. I do read and reply to all of the comments individually. They mean a lot to me. Please reach out if you have a question.
Smile and Keep On Stamping,
Jackie
New Scrapbooking Catalog
The newest addition to Stampin’ Up! is an Online catalog of Scrapbooking products. You can see the catalog by clicking the photo below and save it to your computer.
Online Exclusives
New Online Exclusives have dropped. There are Halloween, Fall, Christmas, and many that are great year round. Of course the new Designer Series Papers and Embellishments are fabulous as well!
You can go directly to these in my Online Store by clicking HERE
I have a wonderful Fun Fold to share with you today. Not only is the fold great, but I have used the fabulous birthday DSP that partners with the Birthday Celebration bundle and Suite. These are all products that will make you smile!
The card is in a stand for photographing so I could get it sort of flat. I could not get the proper angle with it standing on it’s own. Here is a look at it open to see the inside as well as more of the side strips of DSP.
STAMPS& DIES
There are actually only three stamps used from the Birthday Celebration stamp set. And they are beautifully scripted. That is always something I look for. I love different fonts. These are probably some of my all time favorites in terms of bold and beautifully done. Both the inside and the front are stamped using Blueberry Bushel Ink. And the banner strip on the inside is stamped using Wild Wheat Ink. I am so going to miss that color when the In Colors change this Summer. That is my go to for a Gold stamping.
The only Die used is the tag on the front. It is also from the Birthday Celebration Bundle. I was thrilled when I realized it fit the sentiment plus added a great layer to the front of the card. And it shows that Blueberry Ink is a good pairing with Pool Party card stock. I called this a tag, when it really is not. There are no holes in this Die. It is designed to make multiple banners for the birthday celebration. As you can see though it works great as a single layer!
PAPERS
The star of the card is this gorgeous DSP. All of the sheets used are from the Wildflower Birthday Designer Series Paper. This is not just pretty paper. But half of the sheets have gold foil details. You can see on the front with the cakes. And also on the Pool Party strip on the inside with the scallops of gold. There is a second of that strip on the left hand side that you cannot see the way I photographed. The pink check strips are a reverse side of another sheet.
To pair the Blueberry Bushel with the cake sheet really pulls the blue to the forefront. If you follow me I shared a previous card using one of the floral sheets and paired it with Blueberry Bushel as well. It is a perfect match and I could not resist doing it again. Here is a view of the previous card. https://jackiebeers.com/2025/01/banner-window-card/ The Pool Party Banner card stock is pulled from the paper also. And of course I cannot forget the Basic White inside layer.
EXTRAS
This fun card is a CASE of the Fun Fold from Connie Stewart. She called it Vertical Free Standing and has a video. I have a link to my project sheet with basic directions below.
The need for bling on this card was minimal with all of the gold foil in the DSP. I did use the Gold Twisted Thread for the bow of the banner on the front. It needed a bit more attention. And I added a single gold dot from the Low-Profile Dots.
My FEBRUARY HOST CODE is S2EYAW9N. Orders of $50.00 or more will receive an appreciation gift from me. I appreciate you choosing me as your demonstrator!
Thank you for stopping by today. I hope you enjoyed today’s project and will come back. I do read and reply to all of the comments individually. They mean a lot to me. Please reach out if you have a question.
Smile and Keep On Stamping,
Jackie
New Scrapbooking Catalog
The newest addition to Stampin’ Up! is an Online catalog of Scrapbooking products. You can see the catalog by clicking the photo below and save it to your computer.
Online Exclusives
New Online Exclusives have dropped. There are Halloween, Fall, Christmas, and many that are great year round. Of course the new Designer Series Papers and Embellishments are fabulous as well!
You can go directly to these in my Online Store by clicking HERE
Plaids are a pattern that should fit anyone. At least that is my view of the gorgeous plaid DSP Stampin’ Up! currently has. Add this to a simple fun fold card and I think you have a winner. A different shape of the sentiment is the cherry on top of the cake!
STAMPS
The star of this card is hard to define. There are three different options. But I am beginning with the sentiment. This one is from the stamp set that is a must have for sentiments. It is the So Sincere set. I love the vertical Happy Birthday! The layout of the card fits that vertical perfectly. I sometimes look for these and of course do not find them. There should be a vertical sentiment stamp set of the most common sentiments I believe.
The inside sentiment is also from the So Sincere stamp set. That is really an added bonus. I tend to mix and match. But I love having a pair in one set. Here is the open view of the card.
PAPERS
This beautiful plaid DSP is from the Timeless Plaids Designer Series Paper. I really love the colors in this sheet. And all of the plaids are really nice matching colors. The checkerboard on the front strip is the reverse of this piece, I believe. Sorry but I made this card last week for a class and my memory is shorter every day! 🙂 The best part of this paper pack is there are plaids to fit anyone.
The card base is Basic Beige cardstock. This cardstock is so pretty and versatile. It is a soft color in my book. I did pair it with Very Vanilla for the sentiment and the inside. But I could have simply used the Basic Beige there as well. It is light enough to stamp on easily.
DIES
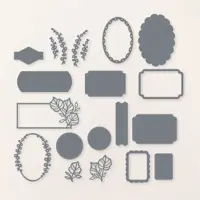
There are two different Die sets used here. That perfect long oval for the sentiment is from the Greetings of the Season Die set. I love that long oval and the fact it fit the sentiment perfectly is just a bonus.
The second Die set used is the Changing Leaves Dies. These are the leaves on the front. There are two leaves attached and one single. The details are great and they add just enough texture to the card. These Dies come with the Hybrid Embossing Folder. Both of these Die sets are on the Last Chance List. This means that they are retired when the last ones are sold.
EXTRAS
The single bling today is unusual of course. If you follow my posts then you know I love bling. Today I restrained myself and used the single Adhesive Backed Sparkle Gems. These are a mix of four different colors of mostly earth tone. This one is black sparkle. It could be elegant or rustic. The placement is important because all of the Greetings of the Season Dies are all tags. My black sparkle dot covers that tag hole!
HOST CODE
My FEBRUARY HOST CODE is S2EYAW9N. Orders of $50.00 or more will receive an appreciation gift from me. I appreciate you choosing me as your demonstrator!
Thank you for stopping by today. I hope you enjoyed today’s project and will come back. I do read and reply to all of the comments individually. They mean a lot to me. Please reach out if you have a question.
Smile and Keep On Stamping,
Jackie
New Scrapbooking Catalog
The newest addition to Stampin’ Up! is an Online catalog of Scrapbooking products. You can see the catalog by clicking the photo below and save it to your computer.
Online Exclusives
New Online Exclusives have dropped. There are Halloween, Fall, Christmas, and many that are great year round. Of course the new Designer Series Papers and Embellishments are fabulous as well!
You can go directly to these in my Online Store by clicking HERE
My card today is for one of the sweetest people I know. She does so much for everyone and I am honored to call her a friend. As a special Thank You, I made this card and hope you are as happy with it as I am.
STAMPS
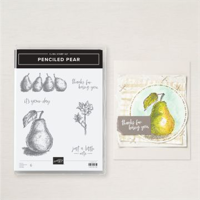
This sentiment is so perfect for the intended recipient. It is a bit different than normal, but fits the bill perfectly. The fun font is awesome as well. I love a different font. This one is from the Penciled Pear stamp set. That set is a hidden gem in the Annual Catalog. The inside sentiment is from the Wonderful Thoughts stamp set. There is also a matching flower from the Painted Lavender stamp set inside. Here is a view of the open card. It is a Double Z fold.
PAPERS
The card base ,or bases, since there are two Z folds are Pretty Peacock cardstock. And all of the DSP is from the Perennial Lavender Designer Series Paper. I normally do not put DSP on the inside of the Z base. However I saw one recently that had done so, and it really added to the card. So I saw this tone on tone floral in the paper pack and said Why Not! Additionally the surround for the front sentiment is also included in the DSP pack. I believe it is the opposite side of this main floral pattern.
EXTRAS
There is only one extra for this card. And that is very surprising even to me! It is the Die used for the sentiment on the front of the card. This Die is from the Unbounded Love Die set. It is one Die, but it cuts the outside and inside both. So it was simple to cut the DSP and then the White with the sentiment separately. Then I simply put them back together again. Plus I now have a White outside and plaid inside leftover for another card. Two for the price of one!
MEASUREMENTS
The Pretty Peacock card base is 11 X 4 1/4 and scored at 2 3/4 and 5 1/2. The inner card is also Pretty Peacock and is 10 1/2 X 3 1/4, and is scored at 4 1/2 and 7 1/2. There are different DSP on each of the layers. For the card base the DSP measures 2 pieces @ 2 1/2 X 4, these are the front and center. And the inside back is 5 1/4 X 4. For the smaller card, the DSP is 4 1/4 X 3 for the front. The middle section is 2 3/4 X 3. The back White layer that is stamped on is 2 3/4 X 3 also.
HOST CODE
My DECEMBER Host Code is SAQE7VYU. Please use this code for orders under $150.00. I will have a small gift for those with orders over $50.00 in addition to the Perk Rewards Program. You can read all of the information at the top of the page in the Menu Bar under SHOP / Perks.
Thank you for stopping by today. I hope you enjoyed today’s project and will come back. I do read and reply to all of the comments individually. They mean a lot to me. Please reach out if you have a question.
Smile and Keep On Stamping,
Jackie
New Scrapbooking Catalog
The newest addition to Stampin’ Up! is an Online catalog of Scrapbooking products. You can see the catalog by clicking the photo below and save it to your computer.
Online Exclusives
New Online Exclusives have dropped. There are Halloween, Fall, Christmas, and many that are great year round. Of course the new Designer Series Papers and Embellishments are fabulous as well!
You can go directly to these in my Online Store by clicking HERE
Fun Fold cards are my favorite to make. And cute animals are a close second in favorites. So today I joined the two using Christmas Friends Bundle.
STAMPS
The star of this card is the Christmas Friends Bundle and this adorable Moose. He looks so happy ice skating through the woods with his warm scarf. I stamped him using Early Espresso Ink and then colored with Stampin’ Blends. All of the colors are in the Supply List at the bottom of the post. The trees and stars are also part of the stamp set and matching Dies. The garland at the bottom, as well as the circle, are also part of the Die set. There are a lot of goodies here that you should check out.
There are two additional stamp sets for the sentiments. This front one is from the Humble Home stamp set. I love the small and simple handwriting look to the Merry Christmas. And the inside sentiment is from the Peaceful Season stamp set.
PAPERS
The DSP is where all of the other papers were pulled from. These pretty snowflakes are from the Snowy Scenes Designer Series Paper. This sheet has the snowglobes on the reverse side. From this I pulled the Garden Green as the card base. The small card is Pool Party which is also part of the DSP.
EXTRAS
The bling for this card is a bit brighter than usual. At least it stands out in the photo very well. They are a trio of the Earth Tone Shimmer Gems from the Mini Catalog. I thought the darker green would pop better and highlight the card base. And I believe they do.
Fun Fold Directions
To create this card you begin with a piece of cardstock measuring 5 1/2 X 8 1/2. Score it at 4 1/4. Then with the 8 1/2 along the top and the score line down the center, place the score line on the trimmer cutting channel. Hold that in place and rotate the cardstock so that the left side bottom point is also in the cutting channel. Cut that angle off. Next is the DSP. The inside panel measures 4 X 5 1/4. Cut two of these. One goes on the inside of the card. The other gets cut at an angle to go on the front of the card. Cut from the top right to the bottom left.
The small card measures 3 X 8 and is scored at 4. And the inside Basic White measures 2 3/4 X 3 3/4. Here are photos of the two other views of the card.
When the small card is added, align it with equal borders as you would any layer. Just ensure the front flap will close. I suggest doing a dry fit before adding adhesive. Please let me know if you have any questions.
HOST CODE
My DECEMBER Host Code is SAQE7VYU. Please use this code for orders under $150.00. I will have a small gift for those with orders over $50.00 in addition to the Perk Rewards Program. You can read all of the information at the top of the page in the Menu Bar under SHOP / Perks.
Thank you for stopping by today. I hope you enjoyed today’s project and will come back. I do read and reply to all of the comments individually. They mean a lot to me. Please reach out if you have a question.
Smile and Keep On Stamping,
Jackie
New Scrapbooking Catalog
The newest addition to Stampin’ Up! is an Online catalog of Scrapbooking products. You can see the catalog by clicking the photo below and save it to your computer.
Online Exclusives
New Online Exclusives have dropped. There are Halloween, Fall, Christmas, and many that are great year round. Of course the new Designer Series Papers and Embellishments are fabulous as well!
You can go directly to these in my Online Store by clicking HERE
The content in this blog is the sole responsibility of Jackie Beers as an Independent Stampin' Up! Demonstrator. The use of and content of classes, services or products offered is not endorsed by Stampin' Up!