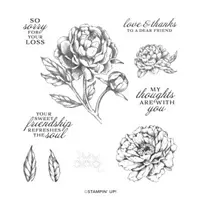
As I have said previously, the Peony is my favorite flower. That said, I have another card using the Prized Peony stamp set and the Peony Garden Designer Series Paper. Both of these are just simple and pretty.
The flower is stamped using Smoky Slate Ink and colored with the Dark Petal Pink Stampin’ Blend. I just went over the darker areas of the flower and left the rest white. The center is colored using the Dark So Saffron Stampin’ Blend.
The dark layer of the card is Basic Gray card stock. This is one color that I do not use very often. I just forget about it and it is a great neutral. It pairs beautifully with the Petal Pink card stock. The DSP on the lever and behind the flower are also shades of gray, so it blends there as well.
Thank you for stopping by today! I really appreciate it and hope you will return tomorrow. There are quite a few layers and pieces to this card, and although it is quite simple to put together, it does take a bit of time to cut the pieces. I am working on a video and will have that for you soon.
HOST CODE
My August Host Code is 6M4NU6C2 Please use this code for orders under $150.00. I will have a small perk for those with orders over $50.00
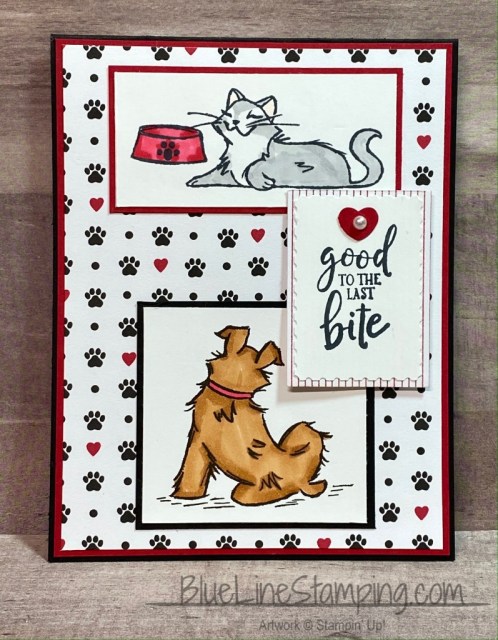
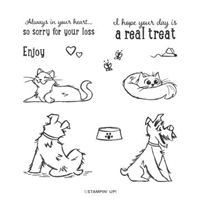
I am sure you were thinking “what in the world” to my title for today! I had the Pampered Pets set out to color an image for a friend to determine the best brown for a dog card. When I went to play today, I decided to use that dog I had colored. My crazy mind went back to our chocolate lab that passed a few years ago. He was always good for craziness!! And the card was born.
The idea behind this layout, is that our dog was allowed to lick the cat plates once they were finished. However, there is always one in a crowd! One of the girls would always sit there acting like she was still eating if he made a move to her plate! Even though she was finished and had cleaned the plate. She just loved to aggravate the dog 🙂 So that is what I see in this kitty by the food bowl. LOL!!!
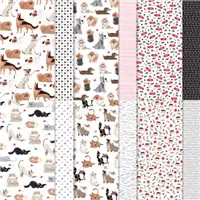
I truly adore the Playful Pets Suite of products. But the paper is almost the tops. I know I can pair the animals with other paper, but I just adore these patterns. They are just perfect images in my opinion.
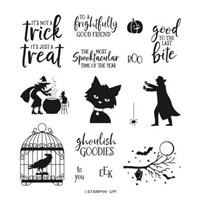
You cannot see the sentiment layer as clearly as I had hoped. But it is punched using the Rectangle Postage Punch. The sentiment itself is from the Ghoulish Goodies stamp set. Good To The Last Bite fit the image in my mind perfectly!
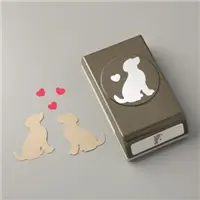
The finishing touch is the heart above the sentiment. It is from the Dog Builder Punch. I finished it off with a small Pearl for some bling.
Thank you for stopping by today! I really appreciate it. And I would love to hear from you to see if you agree with my animal humor! I have added the measurements below, and have all of the products listed at the bottom of the page.
Measurements:
base of Basic Black is 4 1/4 X 11, folded in half
Real Red layer is 4 1/8 X 5 3/8
DSP large layer is 4 X 5 1/4
Dog layer is 2 3/8 X 2 1/4 and 2 1/2 X 2 3/8
Cat layer is 2 7/8 X 1 3/8 and 3 X 1 1/2
layer behind sentiment is 1 1/2 X 2 1/8
HOST CODE
My August Host Code is 6M4NU6C2 Please use this code for orders under $150.00. I will have a small perk for those with orders over $50.00
I hope you enjoyed yesterday’s InKing Royalty Blog Hop! I added a little Note that I had a bonus project to share with you today. Using the negatives from the die cut leaves, I created three note cards that are perfect little Thinking Of You type cards. I am making more than three, but these are the three designs.
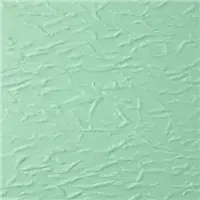
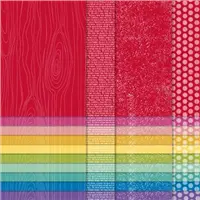
This one is die cut with Just Jade card stock and the stamping is in Just Jade as well. The plaid is the Plaid Tidings Designer Series Paper. (I used different sheets of the Plaid Tidings for all of the cards.) I also added a Misty Moonlight In Color Enamel Dot to coordinate with the Misty Moonlight in the DSP. There is Just Jade in the DSP also, it just doesn’t show much in the photo.
For this card, I backed the Bumblee card stock with Basic Black to match the Black in the Plaid Tidings DSP. The sentiment is in Memento Tuxedo Black. I also added a Bumblee In Color Enamel Dot. The black and white baker’s twine is from the Playful Pets Trim Combo. It worked perfectly here.
This is the final one. I think this piece of the plaid worked best with the Cinnamon Cider card stock. Due to the length of the stem of this leaf, it needed a touch of something. It received a bow made of Linen Thread . The Bumblebee In Color Enamel Dot seems the best match for the sentiment due to the lighter tones in the plaid. The sentiment is stamped in Cinnamon Cider.
I hope I inspired you to make use of the negatives left from these gorgeous leaves. It is hard for me to choose which I like best, the leaf or the negative! Please let me know your thoughts. I love to hear from you. And please know that even though my responses do not show in the post, I respond by email to every comment. I feel that is a more personal touch.
HOST CODE
My August Host Code is 6M4NU6C2 Please use this code for orders under $150.00. I will have a small perk for those with orders over $50.00
Welcome to InKing Royalty’s August Blog Hop! During this year’s blog hops, we are enjoying a year of celebrations. This month’s projects celebrate Autumn Weather, so prepare yourself for projects that are filled with warm tones and beautiful nods to the upcoming change in weather. We are excited to share our creations with you today! After you read my post, I hope you’ll hop over to the next person on the list at the base of this post.
To get my mind into the Fall weather, I used a mix of Annual Catalog and the Mini Catalog. I have paired old and new and the layout is a really good one for most stamps and occasions. But the most important items are the beautiful Stampin’ Up! Colors that I have used. They are beautiful individually, but really shout FALL when together.
This is one of my most favorite cards ever! I love the details of the embossed layer as well as the definition on the leaves. Not to mention the sentiment! You cannot go wrong with an encouraging word or two.
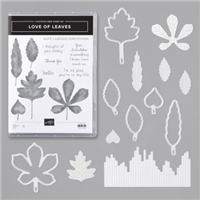
I started with the Love of Leaves Bundle. It was at the top of my list from the Mini Catalog. The distinctive stamping of the leaves is only topped by the detail in the dies. I did tone on tone with the new In Colors of Just Jade, Bumblebee and Cinnamon Cider. The background circle is also Bumblee card stock.
The embossed Sahara Sand piece is done using the Old World Paper 3D Embossing Folder. I LOVE the look of this. It has So Much detail to it.
The banner is cut using the Banners Pick A Punch. The sentiment is from the Love of Leaves stamp set as well. The finishing touch is a few of the Champagne Rhinestones in a few places.
NOTE: Do not throw away your negatives from die cutting the leaves. I have an added extra to share with you tomorrow by using those negatives! So stop back in tomorrow for a bonus idea.
Thank you for stopping by today. I hope you’ll hop along to the next stop on the blog hop, Shawn de Oliveira at Shawn Stamps. There’s lots of inspiration to be found in this group – and you don’t want to miss it!
Thank you for hopping along with us. If you get stuck during the Blog Hop, please use this line-up as a guide:
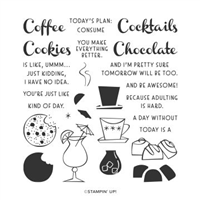
I think the new Nothing Better Than Bundle is so stinking cute! It has cute sentiments and matching designs. Today’s version is a cutie.
The chocolate with Melon Mambo reminds me of the Whtman’s Samplers boxes of chocolates my Mom loved when I was growing up. I knew if they had any “color” on them, that it wasn’t just chocolate. I remember biting into a few and then putting them back ! 🙂
To replicate the fruity chocolates, I stamped the solid image with Soft Suede and then the outline with Melon Mambo. I love the photopolymer stamps for making this type stamping so easy to get just right.
The banner is a scrap of In Color Brights 6×6 DSP . I just trimmed it a touch down to 2″ and used the Banner Triple Punch. The “Chocolate” is stamped on a strip of Whisper White cut 3/4 X 2 1/4. Again, I could place it perfectly on a small strip due to being able to see through the stamp.
Thank you for stopping by today. I really appreciate it. I hope my chocolate card reminds you of your favorite candies.
HOST CODE
My August Host Code is 6M4NU6C2 Please use this code for orders under $150.00. I will have a small perk for those with orders over $50.00
I have been cleaning, sorting, etc in my craft space a bit lately. One of the best parts of this is I find old projects that I saved because of the layout, folds, etc. Today I have a gift card holder that is an “Oldie but a Goodie”. This is one that is very quick and simple in terms of cutting and scoring. And it it super flexible so that different stamping or DSP makes it appropriate for anyone at any time of year. I know I need gift card holders year round!
As I started working on this post, I realized I did not add the touch of bling that I had planned on. So imagine that there is some bling next to the sentiment! LOL!!! Sometimes I would forget my head. I was running out of time, so did not go back down to my room to fix it. Sorry!!
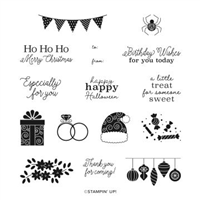
Besides the Plaid Tidings Designer Series Paper, I used the Little Treats stamp set. This little set has decorations and sentiments for a variety of occasions. Plus the Little Treat Box is adorable.
Here is the inside of the card.
As you can see , the gift card sort of stands up in the center fold. You can decorate this card as much, or as little as you want. I opted to just show the pretty DSP. It is from the Plaid Tidings Designer Series Paper. As I have this one done, which is DSP on every panel on both sides, it takes 2 sheets of the 6X6, with just a bit left over. I have the measurements for you below.
Here is a close up of the slit that the gift card fits in.
I cut the slit just after I have made all of the score lines. Go back to the 6″ score line. It is the center one of the three that are close together. Using the Paper Trimmer, lay that score line on the cutting track. Come in 3/8″ and slice down the score line, and stop at 3/8″ from the other end. To make the little stand up holder, use Tear & Tape and place it against the cut edge on one of the panels above or below the cut line. You do not need to do it on both of those sections. But the tape does need to be against the edge so you don’t close up the opening you made.
Thank you for stopping by today. I will add the instructions and measurements just below. If you have any questions, don’t hesitate to contact me. I would love to help you out.
MEASUREMENTS:
Card base is 4 1/4 X 10
Score along the 10″ side at 2, 5, 6, & 7.
Place the 6″ slit on the Paper Trimmer and cut , leaving 3/8″ from each end solid
Fold and burnish on all score lines. Make a “mountain, Valley ” fold with the three short lines. The slit for the gift card should be at the top.
Place Tear & Tape along the edge on each end of one of the 5-6 or 6-7 scored sections.
Cut DSP to: 2 pieces cut 1 3/4 X 4, and 4 pieces cut 2 3/4 X 4
After adhering the paper, remove the Tear & Tape and make the mountain with the slot at the top.
Decorate the front as you see fit. I did use a velcro dot to hold the card closed due to the thickness.
HOST CODE
My August Host Code is 6M4NU6C2 Please use this code for orders under $150.00. I will have a small perk for those with orders over $50.00
The content in this blog is the sole responsibility of Jackie Beers as an Independent Stampin' Up! Demonstrator. The use of and content of classes, services or products offered is not endorsed by Stampin' Up!