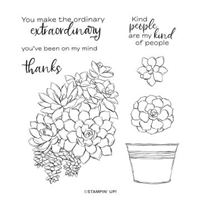
I have the Simply Succulent stamp set to share for the first time today. There are so many great sets in the Mini Catalog, and the Annual Catalog as well, that I just have not gotten to some of them. I have to say that I truly enjoyed playing with colors to come up with the look I wanted for this card.
Since this is a rather large stamp, I decided to let it be the full star of the show. I stamped it on a piece of Basic White cardstock measuring 3 3/8 X 4 5/8. It pretty much fills the paper. I tried to give it a fairly realistic look. I think I need just a bit of a piinkish color and it would be good. I have all of the colors I used in the supply list.
The pot was actually stamped first and masked for the flowers. Most folks probably stamp the flowers first and mask around the edges for the pot. I wanted most of the pot to show since the flower part is quite large. I used Cinnamon Cider as the pot outline and then colored with Cinnamon Cider and Cajun Craze Stampin’ Blends.
Since I decided to not add a sentiment to the front I went a step further for the focal point. I love to use the Light Pool Party Stampin’ Blend as a “shadow” on some stamps. I did that for this one and went all around the succulents and the pot. It makes it look more like a painting and grounds it.
The base of the card is Terracotta Tile with the layer of Just Jade. The Just Jade layer is 4 X 5 1/4. I added another Terracotta Tile layer behind the White. It measures 3 1/2 X 4 3/4. For some added texture, I wrapped the Linen Thread around a couple of times and then added a double bow to the front.
Thank you for visiting today. Please come back tomorrow for another new projecgt.
HOST CODE
My March Host Code is: B6JC9CHE Please use this code for orders under $150.00. I will have a small perk for those with orders over $50.00
I am sure you all dislike the need for sympathy cards as much as I do. However, they are needed more than we wish they were. Today I have one to share. I combined it with a Fun Fold and some gorgeous paper. The card itself can still be a Happy card, even if the occasion is not.
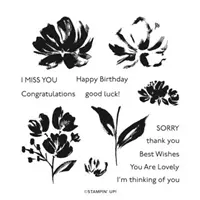
I used the Fine Art Floral Designer Series Paper as the highlight of this card. The Pretty Peacock card base was chosen as the best choice, I thought, from the colors of the DSP. The stamped flower colors came from there as well.
The stamped flowers are from the Art Gallery stamp set. It is a photopolymer stamp set and that material is a bit difficult to color with the Stampin’ Write Markers as we do with the red rubber stamp sets to get more than one color on a stamp. I don’t know if it was just the colors I chose, but it worked beautifully this time. The flower heads are colored using the Bumblebee Stampin’ Write Marker and the leaves are done using the Pretty Peacock Stampin’ Write Marker. (The only negative thing about this is that the markers can only be purchased in the color families, or as the entire set of colors. The only individual color available is Basic Black.) The Terracotta Tile center of the flowers is a separate stamp and I used the terracotta Tile Ink pad for that addition.
Here is a look at the Fun Fold and the inside of the card.
The flowers on the bottom of the inside sentiment layer are the same flowers as the front. I just inked it using the Bumblebee Ink Pad and stamped a little section on the bottom of the White layer.
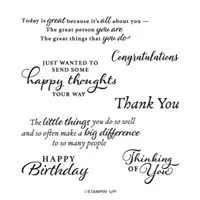
The front sentiment is from the Happy Thoughts stamp set. The inside sentiment, which I think is wonderful, is from the Sale-A-Bration set Heal Your Heart. SAB is over, but there is another two months of SAB later in the year. I do not know if any of the ones from this past will be available at that time. I haven’t been able to find information on that as yet.
Regarding the Fun Fold: I have all of the measurements below. This one is the same principle as one from last week, in that you cut off a section and then use that as the focal layer. You can see the other fold HERE.
Measurements and Directions:
Cut card base of Pretty Peacock to 5 1/2 X 8 1/2, score at 4 1/4. Measure the front flap of the card down 2 3/4 and cut across the from the edge to the score line. Then cut up the score line to remove that section. You will have removed a piece measuring 2 3/4 X 4 1/4. This will be your front focal layer.
Cut White card stock to 5 1/4 X 4 for the inside section of the card.
Cut DSP to 5 1/8 X 3 7/8 for the inside of the card.
Cut White card stock to 2 1/2 X 4 for the bottom flap of the card.
Cut DSP to 2 3/8 X 3 7/8 for the bottom flap
Cut two pieces of White card stock to 2 1/2 X 4. One is for the front focal layer and the other for the inside sentiment layer.
Thank you for stopping by today. I hope you enjoyed this Fun Fold. I love the fold and the Art Gallery Suite of products. This card would work for any occasion with simply a change of sentiment.
HOST CODE
My March Host Code is: B6JC9CHE Please use this code for orders under $150.00. I will have a small perk for those with orders over $50.00
The card I have to share today started with one idea, and ended after the third idea! I hope I am not the only one with those kind of creative issues. LOL!! I started with the Garden Wishes Bundle, but then ended up with only the die set. It is a wonderful die set and can be used to create something much different than the stamp set would have you think.
The Dies are titled Dandy Wishes Dies, and they make me Smile!! The ones I used for these little flowers are more the whimsy than the dies which match the stamps. I love that you can get two totally different looks from one set. I chose the bright colors of Mango Melody and Granny Apple Green to create my little dandelions, although they could be just a cute flower.
The perfect pair to the Garden Wishes Bundle is the Dragonfly Garden Bundle. You have seen me use the Dragonfly Bundle a few times either together or just one part. Today I paired the Dandy Wishes Dies with the Dragonfly Punch and added some of the Dandy Garden Designer Series Paper. I have to say once again how much I Love the way our products all work together!!
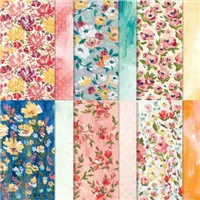
The background DSP of the card is from the Play With Pattern Designer Series Paper. I like the variegated look of the stripes of color. You cannot see it very well, because the color is light, but the center of the two right hand flowers are white with dandelions. It is from the Dandy Garden DSP. The backing to the sentiment is from that same paper. Of course the dragonfly is from the Dandy Garden DSP. The punch fits perfectly to the large and the small dragonflies on the paper. You cannot get much easier than simply punching out a beautifully colored dragonfly!.
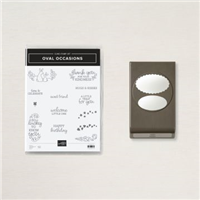
The sentiment is from the Oval Occasions Bundle. The Double Oval Punch is the second part of that bundle. This bundle is one that is great for a variety of occasions. And the punch is simply a Must Have in my book!
Thank you for stopping by today! I hope you liked my bright dandelions! Please come back tomorrow for another new project.
HOST CODE
My March Host Code is: B6JC9CHE Please use this code for orders under $150.00. I will have a small perk for those with orders over $50.00
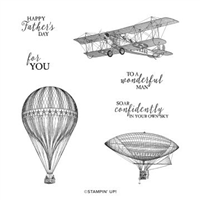
I have another new stamp set to show today. It is from the Mini Catalog and one that I have had, but have not inked up until now. I do love it! The stamped images are very detailed and stamp beautifully. It is the Soar Confidently stamp set. I needed a masculine card and gave this one a try.
I kept this very simple in terms of how much extra I added on. It is for a young man and I didn’t think he would care for much bling! I did use the Painted texture Embossing Folder again. I really am excited every time I see all of the texture it leaves. It may not be the perfect “sky” but I think it works well for it.
I stamped the hot air balloon and colored with patriotic colors in Light Real Red and Dark Daffodil Delight Stampin’ Blends. Since the background sky is blue, I thought those colors would work well. I stamped the balloon in Night of Navy Ink. A Tip: let the Night of Navy dry a minute or two before you begin coloring or it may bleed over just a bit. The balloon is raised using Stampin’ Dimensionals to add to the 3D effect of it floating.
I fussy cut the balloon and it was a really easy one to do. For the sentiment, I used one from the stamp set. I stamped it in Real Red on White cardstock and used the Banner Pick A Punch to get the banner tip on one end.
Thank you for stopping by today. Please come back tomorrow for another new project.
HOST CODE
My March Host Code is: B6JC9CHE Please use this code for orders under $150.00. I will have a small perk for those with orders over $50.00
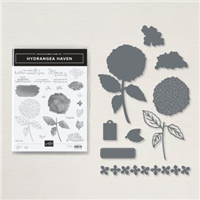
I have previously shared products from the Hydrangea Hill Suite. Today I have again used quite a bit from the suite. I love everything in that group and want to use it regularly!
From the photo it is a bit difficult to see the card base. I played with different colors of cardstock to see what I prefered to pair with this gorgeous DSP this time around. The Hydrangea Hill Designer Series Paper has a variety of gorgeous colors. I finally decided on Purple Posy as the card base and Seaside Spray for the layer. Both are very soft colors that I feel compliment those in the paper.
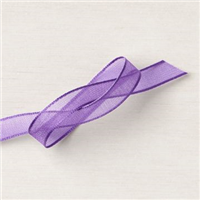
I chose to use two different pieces of the DSP. The stripe piece is 2″ and the floral is 3 1/8 in height. I used the Gorgeous Grape Sheer Ribbon to tie the two pieces together. I made a simple wrap of the ribbon , which is secured on the back of the layers. Then I cut a separate 4″ strip that i slid beneath the ribbon on the front and just tied a knot. These are my favorite kind of bows!!
I also added a tag from the die set, Hydrangea Dies, although it is part of the Hydrangea Haven Bundle. I die cut the tag and then placed a glue dot on the larger section. That made it very easy to slide the small loop beneath the ribbon and position it properly before allowing the opposite end to touch and adhere.
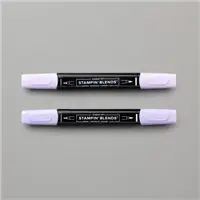
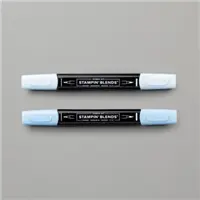
The flower is the star of the show and I wanted it to PoP!! I stamped it with Memento Tuxedo Black Ink and then colored with the Stampin’ Blends. I mixed in a few different colors for the little blossoms after coloring the entire flower lightly with the Light Purple Posy Stampin’ Blend. The leaves are colored with Old Olive Stampin’ Blends. The flower is die cut and then has quite a few Stampin’ Dimensionals under it to raise it to show off its color and give it some depth from the DSP. The final touch was to add a couple of Pearls to the flower head. I opted for the basic white pearl instead of the Pastel Pearls so they would stand out a bit more. The pastel ones would be lovely as well.
Here are the measurements I used.
Base card of Purple Posy cardstock cut 4 1/4 X 11
Layer of Seaside Spray cut 4 X 5 1/4
Flower layer of DSP cut 3 7/8 X 3 1/8
Stripe layer of DSP cut 3 7/8 X 2
Remember that Sale-A-Bration ends on Sunday night. If you have been waiting , the time is almost up. If there is anything I can assist you with, please do not hesitate to reach out to me. Also, Stampin’ Up! has released one little bit of information regarding the Strawberry Punch. It has been backordered and they are two shipments on the way. However, delays happen. So they have allowed us to say that the Strawberry Bundle will be carrying over to the next Annual Catalog! WooHoo!!! I love this bundle, and obviously a lot of you do as well!!. I am thrilled that it will carry over so I can continue to enjoy using it.
Thank you for stopping by today. I hope you will return on Monday for another new project.
HOST CODE
My February Host Code is: MRYR7XY2 Please use this code for orders under $150.00. I will have a small perk for those with orders over $50.00
I have mixed the Forever Greenery Designer Series Paper with the stamp set Free As A Bird for today’s card. I am not sure why I never thought to put these two together before. They seem made for each other.
The DSP speaks for itself and is as gorgeous as ever. For the other card colors, I waited to color the birds before choosing them. I sort of made my own bird with the coloring. We have a lot of little small birds, Cardinals, and Robins at our bird feeders. So I started as a Robin and then took some creative license 🙂
The birds are stamped and colored Flirty Flamingo and Real Red. The branch is Soft Suede and Crumb Cake. The flowers are Light Flirty Flamingo with some Mossy Meadow leaves. Once colored, I cut the birds out using the Stitched Nested Labels Dies. I love the stitching around the edges! Because the DSP is so pretty, and also very Busy, I opted not to put a second layer behind the birds.
Thank you for checking in today. I really appreciate your looking at my creations and I love your comments.
Please remember this is the last week of Sale-A-Bration! A $50.00 product order will get you the addition of a FREE SAB item, a Blue Star Reward (you can read about that under Shop on the menu bar, plus an additional Free little gift from me.
HOST CODE
My February Host Code is: MRYR7XY2 Please use this code for orders under $150.00. I will have a small perk for those with orders over $50.00
The content in this blog is the sole responsibility of Jackie Beers as an Independent Stampin' Up! Demonstrator. The use of and content of classes, services or products offered is not endorsed by Stampin' Up!