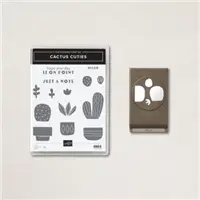
Having cards on hand is one of the best outcomes from doing a blog. To maintain my “on hand” status, I like to do a variety of cards. Today’s card is a “Note” card, but a full size one! Using the Cactus Cuties Bundle make this a Fun time as well.
There is definitely no rule about Note Cards being plain. My version has a bit of bright and shiny to it.
Stamps & Punches
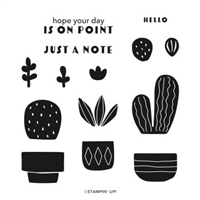
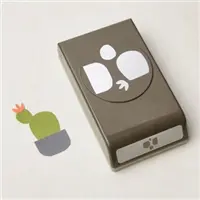
This adorable cactus stamp set is aptly named. It is called the Cactus Cuties. And better yet, it is a Punch Bundle. These are my favorites! After stamping the three different cactus fillers for the pots, I decided to punch the pots from DSP. There are a couple of stamps for different pots, but I wanted them to shine. Additionally, the Just A Note stamp is part of this cute stamp set.
The pink flowers are a stamp and part of the punch as well. However, I simply punched them from cardstock. I wanted bright to go with the darker greens. After choosing the bright pink, I decided it would work perfectly as the cad base as well. Sadly one of the pink flowers fell off of the cactus and is laying on the edge of the pot. LOL! A bit of whimsy in the card.
Paper and Dies
The flower pot and the layer of DSP both are from the Simply Elegant Designer Series Paper. This pack of gorgeous silver and gold paper had not been utilized in quite a while. It was time to bring it out. Paired with the largest of the Scalloped Contours Dies for the layer, it really adds some unexpected shine. These Dies are really a favorite due to the different scallops on the various sizes.
The Layers
The Magenta Madness base card is cut 5 1/2 X 8 1/2 and scored at 4 1/4. For the layer, the largest of the Scalloped Contours Dies was used. And the White stamped layer is 3 X 4 3/8. The flower pots are punched and added with Stampin’ Dimensionals, as are the pink flowers.
SAVINGS ARE IN BLOOM
CLICK ON THE PHOTO FOR A VIEW OF ALL ITEMS DISCOUNTED
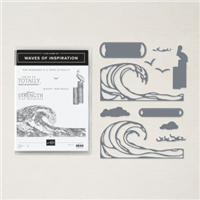
WAVES OF THE OCEAN SUITE …EARLY RELEASE
CLICK ON THE PHOTO TO SEE THE COMPLETE SUITE OF PRODUCTS
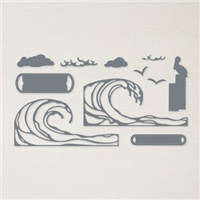
ALL TOGETHER … SPECIAL BUNDLE
CLICK ON THE PHOTO TO SEE ALL OF THE PRODUCTS
HOST CODE
My March Host Code is JGGHP66J. Please use this code for orders under $150.00. I will have a small gift for those with orders over $50.00 in addition to the Perk Rewards Program. You can read all of the information at the top of the page in the Menu Bar under SHOP / Perks.
Thank you for stopping by today. I hope you enjoyed today’s project and will come back. I do read and reply to all of the comments individually. They mean a lot to me. Please reach out if you have a question.
Welcome to InKing Royalty’s March Blog Hop! As we prepare for Spring, flowers are always on our minds. We are sharing flower-themed projects with you today and hope you love them! After you read my post, I hope you’ll hop over to the next person on the list at the base of this post.
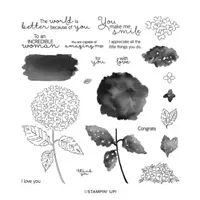
One of my favorite flowers are Hydrangea. I love these gorgeous snowballs of color. My favorites are the ones with purples and blues. And that is what I have created for you today.
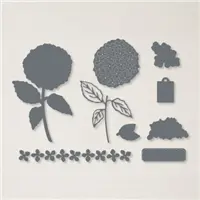
Stamps and Dies
My hydrangea snowball may have a bit more blue than is normal. Creating it was a fun with a mix of different blues and purples. The flower is stamped using Memento Tuxedo Black Ink and then colored with the various Stampin’ Blends. For the leaves and stem I went with Just Jade as the color. And being a bit different, I went with a “floating” sentiment layer. The sentiment layer is from the set and then die cut with a die from the Hydrangea Dies. It has a perforated border, so I used the Highland Heather Stampin’ Write Marker to go around the perforations to give a touch of a color border.
DSP and Vellum
The more prominent layer is the blue from the Sweet Symmetry Designer Series paper. This is to pull the blue from the flower. As does the Highland Heather as the card base and layer. And to give just a bit more of a dimension, I went with the Layering Vellum from the Mini Catalog. This piece is the one with the white writing on it. All of these are gorgeous. Adding this bit of vellum, and allowing it to curl on the edges, gives a little more depth to the card.
Finishing Touches
To pair something with the Just Jade of the leaves and stem, I went with the Just Jade & Gold Ribbon. This is wonderful and soft ribbon. It is so easy to work with. Which is where the idea to use it as a frame of sorts came from. Because it is so soft, it was easy to lay across the corners and tape down on the back. And to match the gold in the ribbon, the Brushed Brass Butterfly was almost a given. It looks perfect flying up next to the big flower.
Thank you for stopping by today. I hope you’ll hop along to the next stop on the blog hop, Lynn Kolcun at Avery’s Owlery. There’s lots of inspiration to be found in this group – and you don’t want to miss it!
Thank you for hopping along with us. If you get stuck during the Blog Hop, please use this line-up as a guide:
CLICK ON THE PHOTO FOR A VIEW OF ALL ITEMS DISCOUNTED
WAVES OF THE OCEAN SUITE …EARLY RELEASE
CLICK ON THE PHOTO TO SEE THE COMPLETE SUITE OF PRODUCTS
ALL TOGETHER … SPECIAL BUNDLE
CLICK ON THE PHOTO TO SEE ALL OF THE PRODUCTS
HOST CODE
My March Host Code is JGGHP66J. Please use this code for orders under $150.00. I will have a small gift for those with orders over $50.00 in addition to the Perk Rewards Program. You can read all of the information at the top of the page in the Menu Bar under SHOP / Perks.
Thank you for stopping by today. I hope you enjoyed today’s project and will come back. I do read and reply to all of the comments individually. They mean a lot to me. Please reach out if you have a question.
There have been so many wonderful cards made using the Ladybug since it’s debut. Today’s card is a fun one I created that looks nothing like a ladybug. This one is very festive!
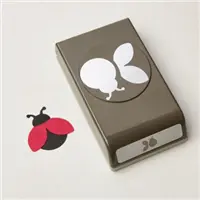
Ladybug Punch
Saying this card is a Ladybug card is a bit of a confusing statement. Yes, I used the Ladybug Punch, but I do not believe that my sweet little bug is anything like a Ladybug. And that is the fun of making cards and creating. To use unusual colors we can make the intended use into something all our own. By punching the bug from two different pieces of bright DSP, it is a totally new looking bug.
Designer Series Paper
The DSP I used is all from the Pattern Party Designer Series Paper. It is a Host Reward in the Annual Catalog. And it is an awesome deal for the amount of paper you get. There are 48 sheets of double sided DSP. And there are 4 each of the 12 double sided pieces. Getting twice the amount of paper as is in a regular package of DSP is exciting. So I used three different pieces. And the wonderful thing is that they coordinate beautifully together.
Stamp Set
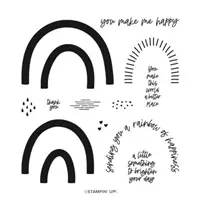
The lovely sentiment is from the Rainbow of Happiness stamp set. This sentiment is so lovely and works for a variety of occasions. I thought it paired wonderfully with the bright Bug I created. Additionally, the little hearts I used are also in the stamp set. They add just a soft touch to the strip and next to the sentiment.
Final Touches
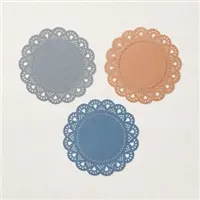
If you do not recognize the White Doily, that is because it is the reverse side of the different color ones in the Heart & Home Doilies. Using the white on the back gives them quite a bit of extra use. And they are easy to color with any type of sponging or blending. Finally I had to give the little bug some additional detail. The Holiday Rhinestones include the gold ones I used for eyes. They seem to fit the Bumblebee color of the card base. And add a touch of bling as well. That is always a win!
SAVINGS ARE IN BLOOM
CLICK ON THE PHOTO FOR A VIEW OF ALL ITEMS DISCOUNTED
WAVES OF THE OCEAN SUITE …EARLY RELEASE
CLICK ON THE PHOTO TO SEE THE COMPLETE SUITE OF PRODUCTS
ALL TOGETHER … SPECIAL BUNDLE
CLICK ON THE PHOTO TO SEE ALL OF THE PRODUCTS
HOST CODE
My March Host Code is JGGHP66J. Please use this code for orders under $150.00. I will have a small gift for those with orders over $50.00 in addition to the Perk Rewards Program. You can read all of the information at the top of the page in the Menu Bar under SHOP / Perks.
Thank you for stopping by today. I hope you enjoyed today’s project and will come back. I do read and reply to all of the comments individually. They mean a lot to me. Please reach out if you have a question.
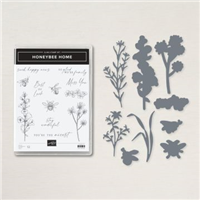
Today’s project is a Color Mix. I chose Purple, Yellow, and Blue as the basis for a card. Doing this was easy with Hand Penned DSP and the Honeybee Home Bundle.
This card is also my idea for the Make My Monday Challenge. To be different, I went with the three colors. It is pretty easy using DSP. I hope you will play along with this challenge over at Make My Monday. Just click on the photo to be taken to the page.
Colors
Since the challenge was Purple,Blue, & Yellow, I looked for DSP that contains those to make it simple. They were found in abundance in the Hand Penned Designer Series Paper. To further show this gorgeous paper, I chose to use three different sheets from the pack. The Misty Moonlight for blue is a no brainer to me. That is my favorite current color. So it became the card base. The large layer of DSP contains all of the needed colors. Then the two smaller are the purple and yellow. Easy as can be!
Stamps and Dies
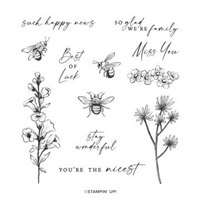
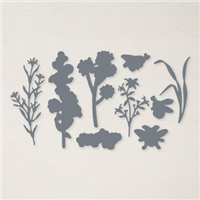
Since I needed an image that would easily fit on the smaller layer, I looked for single flower stems. The perfect one came in the form of this one from Honeybee Home. And with a matching Die to cut it out, I was thrilled. There were more than one stamp I could have used, but this matched some of the flowers in the large piece of DSP.
Finishing Touches
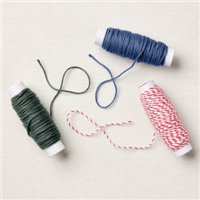
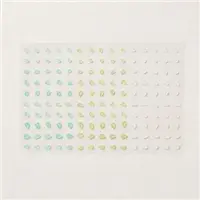
Even with the layers of beautiful paper, the card needed something extra. So I added two something extras. The Misty Moonlight, or it may be Night of Navy, twine is from the Sports Fan Twine Pack. It was simple to slip under the flower stem and tie a little bow. For the Bling of the card, I found the Rhinestone Waves Jewels! Oh My!! These are various shades of blue and into a light green. There are quite a lot more than a normal Jewel pack. And they come in varying sizes. I think that is a huge bonus. The yellow layer received three of the darkest blue in three different sizes. That was the Finishing Touch.
I hope you will check out today’s challenge and see what the other design team members have made from my crazy idea of these three colors.
SAVINGS ARE IN BLOOM
CLICK ON THE PHOTO FOR A VIEW OF ALL ITEMS DISCOUNTED
WAVES OF THE OCEAN SUITE …EARLY RELEASE
CLICK ON THE PHOTO TO SEE THE COMPLETE SUITE OF PRODUCTS
ALL TOGETHER … SPECIAL BUNDLE
CLICK ON THE PHOTO TO SEE ALL OF THE PRODUCTS
HOST CODE
My March Host Code is JGGHP66J. Please use this code for orders under $150.00. I will have a small gift for those with orders over $50.00 in addition to the Perk Rewards Program. You can read all of the information at the top of the page in the Menu Bar under SHOP / Perks.
Thank you for stopping by today. I hope you enjoyed today’s project and will come back. I do read and reply to all of the comments individually. They mean a lot to me. Please reach out if you have a question.
The Waves Of Inspiration Bundle is paired with a Fun Fold as my project today. The Angle Book Fold along with gorgeous colors of paper are a great match.
Fun Fold
The Angle Book Fold card is one I cased from Mary Deatherage. It is pretty quick and easy and works with so many stamp sets. The bonus of it laying flat for mailing is a happy thing. Here is a picture of it standing up.
*Note: I dropped the sentiment tag and it stuck in the wrong spot. Needing to get the photography finished for a class, I went ahead and took the picture with it not angled properly. It is fixed now and I will add another photo later. The tag should be parallel to the standing up section. Those darn dimensionals stick really well when you don’t want them to!!!
Measurments:
The card base is Sahara Sand that is cut 4 1/4 X 11, and scored at 5 1/2 and 6 3/4.
After scoring the two above, rotate the cardstock to the 6 3/4 score end. Place the top right corner in the scoring channel, hold it in place, and rotate the bottom of the card at the 6 3/4 score line in the scoring channel. You are scoring that far right section from top right to bottom left.
Fold and burnish on all of the score lines. Fold the card on the 5 1/2 score line. Adhere the area between to 5 1/2 and 6 3/4 to the back of the card. This is the Book Fold.
To create the standing section, open the card and fold on the diagonal score line.
The cardstock layers are 1 1/8 X 4 1/8 and 4 1/8 X 4 1/8
The DSP layers are 1 X 4 and 4 X 4
The inside White layer is 4 1/8 X 4 1/8
Adhere the DSP to the cardstock layers.
Adhere the narrow pieces to the book fold section.
Adhere the square layer piece to only the bottom angle of the front of the card. The top remains loose so the card can stand up.
To hold the angle open, create your sentiment and add it with Stampin’ Dimensionals. Decide where you want the stand up section to be and place your sentiment up against it.
Stamps and Dies
As I mentioned in the beginning, this is the Waves of Inspiration Bundle. I have a photo at the bottom of the page which you can click on. Click on it and it takes you to a PDF and shows all of these products. The stamps and dies will be in the next Annual Catalog. However, the extra products are during this special release and while supplies last. All of the colors in this suite are amazing! And the Blue Foils are over the top gorgeous!!
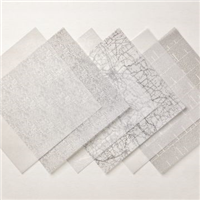
DSP
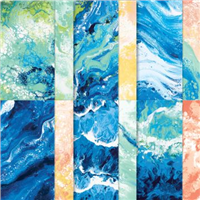
The DSP is from the Waves of The Ocean Designer Series Paper. It is part of this early release. All of the sheets are watercolor looking and were actually made by Stampin’ Up! Artists and then photographed. Designer Series Paper has become a huge favorite of mine and these are wonderful mixes of blues. There are also some Sahara Sand, Calypso Coral and White mixed in.
Please take a look at the Product Suite below!
SAVINGS ARE IN BLOOM
CLICK ON THE PHOTO FOR A VIEW OF ALL ITEMS DISCOUNTED
WAVES OF THE OCEAN SUITE …EARLY RELEASE
CLICK ON THE PHOTO TO SEE THE COMPLETE SUITE OF PRODUCTS
ALL TOGETHER … SPECIAL BUNDLE
CLICK ON THE PHOTO TO SEE ALL OF THE PRODUCTS
HOST CODE
My March Host Code is JGGHP66J. Please use this code for orders under $150.00. I will have a small gift for those with orders over $50.00 in addition to the Perk Rewards Program. You can read all of the information at the top of the page in the Menu Bar under SHOP / Perks.
Thank you for stopping by today. I hope you enjoyed today’s project and will come back. I do read and reply to all of the comments individually. They mean a lot to me. Please reach out if you have a question.
This month, the theme is Cute Critters. We really hope that you will be inspired by all the amazing creations the Pals are sharing with you! As you hop from blog to blog, we would love for you to leave a comment. You will find the lineup at the end of my post to help you “hop” along from Pal to Pal.
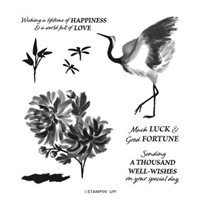
I am not sure that my crane is actually a cute critter. However, I see them at the park where I walk and have to stop and admire their grace and beauty.
Stamps
This is such a simple card that I actually only used one stamp from the Crane of Fortune stamp set on the front of the card. To allow the Crane to shine the one stamp, the paper, and the embellishments are all that I used here. The crane was stamped using Gray Granite Ink. Where I walk there are a couple of ponds and there are a couple of cranes as well. One is white and one is a very light gray. At least those are the colors I see. There could be multiples of each one. Enjoying their beauty enhances the walk.
Paper
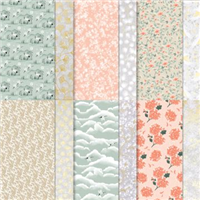
The gorgeous DSP used is from the Symbol of Fortune Designer Series Paper. One side of the paper has gold foil highlights and the other side is beautiful pieces like the one I chose to highlight. This piece reminds me of elegant wallpaper. The Stampin’ Up! artists are amazing! Additionally, all of the colors were pulled from the piece of DSP. They are Crumb Cake, Soft Succulent, and Calypso Coral.
Embellishments
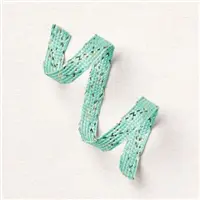
In deciding on final highlights for the crane, I looked through a variety of embellishments. The one that continued to jump up was the Brushed Brass Butterflies. And there are butterflies in the DSP. For the final touch I used the Soft Succulent Open Weave Ribbon. This is a beautiful and easy to work with ribbon.
More inspiration awaits, so use the lineup below to visit the rest of the Design Team. The Pals are excited to show you what they’ve created! Then, please mark your calendars for our next blog hop on April 13th. Our theme will be Fabulous Flowers when our Design Team creates a project using any of the many beautiful flowers in our catalogs.
Thank you for stopping by today. I hope you enjoyed today’s project and will come back. I do read and reply to all of the comments individually. They mean a lot to me. Please reach out if you have a question.
The content in this blog is the sole responsibility of Jackie Beers as an Independent Stampin' Up! Demonstrator. The use of and content of classes, services or products offered is not endorsed by Stampin' Up!