I love quick and cute cards, and that is what I have today. The fun stamp set By My Side carried over to the upcoming catalog and I am sharing it.
Stamps
The images in this stamp set are fun and cute stamps. Just happy young people having a good day. They are all wonderful, but this is probably my favorite. I love her curly hair and that adorable butterfly friend. These were all stamped with Memento Black and then colored using Stampin’ Blends. The colors were pulled from the fun DSP.
Papers
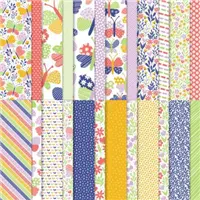
This fun DSP is the retiring Butterfly Kisses Designer Series Paper. It fits the little butterfly in the image perfectly I thought. And since I love Bright colors, it is a wonderful option. All of the colors used came from the DSP. I used a Basic White card base with a layer of Starry Sky to separate the DSP. And to help the images pop, I went around both the image and the sentiment with the Stampin’ Write Marker. To simply drag it around the edges leaves a dark line. Using the Starry Sky Marker mimics the thin layer of Starry Sky card stock.
Finishes
To give the image some grounding, I did a zigzag with the Petal Pink Soft Polyester Ribbon. It is lighter than the Calypso Coral in the DSP, but still works. For a replacement bling, I went with the 2022-2024 Matte Dots. These are the In Colors of Starry Sky and Parakeet Party that are in the DSP also. There is a scattering of the two color dots on the image and sentiment.
Thank you for visiting today! I hope you have a wonderful weekend.
RETIRING LISTS. CLICK ON THE ICON TO GET THE FULL PDF.
Online exclusives are here to stay! Click on the photo and be taken directly to them in my online store. If you place an order, please use my Host Code listed just below.
HOST CODE
My APRIL Host Code is ZE6UJ4TF. Please use this code for orders under $150.00. I will have a small gift for those with orders over $50.00 in addition to the Perk Rewards Program. You can read all of the information at the top of the page in the Menu Bar under SHOP / Perks.
Thank you for stopping by today. I hope you enjoyed today’s project and will come back. I do read and reply to all of the comments individually. They mean a lot to me. Please reach out if you have a question.
The card I have for you today includes final sharing of Amazing Year stamp set and the Regency Park Designer Series Paper. Both are still available in the Last Chance Items sale. And are great items to have in your craft room!
Stamp
Personally I love single stamps for a front image. This one is a favorite as it is simple and the tag fits a variety of occasions. Since the image is stamped onto a watercolored piece, I was hesitant about using the Memento Tuxedo Black Ink. But it worked perfectly! I was very careful using the Stampin’ Blends for the bits that I colored though. The writing tip was a little easier to control how much ink came out. The watercolor paper can cause some smears.
Watercoloring
To create the striped watercolor background was a piece of cake. Last weekend I was with a group of fellow demonstrators stamping, laughing, eating, and laughing some more. My upline created a card with a larger background like this.
To make the background, I used the Water Color Paper from Stampin’ Up! and the widest of the trio of brushes in the Water Painters. To add a couple of drops of re-inker to a bowl was all I needed with the water in the Water Painter. Mix it around and draw it across the paper. The imperfections are what makes it great. Of course, you do this before you stamp the image!! I used Crushed Curry for my stripes.
Papers
All of the colors are from the piece of DSP. It is from the Regency Park Designer Series Paper. Sweet Sorbet is the card base with Crushed Curry as the layer. The strip of Shaded Spruce came about as I was originally going to use that as the layer. Then decided the yellow stripes needed more yellow. But the strip was what was trimmed off and seemed like a fun addition to break up the two other colors.
Finishes
The stripes stand out as something different on this card. But it still needed some bling for a finish. Pearls have always been a “go to” for me. So since I have quite a lot of them still, I went for what I love. They are scattered on the tag and one flower in addition to the trio at the top of the Shaded Spruce strip.
Thank you for stopping in today! If you are interested in any of these retiring items, the time is running out! You can click HERE and be taken to my Online Store !
RETIRING LISTS. CLICK ON THE ICON TO GET THE FULL PDF.
Online exclusives are here to stay! Click on the photo and be taken directly to them in my online store. If you place an order, please use my Host Code listed just below.
HOST CODE
My APRIL Host Code is ZE6UJ4TF. Please use this code for orders under $150.00. I will have a small gift for those with orders over $50.00 in addition to the Perk Rewards Program. You can read all of the information at the top of the page in the Menu Bar under SHOP / Perks.
Thank you for stopping by today. I hope you enjoyed today’s project and will come back. I do read and reply to all of the comments individually. They mean a lot to me. Please reach out if you have a question.
Welcome to InKing Royalty’s April Blog Hop! Just in time for Spring, we are embracing some (or all) of Stampin’ Up!’s gorgeous greens for today’s hop. We are excited to share our creations and hope you love them! After you read my post, I hope you’ll hop over to the next person on the list at the base of this post.
My “green” is a couple of different shades. The papers include Pool Party and Mossy Meadow. Green and flowers are a natural pairing.
Colors
The colors I used were all to showcase green and compliment the daisies. My first choice was this Textured Chic Designer Series Paper. When I made the card, it was still available and now sadly it is all gone. BUT….the Dry Brushed Specialty Designer Series Paper is just as gorgeous and is carrying over to the Online Exclusives! To say that I was happy on hearing this is putting it mildly. I did a Happy Dance!! And it has the same tones of green as does Textured Chic.
To showcase the flexibility of this DSP, I used Pool Party for the card base. Then used Mossy Meadow for the leaves. It is quite a bit darker, but still works and helps to make the leaves stand out. Mossy Meadow was also the sentiment color. The daisies are cut from White card stock, but needed some color. To compliment the gold of the DSP, I used a Blending Brush to add a bit of Lemon Lolly Ink on the top layers. And the centers are colored with Copper Clay Stampin’ Blends.
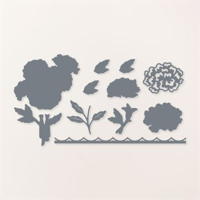
Stamps and Dies
The gorgeous Daisy bunch is from the Cheerful Daisies Bundle. This is a sneak peek of this bundle! I did not stamp the images, but only used the Dies on White card stock. There are two layers to each of the flowers. The base layer is smooth shapes of the entire bunch. Then each flower has a detailed layer to go on top. That is the layer that I added a touch of color too before adhering. They have wonderful detail! The Mossy Meadow Leaves are part of the die. But I cut off the white leaves and used a scrap of Mossy Meadow to die cut just the leaves. Then simply tucked them behind the flower.
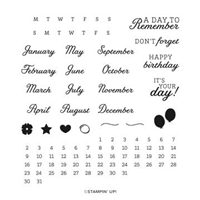
The small and perfect little sentiment is not included in the Daisy set. But is from an unexpected stamp set. It is part of the Days to Remember set. I personally love this set. It is great for adding items to a journal or calendar. Plus it has sweet little sayings like this! And it is carrying over as well. Woohoo!
Extras
To add more texture to the front of the card, I added a strip of the Natural Finish Ribbon. This is pretty wide and makes a great grounding piece for a sentiment. Or like here, some added texture and color. For the Bling of this card, I went a little happy with spreading Butterflies around! I added several of the Brushed Brass Butterflies. Another great item that is carrying over! They are scattered on the flowers and the sentiment.
Thank you for stopping by today. I hope you’ll hop along to the next stop on the blog hop, Lynn Kolcun at Avery’s Owlery. There’s lots of inspiration to be found in this group – and you don’t want to miss it!
Thank you for hopping along with us. If you get stuck during the Blog Hop, please use this line-up as a guide:
RETIRING LISTS. CLICK ON THE ICON TO GET THE FULL PDF.
Online exclusives are here to stay! Click on the photo and be taken directly to them in my online store. If you place an order, please use my Host Code listed just below.
HOST CODE
My APRIL Host Code is ZE6UJ4TF. Please use this code for orders under $150.00. I will have a small gift for those with orders over $50.00 in addition to the Perk Rewards Program. You can read all of the information at the top of the page in the Menu Bar under SHOP / Perks.
Thank you for stopping by today. I hope you enjoyed today’s project and will come back. I do read and reply to all of the comments individually. They mean a lot to me. Please reach out if you have a question.
I have a card to share as always, so please do not leave after reading the NEWS.
Tomorrow is FREE SHIPPING, on orders of $75.00 or more. With some prices increasing in the next catalog, now is the time to stock up on your paper and inks!
And now for today’s card, which showcases three products. It is simple, pretty quick, and really pretty. I hope you like it.
Stamp
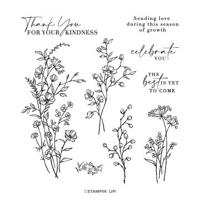
This is a card that could be used for pretty much any occasion. And to keep the front clean looking, I opted not to add a sentiment here. It would be pretty, and simple, to add a small tag sentiment to the ribbon. But I wanted it plain. And that was so easy with this single image from the Dainty Delight Stamp Set. This wonderful set is carrying over to the new Annual Catalog. All it took was a few quick lines with some Old Olive, Berry Burst, and Lemon Lolly Stampin’ Blends to complete the image.
I could have stamped directly on the card base that is Thick Basic White. But I erred on the side of caution. I cut a piece of Basic White to 3 x 4 and stamped in the center of that piece. That allowed me some safety margins to simply attach that to the backside of the Die Cut and Embossed layer. And if the stamped piece sticks out anywhere, it is easy to trim away before adhering to the card.
Tools
To say Tools, makes me think of the Cut and Emboss Machine or Paper Trimmer. But that is what I think of my Dies and Embossing Folders. They work hard for a really long time and are great investments. So I am showcasing a Carryover, and a New tool here.
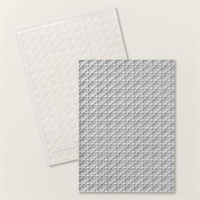
The first thing I did to my top layer was die cut using one of the Countryside Corners Dies. They are all varying sizes of this shape. This is one of the smaller ones. Next I embossed that layer using the Cane Weave Embossing Folder. It gives fabulous detail and you immediately see the cane weave.
Finishes
There is only one item left to complete this card. That is the Simply Elegant Trim. I opted for the gold over the silver. My method for tying bows like this is to cut a strip of ribbon and tape on the back of the card. Then tie my bow separately and add with a Glue Dot. That way you do not pull too tightly on the layer, and you have a snug fit with the wrap around section. This is simple and very easy.
It is hard to believe that I did not add Bling! There was a thought or two about it. But I finally decided that the gold trim was Bling enough for what I wanted to share on this card.
Note:
You will notice that there are a few items not showing in my Supply List below. I used Berry Burst and Lemon Lolly Stampin’ Blends on the coloring the flowers. They, along with the Countryside Corners Dies, are not available yet. So I do not have access to the picture of them. Sorry!!!
Thank you for stopping by today!!!
RETIRING LISTS. CLICK ON THE ICON TO GET THE FULL PDF.
Online exclusives are here to stay! Click on the photo and be taken directly to them in my online store. If you place an order, please use my Host Code listed just below.
HOST CODE
My APRIL Host Code is ZE6UJ4TF. Please use this code for orders under $150.00. I will have a small gift for those with orders over $50.00 in addition to the Perk Rewards Program. You can read all of the information at the top of the page in the Menu Bar under SHOP / Perks.
Thank you for stopping by today. I hope you enjoyed today’s project and will come back. I do read and reply to all of the comments individually. They mean a lot to me. Please reach out if you have a question.
Today’s card is so very simple and yet somewhat elegant looking. And all the beauty is down to the Fancy Flora Designer Series paper.
Papers
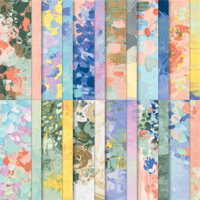
This Fancy Flora Designer Series Paper is so awesome! The look of acrylic paint is perfect. But the color mixtures are fabulous. And it is not just these earth tones. There are vibrant pieces as well. Naturally this piece designated all of the other colors. The card base is Crumb Cake with a thin layer of Evening Evergreen. The sentiment is on a scrap of Soft Succulent to tie in all of the colors. I save these small trimmed pieces for just such a use.
Stamps
The only stamp used on the front of the card is the sentiment. It is from the Graceful Tiles stamp set. I shared a card made into a kaleidoscope with this set last week. This sentiment could not be better for the elegant look of this card, but for the front sentiment of so many occasions.
Tools and Embellishments
To ground the sentiment, I added a strip of the Natural Finish Ribbon. It is a pretty wide one and is almost too large for a bow. But it works perfectly as a grounding layer. The top fancy die piece is from the Marigold Moments Dies. I know that some of these items are out of stock now, and I apologize. I was using things I had laying around. But the paper is in stock and can be paired with so many different items you may have. My final touch of bling is the Milky Dots. And yes they are long gone but I had some.
Thank you for stopping in today!!!
RETIRING LISTS. CLICK ON THE ICON TO GET THE FULL PDF.
Online exclusives are here to stay! Click on the photo and be taken directly to them in my online store. If you place an order, please use my Host Code listed just below.
HOST CODE
My APRIL Host Code is ZE6UJ4TF. Please use this code for orders under $150.00. I will have a small gift for those with orders over $50.00 in addition to the Perk Rewards Program. You can read all of the information at the top of the page in the Menu Bar under SHOP / Perks.
Thank you for stopping by today. I hope you enjoyed today’s project and will come back. I do read and reply to all of the comments individually. They mean a lot to me. Please reach out if you have a question.
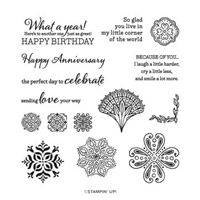
The card I have to share with you today is one that reminds me of an Irish Blessing. This is the Covered In Sunshine stamp set. There is a mix of retiring, carryover, and New products.
Stamp set
Yesterday we were in Scotland with the Thistle and today we have (maybe) an Irish Blessing. I am ready to travel!!! It seems I always fall for items as they are being retired! This stamp set, the Covered In Sunshine, is retiring and I believe I have only used it one time. After making this card, I can think of so many uses for it.
The sentiment is the star of the card. It is actually written at a slant. After reading the words, I knew I wanted the daisies from the Rain or Shine paper. And that created my colors for the card. I stamped the image using Parakeet Party Ink. Then the sun using Crushed Curry. The inside of the sun is colored using the new Lemon Lolly Stampin’ Blends.
Papers and Dies
To complete the Rain or Shine Designer Series Paper daisies, I added a fun polka dot piece of Parakeet Party. This is from the 2022-2024 In Color 6×6 Designer Series Paper. The card base of Crushed Curry was pulled from the daisies as well.
To cut the sentiment, I turned to a new Die Set. It is the Countryside Corners Dies. There are seven or eight of this shape in graduating sizes. The one I used is the 4th largest. And it fit perfectly with the angle of the writing. The sun was cut using the Layering Circles Dies, it was one of the smallest.
Embellishments
To tie in the Parakeet Party color, I added a double ribbon and bow using the 2022-2024 In Color Baker’s Twine. I love bakers twine because it is so very easy to work with. Plus it does not add much thickness to the card.
As a finishing touch I turned to 2021-2023 In Color Rounds. The Pale Papaya ones were close enough for the daisies centers. A few scattered around was just enough to say I have some bling!
Thank you for stopping by today!!!
RETIRING LISTS. CLICK ON THE ICON TO GET THE FULL PDF.
Online exclusives are here to stay! Click on the photo and be taken directly to them in my online store. If you place an order, please use my Host Code listed just below.
HOST CODE
My APRIL Host Code is ZE6UJ4TF. Please use this code for orders under $150.00. I will have a small gift for those with orders over $50.00 in addition to the Perk Rewards Program. You can read all of the information at the top of the page in the Menu Bar under SHOP / Perks.
Thank you for stopping by today. I hope you enjoyed today’s project and will come back. I do read and reply to all of the comments individually. They mean a lot to me. Please reach out if you have a question.
The content in this blog is the sole responsibility of Jackie Beers as an Independent Stampin' Up! Demonstrator. The use of and content of classes, services or products offered is not endorsed by Stampin' Up!