The card I have for you today was a total surprise when finished. And that is a very Happy Surprise. This is really outside of my comfort zone and I love the outcome.
Stamps 1
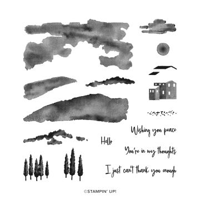
This card utilized A Lot of stamps. It may be an all time record! But it was so fun to create and see it come to life. The majority of the stamps are from the Hills Of Tuscany stamp set. This is one that I overlooked a couple of times in the Mini Catalog. I am so happy that I finally ordered it. These stamps are distinctive, which means they have lighter sections in each stamp.
To create the Hills, I used the large hill stamp. It is inked with Lost Lagoon Ink and randomly stamped across the lower half of the card. I went from one side of the layer to the other. And even turned the stamp upside down to fill in spaces. The outcome, surprisingly, reminds me of rolling hills. Next came the clouds in Balmy Blue, followed by the trees. The tree stamp is three trees together. They are stamped using Shaded Spruce and the lighter ones are where I stamped twice without re-inking.
Stamps 2 & 3
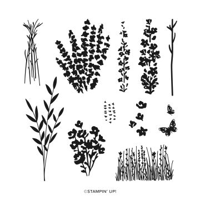
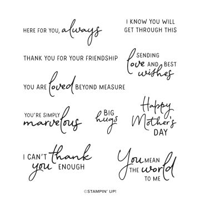
The sentiment is from the fabulous Perennial Postage stamp set for set number 2. I love the message, but also the mix of fonts. And the last stamp set is the Painted Lavender set. The Gorgeous Grape flowers are from that set. As is the greenery behind them. I wanted the flowers to pop more than the greenery, so I stamped the greenery in the same Lost Lagoon as the hills.
Papers and Finishes
There is no Designer Series Paper for the second day ! Oh My!!! 🙂 However, the Gorgeous Grape really pops the flowers from the scene and that is enough. I must confess that I had intended for the layer to be Lost Lagoon and accidentally pulled Pool Party instead. When I realized my mistake, I decided I liked the Pool Party.
To complete the card I punched the sentiment from Pool Party with the larger oval of the Double Oval Punch. Behind it I placed two little strips of the Orchid Oasis Metallic Ribbon. I love this ribbon and all of the colors available! The final touch is a scattering of the beautiful Purple Shimmer Dots.
Thank you for stopping by today!!!
HOST CODE
My MARCH Host Code is GBUE3X7H. Please use this code for orders under $150.00. I will have a small gift for those with orders over $50.00 in addition to the Perk Rewards Program. You can read all of the information at the top of the page in the Menu Bar under SHOP / Perks.
Thank you for stopping by today. I hope you enjoyed today’s project and will come back. I do read and reply to all of the comments individually. They mean a lot to me. Please reach out if you have a question.
Today’s card is using the precious Easter Bunny stamp set. This set has great versatility for any occasions that bunnies are good. The matching punch is simply a wonderful bonus!
Stamp Set
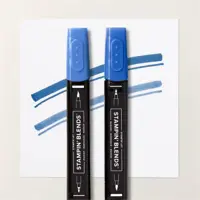
The Easter Bunny stamp set has a mix of Spring items included. All of the stamped images are from the stamp set. I love them all, but especially the sentiment. When I see that sentiment I think of baby showers for some reason. But the images would be great for any type of Spring or child occasion. My stamping of the Easter eggs was a tad high on the grass, but I am good with that! All of the images are colored using Stampin’ Blends.
Punch
The Bunny Punch is still available. It was originally part of the Easter Bunny Bundle. But when they carried over to the Annual Catalog, the Bundle price went away. However it is still a wonderful price point. As I said above, all of the images are from the stamp set. But the punch only works on this one bunny. There is a second bunny stamp. So I stamped the bunny with Pecan Pie Ink and colored him with Crumb Cake Stampin’ Blends. The butterfly is also colored using Stampin’ Blends. I punched out the bunny, and then fussy cut the butterfly. They just seem to go together.
Paper and Finishes
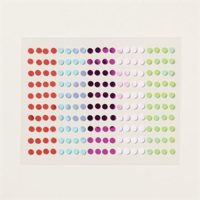
The paper for this card is simply card stock. I know it is shocking for me not to have at least some Designer Series Paper. With the stamping and coloring of everything, more color was not really needed. So we have Blueberry Bushel card stock as the base with the layer of Basic White that is stamped. To complete the little scene, I added one of the larger Rainbow Dots in a matching Blue.
Thank you for stopping in today!! I hope you have a fabulous weekend.
HOST CODE
My MARCH Host Code is GBUE3X7H. Please use this code for orders under $150.00. I will have a small gift for those with orders over $50.00 in addition to the Perk Rewards Program. You can read all of the information at the top of the page in the Menu Bar under SHOP / Perks.
Thank you for stopping by today. I hope you enjoyed today’s project and will come back. I do read and reply to all of the comments individually. They mean a lot to me. Please reach out if you have a question.
I love the fun and quirky stamps. Today’s card includes one that is fun and retro at the same time. It is the Let’s Chat stamp set.
Stamps
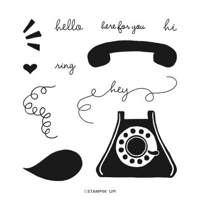
The Let’s Chat stamp set is adorable. The large old fashioned phone with the curly cord is perfect. The younger folks among us will never know the fun of laying in the floor, after pulling the phone as far away from the family as possible, and wrapping the cord around your fingers when talking with friends!! I had long hair so sometimes it would wrap itself in my hair. That was not fun. LOL!!
That this set brings back fond memories is just a bonus. I think it is cute and perfect with so many “retro” items being popular. It includes the phone with a few different sentiments to match. The “Hey” built into the cord is my favorite part. Since the base, cord, and receiver are all separate stamps, it is very easy to place them however you need or want to on the card.
Paper
To add brightness and more fun, I backed the phone with the awesome Masterfully Made Designer Series Paper. I love these colors. So I pulled the brightest, Berry Burst, from the DSP and used that as the background.
The Basic White is a full layer that is 4 X 5 1/4. I added the DSP flush with the bottom section. It is 4 X 3. That way I could partially stamp on the DSP with the phone cord. I love that look.
Finishes
The size of the phone helps it to really pop. And I will add that I used a stamp positioner tool so I could stamp it additional times to get the dark black image. Plus the phone base is fussy cut to sit on top of the DSP. After all of that, the card did not really need anything else. Except there is always the need for bling. In this instance I wanted bold bling. So I went with the Iridescent Discs in a bright color that matches the Berry Burst.
Thank you for stopping by today!!!
HOST CODE
My MARCH Host Code is GBUE3X7H. Please use this code for orders under $150.00. I will have a small gift for those with orders over $50.00 in addition to the Perk Rewards Program. You can read all of the information at the top of the page in the Menu Bar under SHOP / Perks.
Thank you for stopping by today. I hope you enjoyed today’s project and will come back. I do read and reply to all of the comments individually. They mean a lot to me. Please reach out if you have a question.
Today’s card is a great use of smaller DSP pieces and a fun floral. I have mixed the SAB Softly Stippled DSP with the Bottled Happiness set.
Paper
The Softly Stippled Designer Series Paper I used is from Sale-A-Bration. I failed to post this before SAB was over. But I bet quite a few of you have this paper, or any mix of paper that would work beautifully. I cut the two pieces of DSP to 2 3/4 X 5 1/4 and 1 1/4 X 5 1/4. Pebbled Path is the color I chose for this card base. I really like it as a base because it looks good with most colors.
Stamps
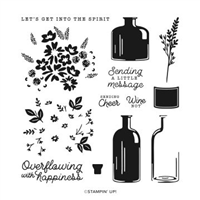
The floral image and the sentiment are from the Bottled Happiness stamp set in the Annual Catalog. I know my flower choices are a little odd, but I chose the Calypso to match the paper. LOL!! This is a two step floral arrangement and they really line up well. It speeds things along when this happens.
Dies
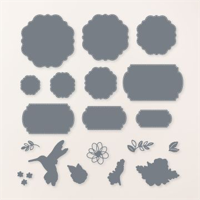
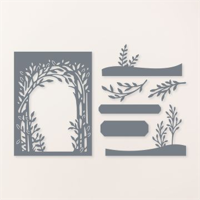
The floral die and the sentiment die are both from the Thoughtful Expressions Die set. I really love the shape of the floral cut. It is a fancy circle, and like that. The sentiment layer has the same design on the ends, as well as the stitching.
Finishes
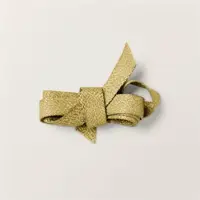
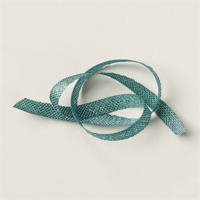
To highlight the sentiment I added some Wild Wheat Ribbon to tie in to the DSP. It is simply zig zagged under the sentiment and not really a bow. I added several Iridescent Rhinestones to the flowers as well as the sentiment layer. But you knew there would be bling!!!
Thank you for stopping by today!
HOST CODE
My MARCH Host Code is GBUE3X7H. Please use this code for orders under $150.00. I will have a small gift for those with orders over $50.00 in addition to the Perk Rewards Program. You can read all of the information at the top of the page in the Menu Bar under SHOP / Perks.
Thank you for stopping by today. I hope you enjoyed today’s project and will come back. I do read and reply to all of the comments individually. They mean a lot to me. Please reach out if you have a question.
I have a card today that is perfect for your DSP scraps and has so much detail! It is a mix of the Cheerful Daisies products. Daisies are almost ready for an appearance here in the South!
Colors
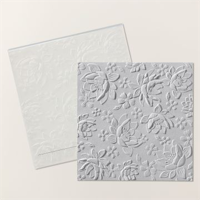
To say my cards generally begin with the DSP is an understatement! Ya’ll know that is where I tend to get all of my colors. In this case, it was the Lemon Lolly embossed layer. I had tested the Layerd Floral Embossing Folder on this Lemon Lolly card stock and loved it. But ended up not using it then. So seeing it on my desk gave me the idea to look for yellows in DSP.
The yellow was found in the Fresh As A Daisy Designer Series Paper. There is an abundance of Lemon Lolly and Crushed Curry in this paper. I found a few scraps with yellow showing and that was all I needed. Layering everything on Basic White kept it softer and I didn’t have to choose from the multiples of other colors! These strips are 3/4 X 4 in length.
Stamps and Dies
The Cheerful Daisies Bundle is all that was needed for the rest of the card. I went very simple though. The outline and detailed dies for the daisies added more of Lemon Lolly with definition. By leaving the two pieces together, it goes well with the Layered Floral Embossed background. I did add a touch of Moody Mauve to the centers by using a Blending Brush. And the die cut leaves are part of the Die set as well.
The sentiment and sentiment shape are both from the Bundle. I love the “Oopsy Daisy” !! Since I am late quite often for birthday cards, it worked out perfectly to have this cute sentiment for my card.
Finishes
To complete the card I pulled an unusual color form the DSP strips. I chose the Moody Mauve from the one strip. But since it did not have a ribbon, I switched gears and used the Sweet Sorbet Metallic Ribbon. I love this ribbon and have it in all of that group of In Colors. It is fabulous to work with to tie bows. I will definitely miss this at the end of the catalog.
There still needed to be a touch of bling to go along with the metallic ribbon. I chose one of the gold Festive Pearls to add to the sentiment layer. It compliments the Crushed Curry flowers in the DSP and pops from the Basic White of the sentiment layer.
Thank you for stopping by today!!
HOST CODE
My FEBRUARY Host Code is PR4KTFTS. Please use this code for orders under $150.00. I will have a small gift for those with orders over $50.00 in addition to the Perk Rewards Program. You can read all of the information at the top of the page in the Menu Bar under SHOP / Perks.
Thank you for stopping by today. I hope you enjoyed today’s project and will come back. I do read and reply to all of the comments individually. They mean a lot to me. Please reach out if you have a question.
I wanted to start with a Reminder! Sale-A-Bration only has today and tomorrow left for this year. We were treated to one extra day with the leap year. There are some great products to add to your inventory. And in case you forgot, there were additional products added this month that have great value. There is a flyer at the bottom of the post. Please reach out to me if you have any questions.
Additionally, there is a wonderful join promotion included in SAB. You have the choice of additional product, or a fabulous glass craft mat. I was able to purchase the mat and it is really nice!! And I would love to have you join my team.
Hello There card
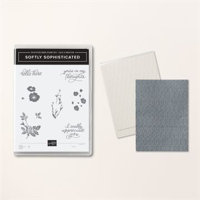
Today’s card is showcasing one of the $100.00 SAB stamp sets. I have used it once before, along with the awesome Embossing Folder. This is the Softly Sophisticated Bundle.
Stamps
The stamps used are all from the Softly Sophisticated stamp set. This set has some of the best sentiments included. And they are in beautifully scripted fonts. I will keep it in my stash for those sentiments. The flowers used are all from the stamp set as well. I stamped repeatedly the stems in Lost Lagoon and then the flowers in Highland Heather. To have some depth, I additionally stamped a couple of times with Gorgeous Grape Ink on scrap paper. These were fussy cut and then added over top of two of the flowers and then as an addition to the sentiment layer.
Papers
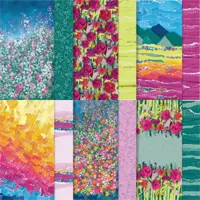
The Perennial Lavender Designer Series Paper is, in my opinion, the most beautiful of Stampin’ Up Designer Paper. I love the mix of purples, but also the greens with the Crumb Cake background. So I used a couple of different pieces for this card’s layers. The multiple floral piece was my first choice. Next came the plaid piece.
Then I decided it needed some more dark color. So I found the deep purple strip in scraps of that pack. (I keep all of the scraps associated with DSP. You never know when a scrap is exactly what you need to finish a card!) And the card base is Shaded Spruce that really helps the first DSP layer to pop! The stamped layer is cut intentionally at an angle. So your eyes are not messing with you! LOL!! It was an idea that didn’t really pan out but I just continued on.
Finishes
To get more texture and to highlight the sentiment, I added a faux bow using the Pretty Peacock and Gold Metallic Ribbon.. It is very soft and does not fight against the sentiment layer. The sentiment is die cut using a die from the Delicate Forest Dies. I wanted a pretty but simple shape. This die perfectly fit that bill! And to complete the card is bling. I added a trio of the Purple Shimmer Dots. Two are on flowers and one on the sentiment layer.
Thank you for visiting today!!
HOST CODE
My FEBRUARY Host Code is PR4KTFTS. Please use this code for orders under $150.00. I will have a small gift for those with orders over $50.00 in addition to the Perk Rewards Program. You can read all of the information at the top of the page in the Menu Bar under SHOP / Perks.
Thank you for stopping by today. I hope you enjoyed today’s project and will come back. I do read and reply to all of the comments individually. They mean a lot to me. Please reach out if you have a question.
The content in this blog is the sole responsibility of Jackie Beers as an Independent Stampin' Up! Demonstrator. The use of and content of classes, services or products offered is not endorsed by Stampin' Up!