The card I have today is the last of the Memories & More cards. It is another one using the Note Cards. I hope these cards have inspired you to try out the Note Cards for those quick Thank You, Gift enclosure, and even a regular card.
STAMPS
To go back to last week and some of the Reindeer Days cards, this one also has No Stamping on the front. There is a sentiment on the inside. How easy is this for a quick card or gift insert!
PAPERS
The basics of this card begins with the Basic White Note Cards. There are twenty cards and envelopes in the pack. They are are scored and ready to go. I added a banner of Real Red that I snipped the ends using my Paper Snips. Then simply layered the Reindeer Days Memories & More card on top. Easy Peasy!!!
EXTRAS
There is no Bling! I have shocked myself. It is very rare for me not to use bling. But there just did not seem a good place to add anything. Make note of this rare occasion!! LOL!!
HOST CODE
My DECEMBER Host Code is SAQE7VYU. Please use this code for orders under $150.00. I will have a small gift for those with orders over $50.00 in addition to the Perk Rewards Program. You can read all of the information at the top of the page in the Menu Bar under SHOP / Perks.
Thank you for stopping by today. I hope you enjoyed today’s project and will come back. I do read and reply to all of the comments individually. They mean a lot to me. Please reach out if you have a question.
Smile and Keep On Stamping,
Jackie
New Scrapbooking Catalog
The newest addition to Stampin’ Up! is an Online catalog of Scrapbooking products. You can see the catalog by clicking the photo below and save it to your computer.
Online Exclusives
New Online Exclusives have dropped. There are Halloween, Fall, Christmas, and many that are great year round. Of course the new Designer Series Papers and Embellishments are fabulous as well!
You can go directly to these in my Online Store by clicking HERE
I am starting off with an OH MY!!! This post was actually yesterday’s post. When I came in just now to do Friday’s post, I realized this one had not been sent out. It really helps when you put the date and schedule them!! My new set up has actually caught me short this time. And it doesn’t help that I have been running around like crazy to get things accomplished. This is part of the reason for sharing these quick cards.
Today’s card is another version of the Quick Cards I mentioned earlier. This one is a tad different in that it uses the smaller of the cards in the pack. And it is created on a Note Card size card and not the regular A2 size.
STAMPS
This is another card where I am shocked to say “There is no Stamping!” . At least not on the front anyway. All that you see is from the Reindeer Days Memories & More Card Pack. Even the cardinal sitting as the tree topper. It is a sticker from the sticker sheet that is part of the package. I will add that I did stamp a sentiment on the inside of the card. So there is some hand stamping.
PAPERS
This card could not be easier in more ways than one. The card pack is the first, and the card itself is the second. This is one of the Note Cards, from the Note Cards and Envelopes package. There are 20 cards with matching envelopes included. And I did not add a layer or anything additional with card stock.
EXTRAS
There is always, almost always, Bling! In this case I added a single rhinestone. It is a tad difficult to see in the photo. But it is below the cardinal on the tree. It is between the cardinal and the sentiment. With this being note card size, I did not want to add a lot of scattered bling. So a single was all I used.
HOST CODE
My DECEMBER Host Code is SAQE7VYU. Please use this code for orders under $150.00. I will have a small gift for those with orders over $50.00 in addition to the Perk Rewards Program. You can read all of the information at the top of the page in the Menu Bar under SHOP / Perks.
Thank you for stopping by today. I hope you enjoyed today’s project and will come back. I do read and reply to all of the comments individually. They mean a lot to me. Please reach out if you have a question.
Smile and Keep On Stamping,
Jackie
New Scrapbooking Catalog
The newest addition to Stampin’ Up! is an Online catalog of Scrapbooking products. You can see the catalog by clicking the photo below and save it to your computer.
Online Exclusives
New Online Exclusives have dropped. There are Halloween, Fall, Christmas, and many that are great year round. Of course the new Designer Series Papers and Embellishments are fabulous as well!
You can go directly to these in my Online Store by clicking HERE
Today is the final day of FREE Shipping on orders of $75.00 or more. The Last Chance Products are like a Clearance Rack Refresh on steroids!! So there should be quite a lot of things on your Wish List available.
I mentioned the Team stamping event this past weekend. A few of the cards from my upline were made using the Memories & More Card Packs. This one is the Reindeer Days Memories & More. Plus, because she is extremely generous, she gave each of us a full pack of the cards. So my cards for the rest of the week are all created from this pack of gorgeous cards.
STAMPS
To say this card is simple, I meant it was simple to create. Other than the inside sentiment, there is No stamping on this one. I really cannot say that I have ever made a no stamping card before.
It seems that for the last few years I make cards all year and then when Christmas card time arrives there is something happening. This year has been one thing after another. So discovering these card packs has been a savior for me. I really am not sure why I have ignored them all these years. DUH!!!
PAPERS
The Reindeer Days Memories & More Card Pack is almost all of this card. There are 54 cards from two different sizes. The striped layer is one of the 4 X 6 cards, cut down just a bit. The reindeer layer is also one of the 4 X 6 but trimmed quite a bit to only have the reindeer with no trimming. I decided on Garden Green as the card base. And the sentiment is a sticker from the Card pack. It is layered on a die cut piece of Real Red cardstock. So do you believe the simple!!!
EXTRAS
There are two products used other than the card pack. First is the layer behind the sentiment. It is a Die from the Stylish Shapes Dies. I used Stampin’ Dimensionals to raise the sentiment, even though it is a sticker. And of course there is bling! I scattered some of the Basic Rhinestones around and that completed the card.
HOST CODE
My DECEMBER Host Code is SAQE7VYU. Please use this code for orders under $150.00. I will have a small gift for those with orders over $50.00 in addition to the Perk Rewards Program. You can read all of the information at the top of the page in the Menu Bar under SHOP / Perks.
Thank you for stopping by today. I hope you enjoyed today’s project and will come back. I do read and reply to all of the comments individually. They mean a lot to me. Please reach out if you have a question.
Smile and Keep On Stamping,
Jackie
New Scrapbooking Catalog
The newest addition to Stampin’ Up! is an Online catalog of Scrapbooking products. You can see the catalog by clicking the photo below and save it to your computer.
Online Exclusives
New Online Exclusives have dropped. There are Halloween, Fall, Christmas, and many that are great year round. Of course the new Designer Series Papers and Embellishments are fabulous as well!
You can go directly to these in my Online Store by clicking HERE
Before I get to today’s project, I want to remind you that Free Shipping begins today. I have been out of town all of last week. And did not have my laptop to get out the information. The Free Shipping begins today and runs thru Wednesday. You can take advantage of any of our products. So it is a great time to get some of the Last Chance items that you may have been looking at. I love the easy way to look up those Last Chance items now. Please let me know if you have any questions or need assistance.
Today’s project is one I made for a Shoebox Swap my Up-Upline put together. It was great to see some of our group that is local. This project has a bit of a retro look to it. The best part is how really easy it is to put together.
This looks very retro to me. A simple gift box from my childhood. Now it is a simple card! I created this from several different versions I have seen. The first version was very similar to this one. However it was only a photo with a couple of measurements. I made that version larger. This fits an A2 envelope almost as a regular card would. I made a few more tweaks regarding how things fit together.
The top pulls out to allow you to see the inside “card”. This card is large enough for you to use a Removable Glue Dot and adhere a gift card. Here is the open view.
STAMPS
To keep this fairly plane and simple, I only used one stamp set. That is an unusual thing for me of late. This stamp set is the Sentimental Wishes stamp set. The sentiments are simple and have a different font than those we normally see. Almost like they are retro as well. The front sentiment layer also includes the bow. I felt it needed a bit of an extra touch.
PAPERS
The card base, both top and bottom are from Real Red cardstock The only additional cardstock is the bit for the Granny Apple Green layer with the sentiment. And the sentiment is on Basic White. the fun “bow” wrapped around the card is from the Take A Bow Designer Series Paper. All of the sheets from this 6X6 paper pack would work wonderfully on this card. There are three main colors, the ones you see in the dots, and these are included on all of the papers in the pack.
EXTRAS
The card itself is fairly straightforward. But I am including the measurements. The only extras are the Circle Punches, which are the 1 3/4″ and the 2″ Circle Punches. For the bling I added a single Rhinestone. This time I used a larger one to stand out a bit better.
MEASUREMENTS
The Real Red card base is cut to 5 X 7 and scored on the 7″ side at 3 1/4. When folded, the shorter section is the card front. Fold the card and add adhesive on the shorter front sides right up against the edge. Tear & Tape is the width to consider.
The Real Red card top measures 5 1/2 X 3 and is scored on the 3″ side at 1 1/2. Fold and burnish. The inside Basic White is cut to 3 3/4 X 4. The 3 3/4 is the width to make sliding in and out easy. I suggest placing the White piece inside of the top, up to the score line, and then stamp the sentiment. This insures it is not up to high. Then center the White and add adhesive of your choice, but only at the very top of the White. Do not add adhesive all the way down the red. Again, think of the width of Tear & Tape. Once that is dry, turn this section over and adhere the back in the same way.
The DSP is from the Take A Bow DSP and measures one at 1 3/8 X 3 1/4, that is for the front. And 5 3/8 X 1 3/8 for the front of the top section. Now slide your top, with the White attached, down into the pocket. It should easily slide in and the top folded red goes down over the bottom part just a bit. This helps the illusion of a box. Add the sentiment on the front and you are completed.
HOST CODE
My DECEMBER Host Code is SAQE7VYU. Please use this code for orders under $150.00. I will have a small gift for those with orders over $50.00 in addition to the Perk Rewards Program. You can read all of the information at the top of the page in the Menu Bar under SHOP / Perks.
Thank you for stopping by today. I hope you enjoyed today’s project and will come back. I do read and reply to all of the comments individually. They mean a lot to me. Please reach out if you have a question.
Smile and Keep On Stamping,
Jackie
New Scrapbooking Catalog
The newest addition to Stampin’ Up! is an Online catalog of Scrapbooking products. You can see the catalog by clicking the photo below and save it to your computer.
Online Exclusives
New Online Exclusives have dropped. There are Halloween, Fall, Christmas, and many that are great year round. Of course the new Designer Series Papers and Embellishments are fabulous as well!
You can go directly to these in my Online Store by clicking HERE
My card today is for one of the sweetest people I know. She does so much for everyone and I am honored to call her a friend. As a special Thank You, I made this card and hope you are as happy with it as I am.
STAMPS
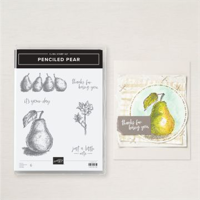
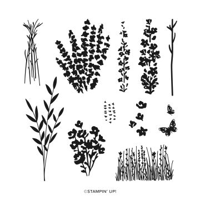
This sentiment is so perfect for the intended recipient. It is a bit different than normal, but fits the bill perfectly. The fun font is awesome as well. I love a different font. This one is from the Penciled Pear stamp set. That set is a hidden gem in the Annual Catalog. The inside sentiment is from the Wonderful Thoughts stamp set. There is also a matching flower from the Painted Lavender stamp set inside. Here is a view of the open card. It is a Double Z fold.
PAPERS
The card base ,or bases, since there are two Z folds are Pretty Peacock cardstock. And all of the DSP is from the Perennial Lavender Designer Series Paper. I normally do not put DSP on the inside of the Z base. However I saw one recently that had done so, and it really added to the card. So I saw this tone on tone floral in the paper pack and said Why Not! Additionally the surround for the front sentiment is also included in the DSP pack. I believe it is the opposite side of this main floral pattern.
EXTRAS
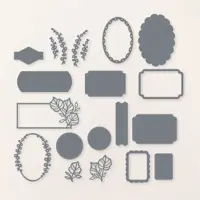
There is only one extra for this card. And that is very surprising even to me! It is the Die used for the sentiment on the front of the card. This Die is from the Unbounded Love Die set. It is one Die, but it cuts the outside and inside both. So it was simple to cut the DSP and then the White with the sentiment separately. Then I simply put them back together again. Plus I now have a White outside and plaid inside leftover for another card. Two for the price of one!
MEASUREMENTS
The Pretty Peacock card base is 11 X 4 1/4 and scored at 2 3/4 and 5 1/2. The inner card is also Pretty Peacock and is 10 1/2 X 3 1/4, and is scored at 4 1/2 and 7 1/2. There are different DSP on each of the layers. For the card base the DSP measures 2 pieces @ 2 1/2 X 4, these are the front and center. And the inside back is 5 1/4 X 4. For the smaller card, the DSP is 4 1/4 X 3 for the front. The middle section is 2 3/4 X 3. The back White layer that is stamped on is 2 3/4 X 3 also.
HOST CODE
My DECEMBER Host Code is SAQE7VYU. Please use this code for orders under $150.00. I will have a small gift for those with orders over $50.00 in addition to the Perk Rewards Program. You can read all of the information at the top of the page in the Menu Bar under SHOP / Perks.
Thank you for stopping by today. I hope you enjoyed today’s project and will come back. I do read and reply to all of the comments individually. They mean a lot to me. Please reach out if you have a question.
Smile and Keep On Stamping,
Jackie
New Scrapbooking Catalog
The newest addition to Stampin’ Up! is an Online catalog of Scrapbooking products. You can see the catalog by clicking the photo below and save it to your computer.
Online Exclusives
New Online Exclusives have dropped. There are Halloween, Fall, Christmas, and many that are great year round. Of course the new Designer Series Papers and Embellishments are fabulous as well!
You can go directly to these in my Online Store by clicking HERE
The content in this blog is the sole responsibility of Jackie Beers as an Independent Stampin' Up! Demonstrator. The use of and content of classes, services or products offered is not endorsed by Stampin' Up!