Cats and dogs are two of my main loves. Actually most animals make me smile and want to hug them. So the North Pole Mischief stamp set was an immediate hit with me. I have shared a couple of cards using the images of the cat. Today I have used the mischievous pup as well.
Stamp
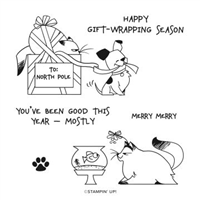
I can imagine this cat sitting on top of the gift! That is an ingrained cat habit to sit in or on a box. At least it is at my house! And then all it takes is a little pup to come along and play with the ribbon. Or it could have been another cat doing the ribbon playing. But the cat is sitting there planning revenge as the pup is happily playing! LOL!!!
The adorable image is stamped using Memento Tuxedo Black Ink and then colored with Stampin’ Blends. I chose the colors from the paper of course. The debate was wether or not to color the dog and cat or leave as is. I think the black sections made when stamping were sufficient for their colors. Of course that took a bit of thinking on!
Paper and Embellishments
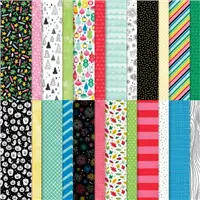
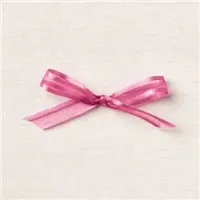
The gorgeous ornament paper is from the celebrate Everything Designer Series Paper. It is a Host reward and well worth the price! And as is the norm, all of my colors came from that piece of paper. I chose to go with a Thick Basic White card base because of all the white in the DSP piece. But layered a bright Granny Apple Green to pop the colors. I actually thought ahead about how I was going to finish the card. When the “package” look was decided, I went with the Polished Pink Open Weave Ribbon. And that made the ribbon choice in the stamped image so the two coordinate. With the busy DSP and the fun image, I decided that no other bling was needed. That is another rare occasion!
Birthday Organizer Kit
DETAILS
Kit includes one 8″ x 10″ (20.3 x 25.4 cm) monthly planner with space to record birthdays each month as well as a pocket sleeve to hold birthday cards.
Includes 12 full-size birthday cards, 6 of 2 designs, and 12 coordinating envelopes.
Includes Glue Dots, Stampin’ Dimensionals, Adhesive-Backed Embellishments, and Tear & Tape Adhesive
Includes die-cut florals and pieces ready for you to use—no prep work required!
Includes sticker sentiments and die-cut labels in Dutch, English, French, and German
My November Host Code is XUE6MDFV. Please use this code for orders under $150.00. I will have a small gift for those with orders over $50.00 in addition to the Perk Rewards Program. You can read all of the information at the top of the page in the Menu Bar under SHOP / Perks.
Thank you for stopping by today. I hope you enjoyed today’s project and will come back. I do read and reply to all of the comments individually. They mean a lot to me. Please reach out if you have a question.
It is the time of year for Gift Card holders. They are a favorite of mine to make and share. Today’s card showcases the Poinsettia paper.
And here is the inside view:
Paper
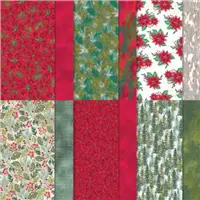
The Boughs of Holly Designer is where I found the beautiful Poinsettias. The two pieces you see when the card is closed I wanted to be the same. They could easily be two different coordinating papers. And for the gift card pocket I opted for a different Poinsettia piece. There are a variety of greens in the paper, but I opted to go with Mossy Meadow as the card base. And I know you are shocked, but I did not add a layer between the DSP and the card base. That is something I almost always do. Since this card, including the gift card, is fairly thick, I did not want to add anymore layers to that.
Stamps
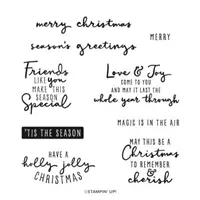
I used two different stamp sets on this card. The two sentiments are from the Christmas To Remember stamp set. And the greenery are from the Christmas Season stamp set. To get the focal layer greenery I simply stamped around the edges and left room in the center for the sentiment. The colors used are ones from the DSP. That made the choices rather easy! For the inside layer I only added a sentiment. That piece is rather small and did not want to take up any more of the writing room.
Measurements:
The card base is cut to 4 1/14 X 11 and scored at 2 1/2 and 5 1/2. Fold and burnish the score lines. The DSP pieces are two at 2 1/4 X 4. These are the gift card pocket and the far right pieces. The front left DSP is 2 3/4 X 4. Adhere all of the DSP pieces and then use a circle punch or die to create the finger notch on the gift card pocket. Then adhere it with Tear & Tape placed very close to the edge on each side. It also helps to place your gift card inside when closing. That insures that the fit is not too tight when you place it afterwards.
The front sentiment layer is a Mossy Meadow cut to 3 X 4 1/4 and a White cut to 2 3/4 X 4. And the final is the inside White at 2 3/4 X 4. I hope you will give this one a try!
Birthday Organizer Kit
DETAILS
Kit includes one 8″ x 10″ (20.3 x 25.4 cm) monthly planner with space to record birthdays each month as well as a pocket sleeve to hold birthday cards.
Includes 12 full-size birthday cards, 6 of 2 designs, and 12 coordinating envelopes.
Includes Glue Dots, Stampin’ Dimensionals, Adhesive-Backed Embellishments, and Tear & Tape Adhesive
Includes die-cut florals and pieces ready for you to use—no prep work required!
Includes sticker sentiments and die-cut labels in Dutch, English, French, and German
My November Host Code is XUE6MDFV. Please use this code for orders under $150.00. I will have a small gift for those with orders over $50.00 in addition to the Perk Rewards Program. You can read all of the information at the top of the page in the Menu Bar under SHOP / Perks.
Thank you for stopping by today. I hope you enjoyed today’s project and will come back. I do read and reply to all of the comments individually. They mean a lot to me. Please reach out if you have a question.
This month, the theme is Home for the Holidays, so the design team created a project for the holiday of their choice. We really hope that you will be inspired by all the amazing creations the Pals are sharing with you! As you hop from blog to blog, we would love for you to leave a comment. You will find the lineup at the end of my post to help you “hop” along from Pal to Pal..
The theme, Home for the Holidays, says Christmas to me. My card showcases the beautiful Lights Aglow DSP and Peaceful Deer stamp set.
Papers
These two pieces of the Lights Aglow Designer Series Paper just seemed perfect for an old-fashioned Christmas theme. Red and Green are the traditional colors and these are that with a touch of bling! And when I added the Gold from the Gold & Rose Gold Specialty Paper, the texture in it really helps the papers pop! For a little different look, I added the card base in Soft Succulent. It is not in the DSP but was what I had chosen for some of the tree colors.
For the focal layer I wanted something more than plain white. So I die cut the piece with the largest square in the Stylish Shapes Dies. The stitching around the edges, plus the gold background paper, seemed to be just right. And the little banner was the finishing touch. I love that sentiment and by flagging the ends it helps it to stand out a bit from the focal layer.
Stamps
The sweet sentiment, and the other stamps used, are all from the Peaceful Deer stamp set. These trees are all included in the stamp set as well. By placing the largest one center stage, and in Soft Succulent Ink, it seems to pop. The other trees are stamped with Evening Evergreen and appear to be in the distance.
Here is a view of the open card.
A second sentiment from the set was used on the inside panel, as well as the smaller of the trees.
More inspiration awaits, so use the lineup below to visit the rest of the Design Team. The Pals are excited to show you what they’ve created! Then, please mark your calendars for our next blog hop on December 14th. Our theme will be Last Minute Gift/Card Ideas.
My November Host Code is XUE6MDFV. Please use this code for orders under $150.00. I will have a small gift for those with orders over $50.00 in addition to the Perk Rewards Program. You can read all of the information at the top of the page in the Menu Bar under SHOP / Perks.
Thank you for stopping by today. I hope you enjoyed today’s project and will come back. I do read and reply to all of the comments individually. They mean a lot to me. Please reach out if you have a question.
Today’s card is a quick one using the In Color Glimmer Paper paired with the Spruced Up Dies. Counting the Ink and Ribbon this is a four part card. It may be a record for me!
Papers
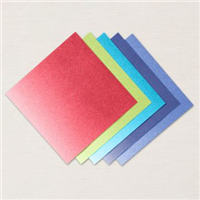
Starting with the paper may seem a bit odd as there does not appear to be a lot of paper! But that is the point. This is a quick card with Thick Basic White, some Glimmer Paper, and a regular Basic White. And that is all it took! The die cut piece is cut to 3 X 5. The three strips of Glimmer Paper are each cut 4 1/4 X 3/4. I believe this technique would work just as well with Designer Series paper scraps, or Washi Tape. I just am in love with this Glimmer Paper.
Focal Layer
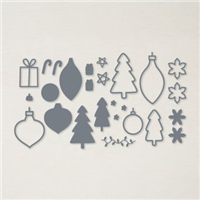
The Focal Layer is the 3 X 5 Basic White piece. I stamped the sentiment, from the Brightest Glow Stamp Set, first and positioned it at the bottom of the card. It is stamped in Parakeet Party Ink. Next was the placement of the ornament die. This is from the Spruced Up Die set. There are a couple of sizes of ornaments and two trees. Any of these dies would work with this technique.
The ornament die was positioned between the top of the layer and the sentiment. After die cutting I added Stampin’ Dimensionals to the back and with the backings still attached, put it on the card. This allowed me to find the perfect location for the Glimmer Paper strips. Once those were in place I adhered the focal layer over them. All that was left was tying a bow using the Parakeet Party Metallic Ribbon.
I hope you will give this technique a try!
Birthday Organizer Kit
DETAILS
Kit includes one 8″ x 10″ (20.3 x 25.4 cm) monthly planner with space to record birthdays each month as well as a pocket sleeve to hold birthday cards.
Includes 12 full-size birthday cards, 6 of 2 designs, and 12 coordinating envelopes.
Includes Glue Dots, Stampin’ Dimensionals, Adhesive-Backed Embellishments, and Tear & Tape Adhesive
Includes die-cut florals and pieces ready for you to use—no prep work required!
Includes sticker sentiments and die-cut labels in Dutch, English, French, and German
My November Host Code is XUE6MDFV. Please use this code for orders under $150.00. I will have a small gift for those with orders over $50.00 in addition to the Perk Rewards Program. You can read all of the information at the top of the page in the Menu Bar under SHOP / Perks.
Thank you for stopping by today. I hope you enjoyed today’s project and will come back. I do read and reply to all of the comments individually. They mean a lot to me. Please reach out if you have a question.
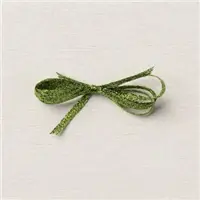
Today’s project is a Fun Fold for a Thank You challenge. I used a few different sheets of the beautiful Texture Chic Designer Series paper to create this one.
And here are the open views:
As mentioned at the top, this card was made for the Make My Monday Blog Challenge. This challenge was simply a Thank You card. You can see inspiring cards from the other designers, as well as join the challenge yourself. Simply click on the link to be taken to the challenge.
Paper
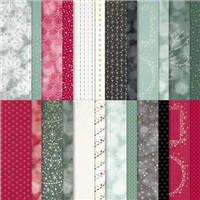
I believe the fabulous DSP is the star of this card. It is from the Texture Chic Designer Series Paper. My favorite is not only the images, but the colors. And in saying that, the color I used for the card base is not actually in the papers. But it matches perfectly with the darker shades and pairs with the Petal Pink. The card base is Soft Suede with the layers of Pool Party.
I have directions further down. But to complete the Paper topic, I used a piece of scrap to die cut the leaves which surround the sentiment on the front. The color variations were so pretty, and with Fall leaves as an inspiration, I decided to give it a try. They look great in my opinion. And to finish the inside of the card, I used a scrap to add a little bit of the Petal Pink to the bottom of the inside White piece.
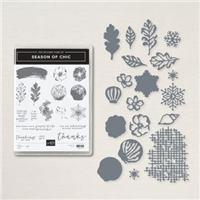
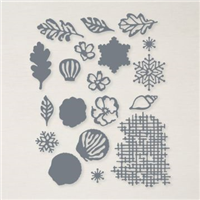
Stamps and Dies
This is an all Chic card. The stamp set used was the Season of Chic with the matching Chic Dies. They are a bundle, and actually there is a Suite of the Texture Chic that contains the DSP, Stamp Bundle, and Distressed Gold Specialty DSP. I used everything except the gold paper.
As I mentioned earlier, the leaves are die cut from the DSP. There are several leaf dies and I loved the openness of them. The stamped Thanks is included in the set, as is the inside sentiment. Sadly there is not a die for the Thanks. So I took my paper snips and sort of outline cut around the stamped word. And to give more color and depth, it is layered on a scrap of Pool Party and I then did the same cut around that. It is not perfect by any means, but I love the look!
Directions
The card base of Soft Suede is cut to 5 1/2 X 8 1/2 and scored at 4 1/4. Cut from the top of the score line diagonally down to the bottom right of the front panel. For the small card, cut a piece of Pool Party to 3 X 8 and score and fold at 4. To make the diagonal pieces, cut a piece of Pool Party to 4 X 5 1/4. Next cut it diagonally from top left to bottom right. These are for both sides of the angle front on the card. Then cut a piece of DSP to 3 7/8 X 5 1/8. Cut it diagonally as well. Since this pattern is not directional, both pieces fit the front and inside of the flap.
To finish the inside of the card, cut a piece of Pool Party to 4 X 5 1/4 and adhere to the inside of the card. Also cut a complimentary piece of DSP to 2 3/4 X 3 3/4 for the front of the small card. A piece of Basic White cut the same size fits the inside of that card. Adhere the small card by having it closed and placing it with even borders all around. I finished mine with a strip of the Petal Pink DSP across the bottom of the White that was 2 3/4 X 1/2.
Birthday Organizer Kit
DETAILS
Kit includes one 8″ x 10″ (20.3 x 25.4 cm) monthly planner with space to record birthdays each month as well as a pocket sleeve to hold birthday cards.
Includes 12 full-size birthday cards, 6 of 2 designs, and 12 coordinating envelopes.
Includes Glue Dots, Stampin’ Dimensionals, Adhesive-Backed Embellishments, and Tear & Tape Adhesive
Includes die-cut florals and pieces ready for you to use—no prep work required!
Includes sticker sentiments and die-cut labels in Dutch, English, French, and German
My November Host Code is XUE6MDFV. Please use this code for orders under $150.00. I will have a small gift for those with orders over $50.00 in addition to the Perk Rewards Program. You can read all of the information at the top of the page in the Menu Bar under SHOP / Perks.
Thank you for stopping by today. I hope you enjoyed today’s project and will come back. I do read and reply to all of the comments individually. They mean a lot to me. Please reach out if you have a question.
The content in this blog is the sole responsibility of Jackie Beers as an Independent Stampin' Up! Demonstrator. The use of and content of classes, services or products offered is not endorsed by Stampin' Up!