The “Smile” card I am sharing today is a technique that is difficult for me. It is a One Layer card. Since I tend to have multiple layers, only having one in addition to the base is very difficult for my brain. LOL!!

Today’s card was designed for the Make My Monday Blog Challenge. As a designer we get to choose a few of the challenges each year. This idea was mine, silly me. LOL!! Hopefully you will join the challenge and add your own version of the one layer card. Simply click on the icon below and you will be taken to the blog. Add your own creation at the bottom of the page.
![]()
Stamps
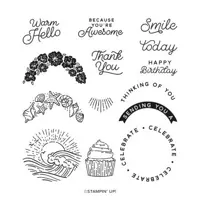
These images are all from the Circle Sayings Stamp set. I have used this set recently and still love it! The fact it is a punch bundle put it to the top of my Must Have List. Although I did not use the matching punch on this card. The cupcake, flowers, and sentiment are all from the stamp set. I love simple sentiments like the Smile. And it was a perfect and simple one for my one layer.
The cupcake is stamped on the card base actually. It was stamped through the hole for perfect placement. I have used several of the new / returning colors. The cupcake cup is colored with Pretty Peacock Stampin’ Blends and the icing is Lemon Lolly. For the flowers they are stamped with the new Moody Mauve with Pretty Peacock for the leaves.
Punch
To make this one layer card a little more interesting, I used the 1 3/4″ Circle Punch. This is one from the Online Exclusives. Punches are so quick and easy to use and I am thrilled that Stampin’ Up! has brought back some of the Circle Punches. To create the see through for the cupcake, I put the paper a little right of center into the punch. Next I placed it on the card base temporarily, and then stamped through the hole. That way when I added the Stampin’ Dimensionals I know the cupcake was positioned properly.
The circle needed a little decoration though. So I stamped the flower stamp across the top and then fussy cut a couple of extras to add to the bottom. That may be cheating just a tad on the One Layer. And to help the circle pop a little, I used the Moody Mauve Stampin’ Write Marker and went around the inside of the circle. I held the layer in one hand and with the other had the marker coming from underneath. By placing the center of the length of the brush tip against the cut out, it left just a darker line around the hole. This method is great for just a touch of detail. And from the photo you may not even notice. It does show better in person.
Finishes
The final touches for this card were very simple ones. I stamped the Smile with Memento Tuxedo Black Ink. And I added one of the Adhesive Back Solid Gems in Lemon Lolly next to the sentiment. That is minimal bling for me!
Thank you for stopping in today!!
Online exclusives are here to stay! Click on the photo and be taken directly to them in my online store. If you place an order, please use my Host Code listed just below.

HOST CODE
My May Host Code is K326G6VQ. Please use this code for orders under $150.00. I will have a small gift for those with orders over $50.00 in addition to the Perk Rewards Program. You can read all of the information at the top of the page in the Menu Bar under SHOP / Perks.
Thank you for stopping by today. I hope you enjoyed today’s project and will come back. I do read and reply to all of the comments individually. They mean a lot to me. Please reach out if you have a question.
Smile and Keep On Stamping,
Jackie

SUPPLIES: