I have another 4 X 4 card that is full of Friendship and Thanks. It is part of a 4 pack gift I made. The other card I shared last week. I used most of the same products in both cards. They use different pieces to make each more individual. There are two of each card.

If you missed the card from last week, you can see it HERE.
Layout
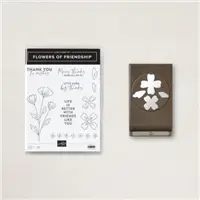
As I mentioned in the beginning of the post, the two cards are basically the same. The size of the cards are the same. The layers are a little different. For this one though I used the Flowers of Friendship Bundle. This bundle is a stamp and punch. You know how I love punches, so this was on my first order from the new catalog!
The difference for this card are the flowers and the sweet sentiment. They are both from the stamp set. I layered the smaller flower on top of the larger one. And glued the leaves to the back side of the larger flower.
The sentiment is stamped and then punched using the Label Me Fancy Punch. I like the rounded edges this punch leaves. Plus it tucks just below the flowers very nicely.
Finishing Touches
This card would qualify as a #simplestamping card so it does not have, or require , much in the finishing. I did add one Gold Gilded Gem to the center of the flower. I also used Stampin’ Dimensionals to raise the flower up. I had also used my bone folder to curl the petals on the smaller flower for some added dimension.
Measurements
- Card base of Merry Merlot is cut 4 X 8 and folded in half
- Crushed Curry layer is cut 2 1/2 X 3 3/4
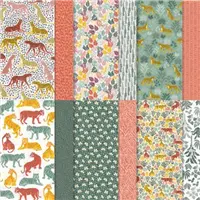
- DSP layer is cut 2 3/8 X 3 5/8
- Layer is positioned equally on the left side aligned with Top, Bottom, and Left edge.
Options for the Punched Images
The punch will punch the two sizes of flower and the two leaves at one time. There are a couple of ways to make the punching more efficient. I just used scrap strips of my cardstock to stamp the images. But first, I turned the punch over and saw the direction each of the components were facing. That way I knew which way to place the stamped images for ease in cutting.
You can also use your Stamparatus and make a template. To do this, take a square of cardstock and punch all four pieces at once to make a template. Then place the template on the stamping surface of your stamparatus. Place the stamps in the template. Pick the flowers up with one plate and then pick the leaves up with the second plate. Now you can stamp and punch multiples easily.
January – June Mini Catalog Last Chance Sale
Click on the image below to get the 4 page pdf of the sale. A reminder, in some cases a Bundle is cheaper to purchase the stamp set and dies individually. Some dies are discounted up to 50% off.
If you order through me, and it is as easy as clicking on the Shop Now button on the Menu Bar, I have a Rewards Program. For every $50.00 in product you purchase, you earn a Blue Star. When you have gathered 10 Blue Stars, you get a $50.00 shopping on me. Plus every time you spend $50.00 I will add a small gift for you. Please use my Host Code listed below.

HOST CODE
My June Host Code is HCX2WT2A Please use this code for orders under $150.00. I will have a small perk for those with orders over $50.00
Thank you for stopping by today. I hope you enjoyed today’s project and will come back. I do read and reply to all of the comments individually. They mean a lot to me. Please reach out if you have a question.
Smile and Keep On Stamping,
Jackie

SUPPLIES: