
Welcome to InKing Royalty’s February Blog Hop! During this year’s blog hops, we are enjoying a year of celebrations. This month’s projects celebrate birthdays, so prepare yourself for a wonderful mix of celebratory cards. We are excited to share our creations with you today! After you read my post, I hope you’ll hop over to the next person on the list at the base of this post.
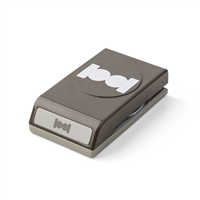
My card is for celebrating. I have made it as a birthday card, but it would work for a variety of events. I cased it from page 50 of the Mini Catalog. The thing that first caught my eye, was the Circle Tab Punch for the pull out tab. I have not used it lately except for tabs for my catalogs. The thought of using it on a card again was exciting. I do love my punches.

And here is a picture of the inside of the card.

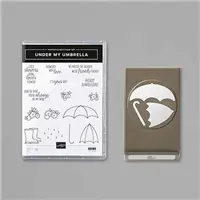
In the catalog, this card is an invitation. I rarely need invitations, but loved the pull out element. I liked the card and layout so much I actually made two of these cards . Both are using the Under The Umbrella Bundle of products. The only change in the two are the colors I used. Here is the second version.

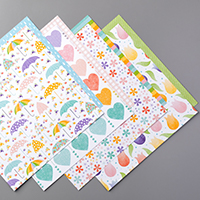
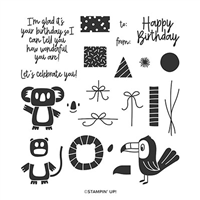
For both cards, I used the Under The Umbrella Bundle. This bundle is a stamp set and punch. I also used the Pleased As Punch Designer Series Paper for the umbrella on the pull out piece. The flower is punched from the Pleased As Punch DSP also using the Small Bloom Punch from Sale-A-Bration.
After I adhered the pocket together, I used the Detailed Trio Punch to round the corners of the pocket. For the purple card, I also rounded the corners of the insert. I did not do that on the Pool Party version. I think I like the insert rounded best.
The umbrella on the inside of the Pool Party card is the multi colored flower one. The “Love” tag on both is from the Cup Of Cheer Dies ( which happily carried over!) I love that tag. And the next SAB release for March has a new matching stamp set for those dies! Woohoo!
This card is actually very quick to do. I have two pictures and directions for cutting the angle. I will place that beneath the Blog Hop List. Some people may not be interested in the how to make it. Shocking I know!!LOL!! The supplies I have listed are for the purple version.
Thank you for stopping by today. I hope you’ll hop along to the next stop on the blog hop, Robin Myren at Songbird Designs by Robin. There’s lots of inspiration to be found in this group – and you don’t want to miss it!
- Brian King at Stamp with Brian
- Sheryl Abernathy at Elegant Sentiments
- Sue Jackson at Just Peachy Stamping
- Linda Krueger at The Stamp Coach
- Jackie Beers at Blue Line Stamping
- Robin Myren at Songbird Designs by Robin
- Lynn Kolcun at Avery’s Owlery
- Jennifer Spiller at Westside Paper Creations
- Ann Murray at Murray Stamps Ink
- Candy Ford at Stamp Candy
- Julie DiMatteo at The Paper Pixie
- Shawn de Oliveira at Shawn Stamps
Card Directions: The card stock is 5 1/2 X 8 1/2 scored at 4 1/4, like a normal card. After scoring, but before folding, place on the trimmer with the scored line on the cutting track. Use the ruler on the blade holder and score down 1″. Turn the card the opposite direction and cut from the end of the first cut across the card. You are removing a 1″ section from the top of the front piece of your card. Next, angle the cut edge up above the cutting track to that 1″ mark on the cutter. See picture:

You can see from the picture what I meant about cutting the 1″ section away from the top of that right side. After getting the top edge lined up at 1″ mark, make sure the score line cut intersection is on the cutting track. Now cut that piece off. See picture.

Now you have your angled card. I used Tear & Tape around the bottom and outside edge (place it on the top layer). The inside white layer measures 3 3/4 X 4. 4 is the height. Place that piece inside the pocket, well away from the tape, when securing the card. This insures you have a little extra room for ease of inserting and removing the tabbed card. If I have confused you…..please contact me and I will be happy to explain further.
The Ultimate Shopping Spree:
The Ultimate Bundle is the Stampin’ Up! Starter Kit. During Sale-A-Bration you get the extra value for your $99.00. If you have a wish list or are ready to place an order and it totals close to 99.00, please read this first.
There is NO OBLIGATIONS to do anything beyond ordering the kit. You pay $99.00 + tax and receive $125.00 of your choice of products + any stamp set from the annual or mini catalog (the most expensive one is the Well Said set with a $45.00 price) + the Mini Paper Cutter, a $26.50 value + the 6X6 DSP sampler pack (48 sheets of DSP) an $11.50 value + a Paper Pumpkin Kit with a value of $22.00 + FREE Shipping which is usually 10% of the order and would add another $23.00 value here. This equals over $230.00 value + business supplies added in at no cost. That is an awesome deal!! And you never have to purchase another thing. But while you are trying it out, and you have until the end of July before your trial period runs out, you are part of my Team! As well as my upline’s team. We have Facebook groups to share our projects and assist each other. I would love to talk with you about this opportunity.
HOST CODE
My February Host Code is 66YQVJQC. Please use this code for orders under $150.00. I will have a small perk for those with orders over $50.00.


The new Stampin’ Up! Paper Trimmer is here!!

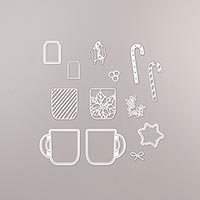
SUPPLIES:


I studied this sample from the catalog, too, but you actually did something with it. I love that you figured out how to recreate it – and I adore the two versions you’ve shared. So happy you could hop with us today.
Goodness I adore these pocket cards, Jackie!! And I love the added Circle Tab Punch pull tab! I’m definitely going to have to try making one of these! Thank you for sharing!
I adore Pocket Cards. So cute what you did with yours. Thanks for sharing.
Love the pocket card. You have inspired me to try my hand at one.
Jackie, I love these cards! I’ve never tried a pocket card, but now that I know how I’m going to give it a try. You’ve also inspired me to have another look at the catalog. I didn’t see this. Thank you! Thank you! Thank you!
Really cute cards, and they look so different even though they are made the same. I love, love this envelope/holder and card, and I thank you for providing the instructions. I have an event coming up that will require a couple of dozen invitations. I might give this idea a try, and I will rely on your post to get me started.
Jackie, these are so pretty and fun! Love the instructions, too.
Love those pull-tab cards. Thanks for sharing your tricks in creating them. I’ll have to give that a try.
I love both of these fun cards! What a great choice of stamp set to show off your card layout.