This is an extra post to remind you of the upcoming Free Shipping day! Plus to give you two printable PDFs I made.
Free Shipping
First is the Free Shipping coming this Tuesday. I cannot wait and have a list ready to go. All of the information is listed in the flyer below.
Free Shipping coming soon…..
Paper and Punches
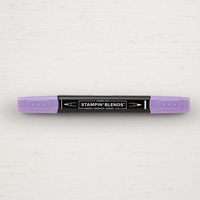
The new Annual Catalog does not include pages showing all of the Designer Paper or the Punches. So I have created a PDF for each one that you can insert in your catalog to have as a handy reference. Both items are listed in the Index of the catalog, but this allows you to see them up close. And even closer if you magnify on the computer! LOL!! I am laughing at myself there because I have done that. I will say that even the up close photos do not do some of these papers justice. Probably my favorite after doing my Paper Shares is the Wildly Flowering. But I also had favorites from each pack of paper.
Paper
Click on the photo to get all of the papers.
Punches
Click on the photo to get the complete Punch list
May Join Promotion
New demonstrators who join during the month of May will receive the following products in their Starter Kit at no additional cost:
2024–2026 In Color Classic Stampin’ Pad Bundle
2024–2026 In Color 8-1/2″ x 11″ (21.6 x 27.9 cm) Cardstock
2024–2026 In Color 6″ x 6″ (15.2 x 15.2 cm) Designer Series Paper
2024–2026 In Color Stampin’ Write Markers
HOST CODE
My MAY Host Code is 96AT2UNW. Please use this code for orders under $150.00. I will have a small gift for those with orders over $50.00 in addition to the Perk Rewards Program. You can read all of the information at the top of the page in the Menu Bar under SHOP / Perks.
Thank you for stopping by today. I hope you enjoyed today’s project and will come back. I do read and reply to all of the comments individually. They mean a lot to me. Please reach out if you have a question.
I have two new products paired up today. And they are not two that you would expect. One is quite feminine and the other is neutral. Yet it makes a wonderful masculine card. I was so excited for the final result.
Stamp set
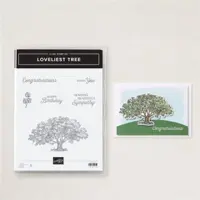
This stamp of the tree may look like an old friend to some of you. It is reminiscent of the long time stamp set Lovely As A Tree. It was around for many, many years. Well there is somewhat of a return. The new set is titled Loveliest Tree. And I have to agree. This is a beautiful tree. All of the stamps are included in the set.
The tree was inked with Stampin’ Write Markers. This is a great technique but only works on Red Rubber stamps. I used Pretty Peacock and Lost Lagoon on the tree leaves. Early Espresso is the tree trunk and Granny Apple Green is the grass at the tree base. It can be a little nervy stamping directly onto DSP. And this was no exception. But I overcame my fear and love the results. Note: the Stampin’ Write Markers are only available as a Color Family and not individually.
The sentiment and little leaves were a last idea for getting the sentiment in. I just couldn’t bring myself to stamp on the DSP again. Or to cover up anything. But it needed something. So I stamped the leaves with Pretty Peacock and the sentiment with Early Espresso on Basic Beige card stock. After fussy cutting around these, I realized it blended in too much. So I adhered it to a Pretty Peacock scrap and fussy cut again. I was really happy with the outcome. let me know what you thing!
Papers
This card became quite a simple one in terms of products and colors. I knew after stamping the tree that I wanted Pretty Peacock as the base. Of course I had already decided on the linen look piece of DSP. This gorgeous paper is from the Country Lace Designer Series Paper. Who would have thought of that name with a masculine card? Well ,hold on to your hat because the eyelet layer is from the same Country Lace DSP. And again, not what you would usually expect. I am so happy that I tried it though. I think both of them are perfect for this card.
The thin layers of Pretty Peacock seem to really highlight the DSP. And when you add the sentiment piece, it further adds to the pop. We have a painting from my late Mother In Law that is a river scene. And on the edge of the painting, next to the matting, is a miniature version of the painting. I have always loved and been amazed at that. The little touch really “makes” the painting. If I squint my eyes, I see this little sentiment layer as a similar thing. And I understand if you roll your eyes at me! LOL!!!!
Measurements
The card base of Pretty Peacock is 5 1/2 X 8 1/2 with the eyelet DSP cut to 5 3/8 X 4 1/8. Then the Pretty Peacock layer is 4 3/4 X 3 1/2. And the focal DSP tree layer is 4 5/8 X 3 3/8. I hope you will try using some unexpected DSP and stamp set combinations.
Free Shipping coming soon…..
May Join Promotion
New demonstrators who join during the month of May will receive the following products in their Starter Kit at no additional cost:
2024–2026 In Color Classic Stampin’ Pad Bundle
2024–2026 In Color 8-1/2″ x 11″ (21.6 x 27.9 cm) Cardstock
2024–2026 In Color 6″ x 6″ (15.2 x 15.2 cm) Designer Series Paper
2024–2026 In Color Stampin’ Write Markers
HOST CODE
My MAY Host Code is 96AT2UNW. Please use this code for orders under $150.00. I will have a small gift for those with orders over $50.00 in addition to the Perk Rewards Program. You can read all of the information at the top of the page in the Menu Bar under SHOP / Perks.
Thank you for stopping by today. I hope you enjoyed today’s project and will come back. I do read and reply to all of the comments individually. They mean a lot to me. Please reach out if you have a question.
Woohoo!!! I don’t know about you but I LOVE Free Shipping days. And this one is coming up soon. I am already working on my list.
May Join Promotion
New demonstrators who join during the month of May will receive the following products in their Starter Kit at no additional cost:
2024–2026 In Color Classic Stampin’ Pad Bundle
2024–2026 In Color 8-1/2″ x 11″ (21.6 x 27.9 cm) Cardstock
2024–2026 In Color 6″ x 6″ (15.2 x 15.2 cm) Designer Series Paper
2024–2026 In Color Stampin’ Write Markers
HOST CODE
My MAY Host Code is 96AT2UNW. Please use this code for orders under $150.00. I will have a small gift for those with orders over $50.00 in addition to the Perk Rewards Program. You can read all of the information at the top of the page in the Menu Bar under SHOP / Perks.
Thank you for stopping by today. I hope you enjoyed today’s project and will come back. I do read and reply to all of the comments individually. They mean a lot to me. Please reach out if you have a question.
The Layers of Beauty Bundle is one of the wonderful new stamp bundles in the Annual Catalog. This is not one I am normally drawn to either. After seeing the use of the matching masks / stencils, I had to try it. And now I am in love!!
Stamp Bundle
The Layers of Beauty is definitely a beauty! I have seen the stamping and mask use with both dark and lighter outline stamping. I chose to go with the traditional Memento Tuxedo Black for the outline. It made lining up the different masks really simple for me as a new user. The first three masks, and they are numbered for ease of use, is all about the flowers. I used Peach Pie and Pumpkin Pie for the flowers. Then the last two masks are the leaves. For this I used Old Olive on both. The flowers and the leaves sort of build the colors. You just have to play with it to see which colors and methods you prefer.
To complete the Bundle is the matching set of Dies. There are Dies for some extra leaves as well as a couple of flowers and a tag. All I used on this card was the large die. And again it was very easy to line up. This is a set that I will be trying in a variety of colors. Also as a finish to the die cut flowers, I used the Light Pool Party Stampin’ Blend and filled in the white spaces in the center of the flowers. My thought is that it looks like you are seeing daylight through the arrangement. Hopefully you see that as well. LOL!!!
Papers
To match the roses, I went with Peach Pie for the card base. This is such a gorgeous color! With the pop of Basic White layer I then added the luscious Thoughtful Designs Designer Series Paper in the green shades. This full sheet is sort of a variegated green and some Wild Wheat thrown in. But I love the leaf design and thought it was perfect for the flower arrangement background.
Finishes
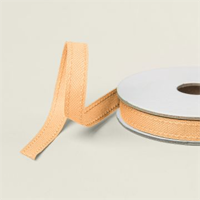
The finishes for this card were difficult in that I could not decide if it really needed anything else. That is a different type problem to have. I finally decided I wanted to add some ribbon. Of course the matching Peach Pie 3/8″ ribbon was the obvious answer. I think it keeps the card from being too formal. But the final touch is a scattering of Pearls.
Thank you for stopping by today!!!
May Join Promotion with New In Colors…..
New demonstrators who join during the month of May will receive the following products in their Starter Kit at no additional cost:
2024–2026 In Color Classic Stampin’ Pad Bundle
2024–2026 In Color 8-1/2″ x 11″ (21.6 x 27.9 cm) Cardstock
2024–2026 In Color 6″ x 6″ (15.2 x 15.2 cm) Designer Series Paper
2024–2026 In Color Stampin’ Write Markers
HOST CODE
My MAY Host Code is 96AT2UNW. Please use this code for orders under $150.00. I will have a small gift for those with orders over $50.00 in addition to the Perk Rewards Program. You can read all of the information at the top of the page in the Menu Bar under SHOP / Perks.
Thank you for stopping by today. I hope you enjoyed today’s project and will come back. I do read and reply to all of the comments individually. They mean a lot to me. Please reach out if you have a question.
The card I have today is a really simple one. These are some of my favorite cards to make. And as soon as I saw this new stamp set, I knew it had to come to me.
Stamp Set
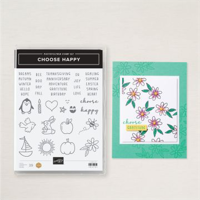
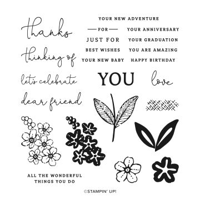
Today’s card is a one stamp set card. You know I love sets that allow this and I am sure you love them as well. This one is the Choose Happy stamp set. It is on page 24 of the Annual Catalog. There are single words where you can build a sentiment as well as year round images to go along with the sweet words. I chose to make a Spring / Summer type card using both images and words.
The three images are stamped with Memento Tuxedo Black Ink and then colored with Stampin’ Blends. Each is on a square of Basic White that is 1 1/2 square. The sentiment is from the set as well and is two separate words so you can create multiple sentiments.
Papers
The gorgeous background paper is from the new Unbounded Beauty Designer Series Paper. I love the mix of colors and patterns of this paper. These colors worked great for the idea of this card. The paper pack has all of the new In Colors included in it’s patterns. But it also matches other colors as well. I went with Coastal Cabana as the card base and squares. I could have used the Summer Splash for a tad lighter look. The squares of Coastal Cabana are 1 3/4 square. Except the heart ended up being 1 1/4 square and 1 1/2 square on it’s layers.
Finishes
To complete this easy card it still needed bling. The 2024-2026 In Color Shimmer Gems fit the bill perfectly. I pulled three different colors from the gems that matched three of the colors used in the images. These are a great embellishments for the shimmer but especially because they are flat and not raised very much. There is no problem with them poking through the envelope when mailing!
Thank you for stopping by today!!!
May Join Promotion
New demonstrators who join during the month of May will receive the following products in their Starter Kit at no additional cost:
2024–2026 In Color Classic Stampin’ Pad Bundle
2024–2026 In Color 8-1/2″ x 11″ (21.6 x 27.9 cm) Cardstock
2024–2026 In Color 6″ x 6″ (15.2 x 15.2 cm) Designer Series Paper
2024–2026 In Color Stampin’ Write Markers
HOST CODE
My MAY Host Code is 96AT2UNW. Please use this code for orders under $150.00. I will have a small gift for those with orders over $50.00 in addition to the Perk Rewards Program. You can read all of the information at the top of the page in the Menu Bar under SHOP / Perks.
Thank you for stopping by today. I hope you enjoyed today’s project and will come back. I do read and reply to all of the comments individually. They mean a lot to me. Please reach out if you have a question.
I have been out of commission for a couple of weeks now. It seems that my run of good health has taken a turn off the tracks. But I am back with only coughs to get rid of. I have missed my craft space and have missed posting for you all. Hopefully I have had my share of this bad stuff for a while!
Today’s card is one I had made for a class last month actually. It is a Bookmark card that I cased from Karen Titus. It is such a fun and simple card with the added bonus of an easy bookmark. Sadly it doesn’t work on my Kindle, LOL!!!!, but it does on my regular books.
Bookmark
The bookmark here is a case from Karen Titus but I have done an easy PDF for the card and the bookmark. All it takes is a square of 5X5 DSP. Here is the PDF if you are interested. CLICK FOR PDF.
Stamps
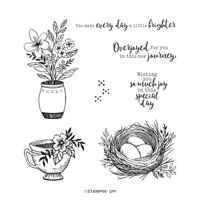
The two stamp sets used here both have carried over to the new Annual Catalog. That is a good thing as both are wonderful sets for a variety of uses. The cup seemed perfect for a bookmark as it represents a relaxing moment to me. Wether you are a coffee or tea person, it works. I stamped it using Memento Tuxedo Black Ink and then colored with Stampin’ Blends.
The sentiment on the front and inside are both from the Sentimental Park stamp set. And it carried over as well. This has sentiments for a various occasions and little stamps to go along. The inside little circles is from the set as well. It adds just a little bit of detail. Here is a view of the inside.
This open view also shows the back side of the bookmark as it is slipped over the corner.
Papers
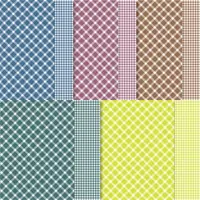
The two different DSP used on this card are both retired now. I thought I had shared this card and realized that I had not. But obviously you could use any DSP that works together. Or you may have both of these in your stash. These are the Glorious Gingham 6X6 Designer Series paper from the last Annual Catalog and the Flight & Airy that was a Sale-A-Bration paper. They are paired with Blueberry Bushel for the rich blue.
Thank you for stopping by today!! I hope you will check back tomorrow.
May Join Promotion
New demonstrators who join during the month of May will receive the following products in their Starter Kit at no additional cost:
2024–2026 In Color Classic Stampin’ Pad Bundle
2024–2026 In Color 8-1/2″ x 11″ (21.6 x 27.9 cm) Cardstock
2024–2026 In Color 6″ x 6″ (15.2 x 15.2 cm) Designer Series Paper
2024–2026 In Color Stampin’ Write Markers
HOST CODE
My MAY Host Code is 96AT2UNW. Please use this code for orders under $150.00. I will have a small gift for those with orders over $50.00 in addition to the Perk Rewards Program. You can read all of the information at the top of the page in the Menu Bar under SHOP / Perks.
Thank you for stopping by today. I hope you enjoyed today’s project and will come back. I do read and reply to all of the comments individually. They mean a lot to me. Please reach out if you have a question.
I hope you are enjoying the new Annual Catalog. The layout is different but in a specific way. It is planned out for the different types of crafters. I especially like that all of the Suites and Bundles are together. And did you see the new Join Offer. All of the new In Colors are a Free addition to the Starter Kit. See the bottom of the post for this information!
Today is the second day of the new catalog and I am using Online Exclusives products. I am not really sure how that happened. But I have a year to share all of the fun and new items with you.
Papers
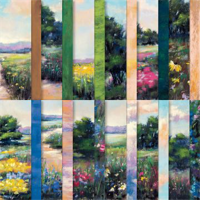
This card is really all about the paper! This piece of Meandering Meadow Designer Series Paper is gorgeous. All of the prints in this pack are fabulous and have awesome landscape scenes. This card was a way to really showcase the paper. And it being a 6X6 pack really works well.
I paired the DSP with Granny Apple Green card stock for the card base. And Lemon Lolly for the layer. Both pull those colors from the DSP so well. I love bright colors, but I believe a dark green would work just as well. I am in a Spring and Bright mood lately.
Stamps
The stamp set is only used on the tag and the inside. It is the Garden Meadow stamp set which matches the DSP. There is a Die set as well but I did not utilize it on this card. When I first stamped the sentiment, I realized that it needed something to help it pop. The DSP is so busy that the sentiment alone just blended in. So I went with the addition of the small floral which matches the DSP somewhat. It is stamped and then colored with Stampin’ Blends.
Dies and Finishes
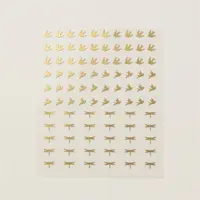
To add more depth to the sentiment, I layered two sizes of the Deckled Rectangles Dies. Actually I had to trim them a bit. I hope you know what I am referring to when I say trim them. It means to cut the shape and then put it back in the die to shorten it. There are two different sizes of the Dies used. And to finish off the sentiment layer I used one of the Adhesive Backed Birds and Dragonflies embellishments. Actually there are a few other dragonflies floating around the flowers. And the final touch was a small bow using the Bakers Twine 3 Color Combo.
Inside View
This card is a new favorite of a Gift Card Holder. I love the simplicity. But also that you can add the gift card without removing the outside packaging. Sometimes that is where the dollar amount is located. Granted it does add more thickness for mailing. So keep that in mind. The card works with our without the packaging. Take a look.
Directions
The card base is 5 1/2 X 8 1/2 scored at 4 1/4 on the 8 1/2 side. Next turn the card counter clockwise and over to 4 1/4 on the Paper Trimmer. (Your score line is now horizontal in the middle of the trimmer.) Cut from the edge down to the score line. After folding and burnishing you have the small flap at the bottom. Add Tear & Tape to the bottom edge of the little flap and the outer edge. Place it right up to the edge. Add a gift card in place when you adhere this and that gives you a little more room so it is not as tight of a fit.
Thank you for stopping in today!!
May Join Offer
New demonstrators who join during the month of May will receive the following products in their Starter Kit at no additional cost:
2024–2026 In Color Classic Stampin’ Pad Bundle
2024–2026 In Color 8-1/2″ x 11″ (21.6 x 27.9 cm) Cardstock
2024–2026 In Color 6″ x 6″ (15.2 x 15.2 cm) Designer Series Paper
2024–2026 In Color Stampin’ Write Markers
HOST CODE
My MAY Host Code is 96AT2UNW. Please use this code for orders under $150.00. I will have a small gift for those with orders over $50.00 in addition to the Perk Rewards Program. You can read all of the information at the top of the page in the Menu Bar under SHOP / Perks.
Thank you for stopping by today. I hope you enjoyed today’s project and will come back. I do read and reply to all of the comments individually. They mean a lot to me. Please reach out if you have a question.
Today is the last day of the current Annual Catalog. I will up early tomorrow placing my order for the Paper and Ribbon Share of the New Annual Catalog. There are some awesome sets in the upcoming catalog and I cannot wait for you to see them.
The card I have to share today is a fun Pull Out Birthday card. This is a little different, but easy to make and a fun change.
Stamp Bundle
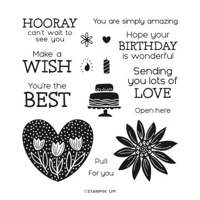
The Bee My Valentine Bundle stops after today for the Bundle pricing. It is carrying over to the new catalog, but will not be a bundle. It is on page 75 of the new Annual Catalog. The fact that it is a punch bundle is one thing I love about it. And that it is a year round stamp set! Here is the inside view, (or pulled out view) !
The bee is stamped and then punched out and all the pieces layered together. To place him I slid the card in the slot and then decided where I wanted to add him. With Stampin’ Dimensionals in a line down his body, I was able to fit him close to the “V” of the DSP. The two sentiments are both from the Hooray For Surprises stamp set. This is a Bundle that is carrying over as well, just not as a bundle. It will be on page 77 of the new Annual Catalog.
Papers
The different card stocks used are all pulled from the DSP. It is the Bee Mine Designer Series paper. Unfortunately the paper is sold out now. However I think the bee will work with any of the floral papers. I know there are always bees around my flowers!! The card base is Daffodil Delight with a layer of Pool Party.
Measurements
The card base is 4 1/4 X 5 1/2 with the layer of Pool Party cut to 4 X 5 1/4. Next is the Basic White at 3 3/4 X 5. To make the DSP layers I took a piece of 3 3/4 X 3 and cut it on the diagonal. My paper is showing both sides of the DSP and one side is not directional. This made things easy. I cut the paper on the diagonal with the bees as pictured. That allows me to simply flip the other half to add that layer. These two DSP pieces fit flush across the bottom of the card and up the sides. Be sure and slide in the tag before gluing so it is not such a tight fit.
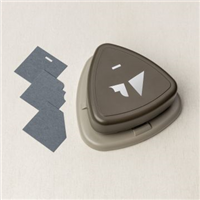
The card is 2 3/4 X 4 with the white at 2 1/2 X 3 3/4. I used the retiring Very Best Trio Punch to make the ribbon slot. You can also add another White to the back of the tag if you wanted to write a message to the recipient other than signing the card.
Finishes
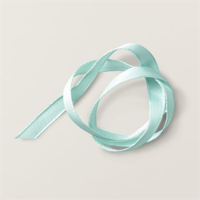
There are no Bling on this card! That is shocking I know. With the raised bee and then the tag, I thought it really did not need any. Although I did add the flowers next tot he sentiment on the inside. The ribbon for the tag pull is Pool Party Ribbon. Sadly it is also no longer available. I apologize!! But any color from the DSP would work perfectly.
Thank you for stopping by today!! If you do not have a current Demonstrator, I would love to help you with the new Annual Catalog and any questions you may have.
Both of the Last Chance Lists are listed below. Click on either the Mini or Annual Catalog list and you will get a PDF of the full list.
HOST CODE
My APRIL Host Code is A7AUT6UB. Please use this code for orders under $150.00. I will have a small gift for those with orders over $50.00 in addition to the Perk Rewards Program. You can read all of the information at the top of the page in the Menu Bar under SHOP / Perks.
Thank you for stopping by today. I hope you enjoyed today’s project and will come back. I do read and reply to all of the comments individually. They mean a lot to me. Please reach out if you have a question.
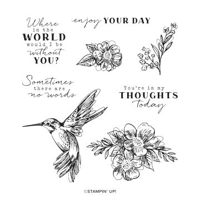
I am sharing a mix of current and upcoming products again. The Thoughtful Expressions stamp set is carrying over without the layering Dies that were a bundle. But the stamp set is gorgeous and has the beautiful hummingbird. This is paired with some new Designer Series Paper.
Stamps
The Thoughtful Expressions stamp set has great floral stamps, sentiments, and this beautiful hummingbird. I love hummingbirds and have several feeders hoping to see them often. My hummingbird here may not look totally real as I was trying to somewhat match him to the papers. I think it is ok except for the red neck. But I could not leave that part off.
The images are all stamped with Memento Black Ink and then colored with Stampin’ Blends. The floral image is stamped twice to get the width I needed. I did use several of the new In Colors. The leaves, and the hummingbird, have Shy Shamrock and Summer Splash. For the flowers I went with Pretty In Pink with a center of Petunia Pop. To complete the hummingbird I used Soft Sea Foam for the lightest green and tried to blend that in. Plus the red neck which is Poppy Parade. There is not a die for the hummingbird. But he is easy to fussy cut, and well worth the effort.
Papers
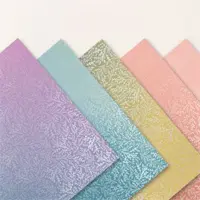
The colors are to go along with the Hummingbird and the flowers. I chose Shy Shamrock for the card base and the piece of floral DSP is Shy Shamrock. It is from the 2024-2026 In Color Designer Series Paper. There are sheets of each of the new In Colors. The striped paper is from the same pack and is the reverse pattern to the floral. This one is Petunia Pop.
This is the gorgeous In Color Designer Series Paper. You can see there are two different designs of each of the five colors.
Finishes
To complete the card, I wrapped a length of Summer Splash ribbon around the floral images and Petunia Pop layers. I then used a small section to tie a simple knot over to the right side. The hummingbird is raised using Stampin’ Dimensionals and is drinking from the left flower. And the finishing touch is a scattering of Rhinestone Basic Gems.
Thank you for stopping by today!!!
Both of the Last Chance Lists are listed below. Click on either the Mini or Annual Catalog list and you will get a PDF of the full list.
HOST CODE
My APRIL Host Code is A7AUT6UB. Please use this code for orders under $150.00. I will have a small gift for those with orders over $50.00 in addition to the Perk Rewards Program. You can read all of the information at the top of the page in the Menu Bar under SHOP / Perks.
Thank you for stopping by today. I hope you enjoyed today’s project and will come back. I do read and reply to all of the comments individually. They mean a lot to me. Please reach out if you have a question.
Smile and Keep On Stamping,
Jackie
SUPPLIES:
Not all of the products are available until the new catalog on Wednesday. These are the ones that are available now.
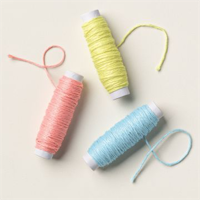
Tomorrow is the last day to sign up for my Product Share. I have Papers , Ribbon, or Both. The sheet below shows what I am offering. I have cut out the Color Family DSPs that I had originally added. This lessens the amount. With the lower price point, you can get both ribbon and paper for the original paper price! That is a Win I believe!!.
There are two ways to sign up. Send an email to jackie@jackiebeers.com , or on the menu bar choose SHOP. In the Shop drop down you will see Product Shares. Click that and complete the form. I will need the payment by tomorrow night. So get your order in as soon as possible.
Both of the Last Chance Lists are listed below. Click on either the Mini or Annual Catalog list and you will get a PDF of the full list.
HOST CODE
My APRIL Host Code is A7AUT6UB. Please use this code for orders under $150.00. I will have a small gift for those with orders over $50.00 in addition to the Perk Rewards Program. You can read all of the information at the top of the page in the Menu Bar under SHOP / Perks.
Thank you for stopping by today. I hope you enjoyed today’s project and will come back. I do read and reply to all of the comments individually. They mean a lot to me. Please reach out if you have a question.
The content in this blog is the sole responsibility of Jackie Beers as an Independent Stampin' Up! Demonstrator. The use of and content of classes, services or products offered is not endorsed by Stampin' Up!