I generally do not use the Kits from Stampin’ Up!. They are wonderful kits and I know people who love them for quick and beautiful cards. I saw one that spoke to me. You all know how much I love coloring! Well the Nature’s Painting Kit is so much better than I even expected. I have now joined my own Kit Fan Club .
KIT
This Nature’s Painting Kit contains fabulous floral designs. The “stamped” image that I colored comes pre-stamped in a pad. There are 24 stamped watercolor pages. These are different images and multiples of each. You also receive a package of Watercolor Pencils and a Water Painter. The photos on the booklet are gorgeous and show methods of how to start with lighter colors and then darker. But the magic is when you add the water painter to the pencil coloring! It is almost as good as embossing for the Wow! So now I am a kit person. Or at least for this style of kits.
The color choices I made for coloring was intended to copy the included flyer. It does somewhat but is not quite as vibrant. I will say that the size of the paper is roughly 6 X 4 1/2. I cut it down to 3 7/8 X 5 1/8 to add my layer and it be a regular size A2 card.
STAMPS
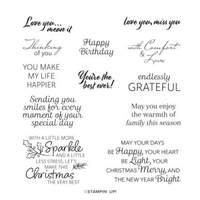
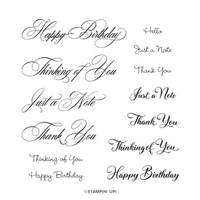
There are no stamps included in this kit. So I went to one of my favorite sentiment sets for this sentiment. I love how the pre-stamped page leaves this opening that is perfect for a sentiment. One of my go to sets is the Wonderful Thoughts stamp set. It doesn’t contain the general Happy Birthday but has sweet sentiments.
PAPERS
The choosing of the layers was done by holding up my finished product to the different cardstock. I landed on Granny Apple Green for the layer to highlight the leaves. And Lemon Lolly to help the lighter flowers to pop. Calypso Coral or Flirty Flamingo would have made the darker flowers stand out if you wanted.
EXTRAS
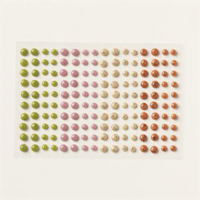
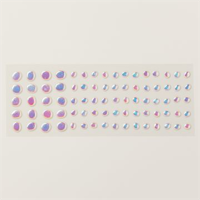
This card really did not require extras. I thought about adding some ribbon, but it seemed to detract rather than add. So after stamping the sentiment I looked for appropriate bling. The Antique Pearls were the winner. They are simply surrounding the sentiment and seem perfect for the flowers.
HOST CODE
My January Host Code is KSG3THS3. Orders of $50.00 or more will receive an appreciation gift from me. I appreciate you choosing me as your demonstrator!
Thank you for stopping by today. I hope you enjoyed today’s project and will come back. I do read and reply to all of the comments individually. They mean a lot to me. Please reach out if you have a question.
Smile and Keep On Stamping,
Jackie
New Scrapbooking Catalog
The newest addition to Stampin’ Up! is an Online catalog of Scrapbooking products. You can see the catalog by clicking the photo below and save it to your computer.
Online Exclusives
New Online Exclusives have dropped. There are Halloween, Fall, Christmas, and many that are great year round. Of course the new Designer Series Papers and Embellishments are fabulous as well!
You can go directly to these in my Online Store by clicking HERE
I have intended to try the floating object card for quite a while. And today I have given it a shot. I will not say mastered it, but I am happy with the outcome. The Thoughtful Journey DSP is easy to make a great card with.
Papers
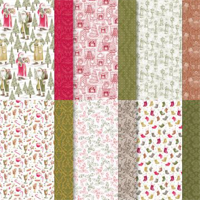
The floating picture and the DSP are the stars of this card. This beautiful paper is from the Thoughtful Journey Designer Series Paper. These papers all look like a watercolor painting that have been turned into DSP. And honestly some of Stampin’ Up!s papers are just that. But I am not sure about this pack, so I will not say that is the case. However it was created, the paper is gorgeous. Additionally, this paper is part of the DSP Sale that is almost over!!
To get the card basics, I pulled the colors from the DSP. The card base is Old Olive and is paired with Blackberry Bliss. Sadly the Blackberry Bliss is so dark that you cannot see I used the Fern 3D Embossing Folder on that layer. It really stands out in person.
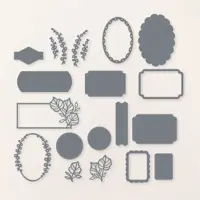
Dies
The circle for the floating picture is made using the Everyday Details Dies. I used the largest one and it was the perfect size. This die has circles around the edge and I would have preferred a solid circle. Any circles you have in your stash would work however.
The sentiment Die is a fabulous new one. It is from the Unbounded Love Dies. I die cut the piece twice. Once with Old Olive and once with Basic White. There is no extra cutting involved. The center that I stamped on is cut out when you use the Die. And they piece back together perfectly!
Sentiments
The sentiment is from the Wonderful Thoughts stamp set. I love the beautiful font. It is not shown, but I used another thinking of you type sentiment on the inside with a strip of the same DSP along the bottom. I really need to remember to photograph the inside!!
Extras
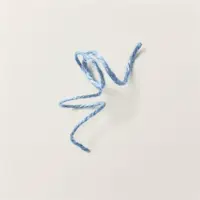
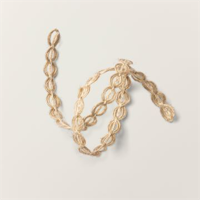
The little bow on the sentiment is from a single strand of the 2023-2025 In Color Twine. I had another card where I pulled the strands apart since it so thick. There are about four strands together. I am really loving the thin and simple bow. The bling is from the Purple Shimmer Gems. A single of the darkest color was added to the sentiment also.
Directions for the Floating Picture
The largest circle from the Everyday Details was used to cut Basic Black card stock. Next I took a piece of the DSP that I cut 3 1/2 X 3 1/2 and then cut it into 1/2″ strips. I began placing the strips at the bottom and used the edges of the Stampin’ Dimensionals. You can use the Foam Strips, but I have a lot of Dimensional sheets with only the edges remainig. I tried to think of a method to equally space the strips, but ultimately ended up just eyeballing it. Once they were all attached, I turned it over and cut around the black circle.
Thank you for stopping by today!!
Designer Series Paper Sale begins on August 6 – 31st.
Papers included in the sale are:
Bright & Beautiful
Countryside Inn
Country Lace
Country Woods
Full of Life
Lily Pond Lane
Mediterranean Blooms
Perennial Lavender
Take To The Sky
Thoughtful Journey
To Market
Unbounded Beauty
Wildly Flowering
Winter Meadow
Online Exclusives
New Online Exclusives have dropped. There are Halloween, Fall, Christmas, and many that are great year round. Of course the new Designer Series Papers and Embellishments are fabulous as well!
You can go directly to these in my Online Store by clicking HERE
HOST CODE
My AUGUST Host Code is NB9XKFUZ. Please use this code for orders under $150.00. I will have a small gift for those with orders over $50.00 in addition to the Perk Rewards Program. You can read all of the information at the top of the page in the Menu Bar under SHOP / Perks.
Thank you for stopping by today. I hope you enjoyed today’s project and will come back. I do read and reply to all of the comments individually. They mean a lot to me. Please reach out if you have a question.
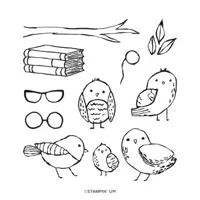
The card I am sharing today is a mixture from the different catalogs. The Birds Eye View stamp set is the star. I needed a card for my eye doctor and the “spectacles” just seemed the perfect stamp.
Stamps
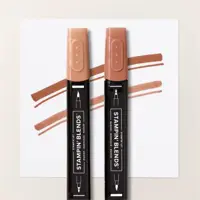
The Bird’s Eye View with the glasses was the immediate thought I had for this card. I always love the animal stamps and the glasses simply put this one over the top for me. The owl, at least I hope that is what this bird is supposed to be, is stamped with Early Espresso Ink and then colored with different Stampin’ Blends.
The sentiment is from the Very Best Occasions. This is a wonderful set with a variety of sentiments we tend to need. I love the mix of fonts as well. And it is a perfect size.
Dies and Punches
The fun owl was die cut using two from the Thoughtful Expressions Die set. I love this design and the fact there are several different sizes for layer makes it a definite for me. Plus this is a more unique shape for a circle. And that is always nice. I hope you will give a second look at these dies. And the matching stamp set is great, I just did not use it today.
The sentiment is punched using my favorite punch. That is the Double Oval Punch. This is the smaller of the two ovals. I had intended to use both sizes, but the single seemed to be enough. Especially with this being a masculine card, I did not want to overwhelm with the shapes.
Papers and Finishes
The beautiful DSP is from the Poetic Expressions Designer Series Paper. This paper has great colors and designs, like this one, that are great for any occasion. I love the mix of Boho Blue and Mossy Meadow in this piece. So I paired it with the Boho Blue card base and layer. The darker Mossy Meadow for the layer grounds the softer colors. And with a thin border, it helps the DSP to pop.
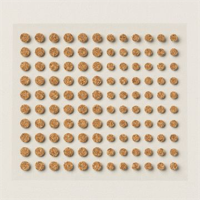
For the finish I added a strip of the Mossy Meadow to have a landing for the sentiment and the owl layers. Sometimes card stock works just as well as a ribbon. And to finish the card I added a trio of the Adhesive Backed Cork Rounds. These are so unique and the perfect touch for a variety of cards.
Thank you for visiting today!!!
Online exclusives are here to stay! Click on the photo and be taken directly to them in my online store. If you place an order, please use my Host Code listed just below.
HOST CODE
My JANUARY Host Code is BQEMX92K. Please use this code for orders under $150.00. I will have a small gift for those with orders over $50.00 in addition to the Perk Rewards Program. You can read all of the information at the top of the page in the Menu Bar under SHOP / Perks.
Thank you for stopping by today. I hope you enjoyed today’s project and will come back. I do read and reply to all of the comments individually. They mean a lot to me. Please reach out if you have a question.
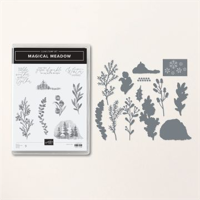
The card I have to share today is using the Magical Meadow Bundle. The scenes in this set remind me more of mountains than meadows. And I love them!
Stamps and Dies
This beautiful tree image is from the Magical Meadows stamp set. The fun shape is actually the shape of the image and it’s matching Die. I really like the rugged look it gives. The sentiment is from the, in my opinion, must have stamp set titled Go To Greetings. This set has a few regularly used sentiment in a couple of sizes. I really love it and use it quite often. The sentiment was stamped and then the edges were angle cut with Paper Snips.
Papers
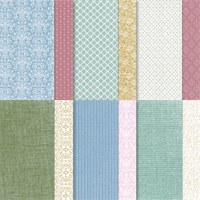
This beautiful greenery paper is from the Joy of Christmas Designer Series Paper. It is definitely not just Christmas paper! These leaves have such beautiful shades of green that I was able to use Shaded Spruce card stock and Old Olive ink for a perfect pairing.
Details
This is a fairly simple card but has several different texture details. The strip behind the focal area is embossed using the Distressed Tile Embossing Folder. That is definitely a favorite folder. I also added a strip of the Wavy Trim to carry more of the Mountain theme. And the thin ribbon behind the trim is actually Soft Sea Foam Seam Binding. I was looking for a soft green and this was perfect. Sadly it is a retired ribbon, but it worked for me. I am sure you have ribbon in your stash that would work as well. The final touch is a scattering of the green Adhesive Backed Speckled Dots.
Last Chance Products
This Magical Meadow Bundle is on the retiring list. Click on the photo and you will be taken to the complete PDF.
Online exclusives are here to stay! Click on the photo and be taken directly to them in my online store. If you place an order, please use my Host Code listed just below.
HOST CODE
My NOVEMBER Host Code is 626NJVKN. Please use this code for orders under $150.00. I will have a small gift for those with orders over $50.00 in addition to the Perk Rewards Program. You can read all of the information at the top of the page in the Menu Bar under SHOP / Perks.
Thank you for stopping by today. I hope you enjoyed today’s project and will come back. I do read and reply to all of the comments individually. They mean a lot to me. Please reach out if you have a question.
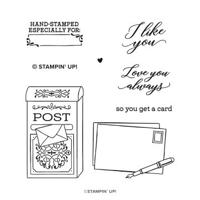
Today’s card mixes Christmas DSP with the Stamped With Love set from the Annual Catalog. They may not have been designed together, but I believe they are a perfect fit.
Papers
The beginning to most of my cards is the DSP. This one was no exception. The retro looking mailboxes are a reverse side of one of the sheets from the Traditions of St. Nick Designer Series Paper. It is an Online Exclusive that is really nice paper with lots of Old World looking ST. Nick’s on it. As soon as I saw the paper, I knew it needed to be paired with the Stamped With Love set from the Annual Catalog.
The DSP piece is a muted Mossy Meadow color. I used Mossy Meadow for the narrow border layer. But went with Wild Wheat for a richer look. Actually, the idea for the Wild Wheat came in coloring the fountain pen. I wanted to make the writing tip either gold or silver. The Wild Wheat fit the bill for gold.
Stamps
There are two stamp sets used for this card. The first is the Stamped With Love. But it does not have a sentiment on the envelope. So I went with the beautifully written Thinking of You from the Very Best Occasions stamp set.
The fountain pen and the heart inside the stamp are both colored using Stampin’ Blends. Real Red for the heart and Mossy Meadow and Wild Wheat for the fountain pen.
Dies
To create the focal layers, I used the Deckled Rectangles Dies. These come in several sizes and are a great to have in your tool chest. To fit the size I needed, I ended up using the same size for the focal layer and the background layer. With them being offset it is a perfect fit. To finish the card, I added a single green pearl from the Blooming Pearls embellishments.
Layers
The layers of the card are 4 1/4 X 11 scored at 5 1/2. The Mossy Meadow is 4 7/8 X 3 5/8. And the DSP is cut to 4 3/4 X 3 1/2.
Thank you for stopping by today!!
Online exclusives are here to stay! Click on the photo and be taken directly to them in my online store. If you place an order, please use my Host Code listed just below.
HOST CODE
My NOVEMBER Host Code is 626NJVKN. Please use this code for orders under $150.00. I will have a small gift for those with orders over $50.00 in addition to the Perk Rewards Program. You can read all of the information at the top of the page in the Menu Bar under SHOP / Perks.
Thank you for stopping by today. I hope you enjoyed today’s project and will come back. I do read and reply to all of the comments individually. They mean a lot to me. Please reach out if you have a question.
The card I have to share today is a mixture of Country and Chic. It is a peek through type card which is a bit different for me.
This card was made for the Make My Monday Challenge. As a Design Team member, we have the theme ahead of time. This one really through me. It is titled an Aperture Card. I had nothing at first. However now you will have several ideas if you would like to play along. Simply click on the icon below and you will go to the Challenge Blog. There you can see other versions of this challenge and play along yourself.
Dies
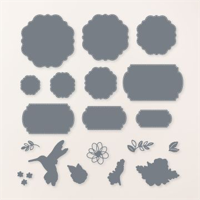
As I said above, I had no idea where to start on this theme. But having seen several layered cards using the Countryside Corners Dies I had a thought. I used the dies to make an opening that you could see inside the card. Thank you Stampin’ Up! for these fun dies!!! Here is a view of the inside.
Stamps
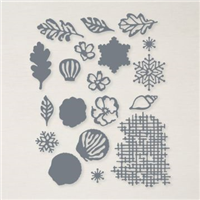
The idea for the inside came from a friend’s post on Facebook. She is a talented artist in many different medias. Her last post was some resin with sea shells. As soon as I saw her post I knew what could go inside my opening. The Season of Chic is a set, with Dies, that I love but rarely use! I think we all have those.
I stamped multiples of the sea shell using Petal Pink as the base, both stamped fully and stamped off, and Crumb Cake as the outline. The small swirl shell on the front was where I had tested some of the splatter in different strengths and used that scrap to die cut it. After stamping the splatter, or in my case it is sand, I decided it needed color. Using the Pool Party that matches the card stock, I used a blender brush to brush that area. Then created a fun layer for the bottom front with what looks like bird prints in the sand.
Finishes
The card took several different turns in the process of being made. The bottom Pool Party piece was added after I decided that after adding the “water” on the inside there needed to be room to write a note. I do think it helps to highlight my unusual spot for the front sentiment though. And to finish I added several of the Flat Adhesive Pearls to the various shells.
Thank you for stopping by today!!! Don’t forget we are halfway through Bonus Days.
Bonus Days for the remainder of July!
For every increment of $50.00 in product per order you will receive a Coupon for $5.00. There is no limit to the number of coupon codes you can receive. Then you can redeem all of your codes during the month of August! Additionally, my Blue Star Rewards are for every $50.00 in product per order. So you would also be earning my rewards as well.
Online exclusives are here to stay! Click on the photo and be taken directly to them in my online store. If you place an order, please use my Host Code listed just below.
HOST CODE
My July Host Code is MXQY2UE9. Please use this code for orders under $150.00. I will have a small gift for those with orders over $50.00 in addition to the Perk Rewards Program. You can read all of the information at the top of the page in the Menu Bar under SHOP / Perks.
Thank you for stopping by today. I hope you enjoyed today’s project and will come back. I do read and reply to all of the comments individually. They mean a lot to me. Please reach out if you have a question.
The content in this blog is the sole responsibility of Jackie Beers as an Independent Stampin' Up! Demonstrator. The use of and content of classes, services or products offered is not endorsed by Stampin' Up!