The Christmas sets in the Mini Catalog are all fun and beautiful. But I do have a favorite. The Humble Home Bundle is such a simple and sweet set that it gets my Top Pick rating.
Stamp Bundle
The Humble Home is just a cute stamp set with a matching punch. Punches are my preference for quick cards and this one is great. I kept this card fairly simple on the stamping so it would be a quick one. There are a couple of sentiments in the set. And this one is my favorite.
The sentiment is stamped using Garden Green Ink as I wanted a bright green to match the DSP. And the house is stamped with Real Red Ink. The gingerbread trim is colored with Granny Apple Green Stampin’ Blend just for an added touch. Plus if you look closely you will notice a little silver door knob. In place of bling, I added this silver pearl for the door knob. This is an addition that would be easy to make any color to match your colors simply by coloring a pearl with Stampin’ Blends.
The house is stamped onto the Basic White. I debated on punching out the house and raising it, but opted for this flat one. However I did utilize the punch to get the adorable heart in the upper corner. Having a separate heart is always handy for a multitude of card projects. Now just to remember it!!
Dies
The Bundle may include a punch, but I still used a Die. Just to give a little added texture, I cut the Basic White rectangle out using the Deckled Rectangle Die set. This size is the 4th largest of the Dies. There are a lot of them to choose from!
Papers
The card base is a basic Real Red base. However I added a lot of bright and fancy with the DSP layer. These Christmas light strings are from the Reindeer Days Designer Series Paper. This paper screams Christmas in a wonderful way. Just looking at these lights makes me smile. And that is what card making should be all about. That and having fun !
Thank you for stopping by today!!
New Scrapbooking Catalog
The newest addition to Stampin’ Up! is an Online catalog of Scrapbooking products. You can see the catalog by clicking the photo below and save it to your computer.
Online Exclusives
New Online Exclusives have dropped. There are Halloween, Fall, Christmas, and many that are great year round. Of course the new Designer Series Papers and Embellishments are fabulous as well!
You can go directly to these in my Online Store by clicking HERE
HOST CODE
My SEPTEMBER Host Code is S9CRPBZ4. Please use this code for orders under $150.00. I will have a small gift for those with orders over $50.00 in addition to the Perk Rewards Program. You can read all of the information at the top of the page in the Menu Bar under SHOP / Perks.
Thank you for stopping by today. I hope you enjoyed today’s project and will come back. I do read and reply to all of the comments individually. They mean a lot to me. Please reach out if you have a question.
I have mixed a couple of Christmas sets and a very simple technique for a cute Christmas card. Trees are always a good option for Christmas cards and so simple to create.
Stamps and Dies
The main stamp set used is a Bundle available from the Online Exclusives. It is the Frosted Forest Bundle. And the trees from my card are from this Bundled set. The trees are stamped using Mossy Meadow Ink and then Die cut using matching Dies. The smaller tree was stamped twice with the second one “stamped Off” first. And the adorable little bird flying above is also from the set with a matching Die. There are actually two of the bird dies to make things a bit quicker for you.
The sentiment layer is a separate Stamp and Die Bundle. It is from the Peaceful Season Bundle. This one is a sentiment stamp set with great shapes for layering the sentiments. I love the one I have used here. The ribbon slots are handy but the little perforated design next to the slots is really pretty and a touch of fancy.
Papers
The brown shades I used here are not my normal Christmas colors. My thought was for a little more rustic than usual. I had the trees in the forest sort of idea and needed a DSP that would work with that. This piece from the Country Woods Designer Series Paper is what I decided on. And the touch of Pecan Pie in the wood grain led to the card base being Pecan Pie. The other color option was going to be Crumb Cake. They both look good against the DSP. So I decided to use both colors and made the Crumb Cake the layer.
These layers are a little smaller than usual to allow the Pecan Pie to help the colors of the DSP to stand out more. The Crumb Cake layer is 3 3/4 X 5 and the DSP is 3 5/8 X 4 7/8.
Technique
The technique may not really be a technique. However it gave the trees the finished look I wanted. I used Blending Brushes to add Mossy Meadow Ink to the stamped trees. They are stamped on Basic White using Mossy Meadow. So I made sure to keep the ink on the Blending Brush light. This could be accomplished using sponges or sponge daubers if you prefer. Those are definitely older techniques.
Finishes
There are not a lot of extras really added to this card. The sentiment layer, with having the ribbon slots, had to have some ribbon. I chose the Pecan Pie Center Stripe Ribbon. It does not show very much, but it is noticeable. Of course there must be Bling! I added the Pecan PIe from the Pecan Pie & Clear Ribbon Dots. They are not very shiny, but fit my theme perfectly.
Thank you for stopping by today!!!
New Scrapbooking Catalog
The newest addition to Stampin’ Up! is an Online catalog of Scrapbooking products. You can see the catalog by clicking the photo below and save it to your computer.
Online Exclusives
New Online Exclusives have dropped. There are Halloween, Fall, Christmas, and many that are great year round. Of course the new Designer Series Papers and Embellishments are fabulous as well!
You can go directly to these in my Online Store by clicking HERE
HOST CODE
My SEPTEMBER Host Code is S9CRPBZ4. Please use this code for orders under $150.00. I will have a small gift for those with orders over $50.00 in addition to the Perk Rewards Program. You can read all of the information at the top of the page in the Menu Bar under SHOP / Perks.
Thank you for stopping by today. I hope you enjoyed today’s project and will come back. I do read and reply to all of the comments individually. They mean a lot to me. Please reach out if you have a question.
The card I have to share today is a Fun Fold that keeps on folding. Not really, but it does have a card inside of a card.
Stamps
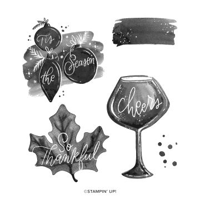
The large image is from the Cheers To The Season stamp set. This set has large images like this one, and I really love it. My fingers were crossed that this set would carry over. But sadly it did not. However, a benefit to you is that it is reduced to $17.50 in the Last Chance Products. And it is well worth that price.
The image is one of the definition stamps, as are the others in the set. They stamp amazing and look great in any color. I chose Cherry Cobbler for this one to match the berries of the DSP.
Inside View 1
This card is a multi fold, or multi card Fun Fold. So the next view is not totally the inside.
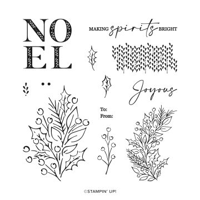
The stamp used here is from the Joy of Noel stamp set. And is cut using the matching Dies. These are both still available as well.
Inside View 2
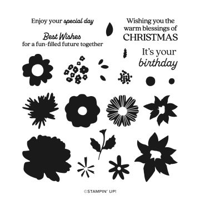
This second Inside View is the actual inside of the card. The stamp set used here is the Modern Garden for this sweet sentiment. And I added a little strip of the DSP to match the front.
Dies
To help the stamped images to really pop, I used two different die sets. They are similar, yet different. The front focal image is made using the Deckled Circle Dies. I used the 6th and 7th largest for the image and the gold. This die set is in the current Mini Catalog, but is carrying over to be an Online Exclusive. There are about 12 dies in this set. And they are all great sizes up to maybe a 6″ circle.
The second set of Dies is on the Inside View 1. To back the sweet greenery sprig, I added a Deckled Rectangle Die. This one is the 3rd largest of the rectangles. These dies are in the Annual Catalog. And are just as wonderful as the circles.
Papers
The paper choices are generally first with me. And the piece of DSP did make the color choices of the ink and card base. It is from the Joyful Designer Series Paper. I love this delicate, yet bold, look. The bit of gold is what prompted me to use the gold circle as a background for the image. I do not normally use a Gold Foil, but it works wonderfully here. The card base is Cherry Cobbler which is the color of the berries in the DSP. And finally a Basic White for the inside card. The measurements are very easy. The card base is 6 1/2 X 5 1/2 and scored at 2 1/4. And the inside Basic White card is 8 X 5 1/4 and scored at 4.
Thank you for stopping in today!!
Online exclusives are here to stay! Click on the photo and be taken directly to them in my online store. If you place an order, please use my Host Code listed just below.
HOST CODE
My DECEMBER Host Code is YJUB2G6X. Please use this code for orders under $150.00. I will have a small gift for those with orders over $50.00 in addition to the Perk Rewards Program. You can read all of the information at the top of the page in the Menu Bar under SHOP / Perks.
Thank you for stopping by today. I hope you enjoyed today’s project and will come back. I do read and reply to all of the comments individually. They mean a lot to me. Please reach out if you have a question.
Today is the last card from the One Sheet Technique of last week. This one is a gift card holder. These are my favorites as I give a lot of gift cards.
Products
The card looks the same as the other three on the front. And it should! The Joy of Noel for the greenery, and the Rocking Horse for the sentiment are a great pair. Both are still available in the Last Chance Products! And here is a look at the open card.
The inside sentiment is the same as well. It is from the Very Best Occasions set in the Annual Catalog. This is a set you should definitely check out!
Fold
This card begins as a 11 X 4 1/4 card that is scored at 2 and 5 1/2. Simply fold the 2″ score to the inside and use Tear & Tape on each side right at the edge. I used a retired small circle punch to make a finger groove as well. After the pocket is made, add your layers to the front and the inside greeting layer. This is such a versatile layout. You can make the Z fold card from Friday or fold the small score to the inside and have a gift card holder. If you missed Friday’s card you can see it HERE
Thank you for visiting today!! I promise to have a different card tomorrow. This completed my four card technique.
Online exclusives are here to stay! Click on the photo and be taken directly to them in my online store. If you place an order, please use my Host Code listed just below.
HOST CODE
My DECEMBER Host Code is YJUB2G6X. Please use this code for orders under $150.00. I will have a small gift for those with orders over $50.00 in addition to the Perk Rewards Program. You can read all of the information at the top of the page in the Menu Bar under SHOP / Perks.
Thank you for stopping by today. I hope you enjoyed today’s project and will come back. I do read and reply to all of the comments individually. They mean a lot to me. Please reach out if you have a question.
The card I have to share today the third card from the one sheet technique I showed on Thursday. This time I made a “Z” Fun Fold using the third quarter of the sheet. It still includes all of the same products and colors.
The card actually is equal borders all around. I did not realize that it was not laying totally flat until I needed to get this post ready! Sorry!! And here is the open view.
Technique
The technique is more difficult to see on this card. I was not strategic and even on my shading of the Balmy Blue cross I made on the full sheet of Basic White card stock. So this piece is much lighter around the two edges where the shading is. And light sections are hard to see in photos. Please trust me that there is Balmy Blue shading on the right side and a bit across the bottom right corner. If you missed yesterday’s post for all I did, you can view it HERE.
Fold
The card base is Poppy Parade that is cut 11 X 4 1/4 and scored at 5 1/2. It is also scored at 2 7/8 with this short section folded backward to be the top layer. The DSP is cut 5 1/4 X 4 with the stamped layer at 3 3/4 X 5. They are layered together and then adhered to only that top folded back layer. This gives the “Z” Fold.
Stamps
The front image is from the Joy of Noel stamp set. I love this image for it’s beauty, but it is a quick one to color as well. The front sentiment is from the Rocking Horse stamp set. This set is still available, but sadly the dies are gone. I love the Joy in the sentiment as it goes along with the Joy in the main set and the paper. And the inside sentiment, which you get a sneak peek at in the open view, is from the Very Best Occasions stamp set. This is a great set for all times of the year.
Papers and colors
The papers and coloring are the same as the other two card from yesterday also. They are a card base of Poppy Parade, with a layer of DSP from the Joy of Christmas Designer Series Paper. This paper was very popular and sold out already. But any Christmas paper will do.
The image is colored using Stampin’ Blends. They are Mossy Meadow for the holly, Old Olive for the leaves, and Shaded Spruce for the piece of Fir showing. And the berries are Poppy Parade to match the card base. I chose it as a brighter red.
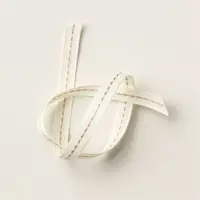
The ribbon is from the upcoming January – April Mini Catalog. It is Sweet Sorbet Bordered Ribbon. I love the width and the edge of White.
Thank you for stopping in today! I hope you have a great weekend! The final card in this series will be shared on Monday!
Online exclusives are here to stay! Click on the photo and be taken directly to them in my online store. If you place an order, please use my Host Code listed just below.
HOST CODE
My DECEMBER Host Code is YJUB2G6X. Please use this code for orders under $150.00. I will have a small gift for those with orders over $50.00 in addition to the Perk Rewards Program. You can read all of the information at the top of the page in the Menu Bar under SHOP / Perks.
Thank you for stopping by today. I hope you enjoyed today’s project and will come back. I do read and reply to all of the comments individually. They mean a lot to me. Please reach out if you have a question.
The project, or technique, I am sharing today is one I did last December. It is stamping a full sheet of card stock to create four cards. This one is a little bit different and is also quicker.
This is the first card. And here is the second one.
Beginning
The start of this project is with a full sheet of Basic White card stock. I failed to take a photo even though I told myself to several times as I was creating the base! DUH!! The next step was to use a Blending Brush and Balmy Blue Ink. I shaded a cross on the sheet of card stock. It was simply to give some definition around two of the edges and the base of the greenery. Next I stamped the greenery image and colored it. Then all that was left to do was cut the sheet into four pieces and trim to the size I wanted. I chose to have all of the stamped pieces 3 3/4 X 5.
Stamp sets
The greenery image is from the Joy of Noel stamp set. The image is stamped using Memento Tuxedo Black Ink and then colored with Stampin’ Blends. There are three different greens used. The holly is Mossy Meadow, the leaves are Old Olive, and the bit of Fir is Shaded Spruce. The final color is the berries and I went with a different red and chose Poppy Parade.
The front sentiment was picked after going through most of my Christmas sets. It is from the Rocking Horse stamp set. I love mixed fonts, and especially love the cursive used here. Plus it goes along with the Joy theme of products used.
Papers
The focal layer, as mentioned at the beginning is Basic White. But I went a little different and added a thin layer of DSP. Generally I do not use DSP unless it is well viewed. This time the scene seemed to call for it. So these pieces are from the Joy of Christmas Designer Series Paper. (Sadly this paper is sold out. But any DSP with similar colors will be beautiful.) And the card base is Poppy Parade to match the berries of the image.
Finishes
The one thing to tie everything down is the ribbon. This is Sweet Sorbet Bordered Ribbon. It is in the upcoming Mini Catalog. The color matched the Poppy Parade much better than a Real Red ribbon would. And I like the size of it. So a ribbon holding a sprig of greenery is the focal image of my card.
Thank you for stopping by today!! I hope you will come by tomorrow and check out the other two cards from this technique. They are Fun Folds.
Online exclusives are here to stay! Click on the photo and be taken directly to them in my online store. If you place an order, please use my Host Code listed just below.
HOST CODE
My DECEMBER Host Code is YJUB2G6X. Please use this code for orders under $150.00. I will have a small gift for those with orders over $50.00 in addition to the Perk Rewards Program. You can read all of the information at the top of the page in the Menu Bar under SHOP / Perks.
Thank you for stopping by today. I hope you enjoyed today’s project and will come back. I do read and reply to all of the comments individually. They mean a lot to me. Please reach out if you have a question.
The content in this blog is the sole responsibility of Jackie Beers as an Independent Stampin' Up! Demonstrator. The use of and content of classes, services or products offered is not endorsed by Stampin' Up!