My card for today is a Fun Snowman card. There are a couple of different simple techniques I have shared as well.
Also, today is my first time as a Design Team Member of the Make My Monday card challenges. This is my entry for a Cute Christmas. You can see the other Design Team Member’s cards by clicking on the link and can also enter your card there as well. Just click on the logo below.
Stamps
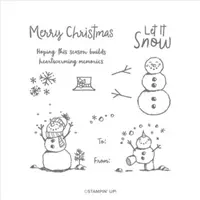
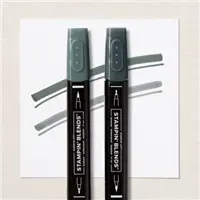
The cute snowman that looks so very happy is from the Snowman Season stamp set. This is a carryover from last year and is in the Annual Catalog. I paired him with the “Joy” from the Bright Baubles stamp set. He is colored with a Light Pool Party for shading but it is difficult to see in the photo. And instead of a traditional red, I went with Poppy Parade for the Joy and in coloring his scarf and hat. Of course I had to use the Stampin’ Blends for all my coloring. You know they are my favorite!
Paper
The DSP pieces are both from the Tiding Of Christmas Designer Series Paper Pack. It is also in the Annual Catalog. I paired these two pieces with Sahara Sand for the base and Soft Succulent as the layer and Snowman background. For a little bit of a fun change, and a very old technique, I tore the snowflake paper across the top. This gives the illusion of a bit of a hill with the trees behind. At least it does in my brain. LOL!!
Dies
I had a bit of a difficult time deciding how to frame the snowman. After looking through all of my dies and punches, I came to the Rectangle Stitched Dies. I used these for the snowman and the layer of Soft Succulent. The dies were perfect in their width but to tall. I mentioned another technique and this is it. With the Stitching dies you can first die cut your image, and then line up the stitches again.
In my case I needed to make them shorter. So I matched up the stitching on the top of the paper where I needed it to be with the top of the die. It takes a minute but is fairly simple. You must line up the stitching the rest of the way down your already die cut layer. But once you get it at the top, it is easy to press the others into place. And as an added bonus, the Joy flag along with the extra one are the pieces that were cut off to make the others shorter. I couldn’t waste those.
Fabulous Stampin’ Up! Join Promotion
Join my team by purchasing the Starter Kit for $75.00 and receive $125.00 of products totally of your choosing! That is a fabulous deal at a $24.00 discount off of the regular Starter Kit price. This is always the Ultimate Bundle of products, and now it is even better! You can simply click on the picture below and Join.
HOST CODE
My November Host Code is M4GF9KZ7. Please use this code for orders under $150.00. I will have a small gift for those with orders over $50.00 in addition to the Perk Rewards Program. You can read all of the information at the top of the page in the Menu Bar under SHOP / Perks.
Thank you for stopping by today. I hope you enjoyed today’s project and will come back. I do read and reply to all of the comments individually. They mean a lot to me. Please reach out if you have a question.
Today’s project is another of my envelope fun fold card using the Sweet Stockings products.
Stamps
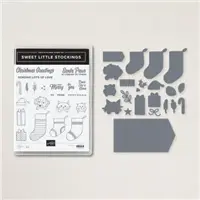
The Sweet Stockings Suite of products are simply adorable! I used the Sweet Little Stockings Bundle for today’s project. All of the stamps used are from the stamp set. And the adorable kitty head sitting on the sentiment is the perfect addition. I am an animal lover. Especially cats and dogs. We only have cats right now, but any of the babies in this set are adorable. (Except maybe the hamster!)
The kitty head is stamped using Basic Gray and then colored with Smoky Slate Stampin’ Blends. There are matching dies for most of the items in the stamp set. I used just the kitty head to die cut. The adorable little girl is added so her paws are hanging over a bit.
Paper
The DSP sheet of tangled Christmas lights is from the Sweet Stockings Designer Series Paper. As pretty and cute as all of the sheets in the paper pack are, this piece is my favorite. I just have to Smile when I see it. And the best part is that even though the paper is a starring role in the card, it only uses a 3 1/2 X 3 1/2 square of it. You can get nine of these from one piece of 12 X 12 paper!
Here is a view of the inside of the card. There is a little surprise n there.
The sentiment is from the Sweet Little Stockings set and the cute little kitty is from another piece in the DSP pack. There are both cats and dogs in these little stockings on one of the sheets. I used my Paper Snips to cut this one out. The trick to this little cutting is to leave a bit of white around the edges. But the most important part of fussy cutting is to turn your paper and not the scissors. Plus it helps to have sharp scissors!
Directions
Click on this picture for a pdf of the directions.
Fabulous Stampin’ Up! Join Promotion
Join my team by purchasing the Starter Kit for $75.00 and receive $125.00 of products totally of your choosing! That is a fabulous deal at a $24.00 discount off of the regular Starter Kit price. This is always the Ultimate Bundle of products, and now it is even better! You can simply click on the picture below and Join.
HOST CODE
My November Host Code is M4GF9KZ7. Please use this code for orders under $150.00. I will have a small gift for those with orders over $50.00 in addition to the Perk Rewards Program. You can read all of the information at the top of the page in the Menu Bar under SHOP / Perks.
Thank you for stopping by today. I hope you enjoyed today’s project and will come back. I do read and reply to all of the comments individually. They mean a lot to me. Please reach out if you have a question.
Before I get to today’s project, I want to remind you that today is the last day to shop with discounts on cardstock, Ink pads, and Dies from the Annual Catalog. Click HERE for all of the details.
Sending Love Project
Today’s card is a fun card with a Fun Fold that can be made and decorated quickly. This would be a good card for making multiples.
I got carried away with my inside stamping and didn’t realize I had stamped on the bottom right of the inside layer. Don’t stamp there!!! Here is a view of the inside.
I had intended to only stamp on the inside left. DUH!!!! That way the trees are not seen when the card is closed.
Stamps
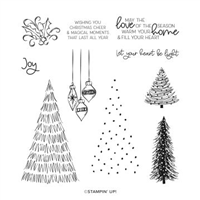
The stamps used are all from the Peaceful Deer stamp set. I love this set because it is great for a variety of projects. And that doesn’t even include the deer with the coordinating punch! The sentiments are from the stamp set as are the little trees.
Paper and Embellishments
Forgive the DSP, it is the last SAB paper Peaceful Prints. Any of the current Christmas paper would work perfectly, even with the other colors I chose. The card base is Soft Sea Foam and is a great pair to Garden Green, which is what the DSP main color is.
The sentiment is punched using the Label Me Fancy Punch and then layered using the Everyday Label Punch. I love punches!! Additionally, I added the gorgeous Wonderful Snowflake as the star of the show. To finish off the snowflake and sentiment, there are 3 of the Holiday Rhinestones added.
Directions
This card is a case of a Paper Pixie card.
The card base of Soft Sea Foam is cut 5 1/2 X 6 1/2 and scored at 2 1/4 on the 6 1/2 side.
Cut an extra piece of Soft Sea Foam and cut 3 1/4 wide X 3 1/2 tall. Score at 1/2 on the 3 1/4 length.
Fold and burnish the card base. Adhere the 1/2 section of the extra Soft Sea Foam to the inside on the right edge. The now flap will fold over the front and layer over top of the left side flap.
Cut a Basic White layer to 5 1/4 X 4, adhere to inside. This covers where the flap is adhered.
The DSP is 2 X 5 1/4 for the left side flap and 2 1/2 X 3 1/4 for the right side flap.
Fabulous Stampin’ Up! Join Promotion + add in the Sale prices!
You read that correctly. You can add items from the Sale, which ends today, into your Starter Kit for even more savings!!!
Join my team by purchasing the Starter Kit for $75.00 and receive $125.00 of products totally of your choosing! That is a fabulous deal at a $24.00 discount off of the regular Starter Kit price. This is always the Ultimate Bundle of products, and now it is even better! You can simply click on the picture below and Join.
HOST CODE
My November Host Code is M4GF9KZ7. Please use this code for orders under $150.00. I will have a small gift for those with orders over $50.00 in addition to the Perk Rewards Program. You can read all of the information at the top of the page in the Menu Bar under SHOP / Perks.
Thank you for stopping by today. I hope you enjoyed today’s project and will come back. I do read and reply to all of the comments individually. They mean a lot to me. Please reach out if you have a question.
Welcome to InKing Royalty’s November Blog Hop! During this year’s blog hops, we are having fun with our stamping favorites – our favorite themes for seasonal cards and projects. This month’s projects feature pretty packages and beautiful tags to inspire your holiday gift-giving. We are excited to share our creations with you today! After you read my post, I hope you’ll hop over to the next person on the list at the base of this post.
Project
I chose for today’s project to share a simple gift that is easy and fun to make. It is a little box which holds gift tags. This fell in line perfectly with the title of the Blog Hop. My box holds 10 tags, however that may very depending on your embellishments.
And here is the side view as well as the tags:
Paper and Ribbon
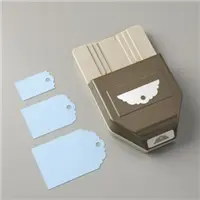
All of the DSP used is from the Whimsy & Wonder Designer Series Paper. You can see from the tags photo that I used almost all of the different patterns of this gorgeous paper. The base of the box is Thick Basic White cardstock. The tags are all regular Basic White cardstock with the DSP cut and glued to the cardstock prior to punching with the Delightful Tag Topper Punch. This gives them quite a bit more strength.
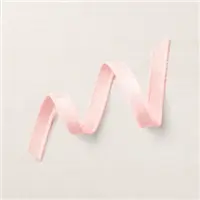
I used the Blushing Bride Frayed Grosgrain Ribbon for the handle and decorative bow. The ribbon is cut to 7″ and placed from outside to inside of the tag hole. I used two glue dots , one above the other, to adhere the ribbon to the inside of the box. This is done on both the front and the back. The bow I tied for the front is added to the front of the box with a couple of glue dots as well.
The tag ribbon is the White Glittered Organdy Ribbon. I added the ribbon with a bookmarker type tie. This way the recipient can easily remove it and add to a bag, or leave as is and add to a package.
Stamps, Dies, Punches, Etc.
The sentiments you see on all of the tags, as well as the front of the box, are all from the Peaceful Deer stamp set. They were the perfect size to fit where needed. Some of them are angled a bit, but that adds to the look. Also I added a To / From to the back of each tag. Since the back side of the tag is Basic White, It was a no brainer. That stamp came from the Bright Baubles stamp set.
In addition to the Delightful Tag Topper Punch, I also used the Double Oval Punch. The ovals were used together on the front of the box to add some depth for the sweet sentiment. On the tags the smaller one was used and adhered flat to the tag as to not create bulk.
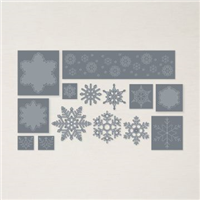
There was one die used on the tags. It is from the Stitched Snowflakes Dies and matched perfectly the snowflakes on the pink piece of the DSP. And of course there has to be bling! I used both the Basic Rhinestone Jewels and the Holiday Rhinestones on the tags and the box sentiment.
PDF of my project
Click on the little photo for a pdf of the box and tags.
Thank you for stopping by today. I hope you’ll hop along to the next stop on the blog hop, Renae Novak at Blessed By Cards. There’s lots of inspiration to be found in this group – and you don’t want to miss it!
Thank you for hopping along with us. If you get stuck during the Blog Hop, please use this line-up as a guide:
Join my team by purchasing the Starter Kit for $75.00 and receive $125.00 of products totally of your choosing! That is a fabulous deal at a $24.00 discount off of the regular Starter Kit price. This is always the Ultimate Bundle of products, and now it is even better! You can simply click on the picture below and Join.
HOST CODE
My November Host Code is M4GF9KZ7. Please use this code for orders under $150.00. I will have a small gift for those with orders over $50.00 in addition to the Perk Rewards Program. You can read all of the information at the top of the page in the Menu Bar under SHOP / Perks.
Thank you for stopping by today. I hope you enjoyed today’s project and will come back. I do read and reply to all of the comments individually. They mean a lot to me. Please reach out if you have a question.
Welcome to the Stampin’ Pretty Pals’ Blog Hop! This month, the theme is “Home for the Holidays”. We really hope that you enjoy and are inspired by them! As you hop from blog to blog, don’t forget to leave comments because we love hearing from you. You will find the lineup at the end of my post to help you “hop” along from Pal to Pal.
I chose a New to me fun fold Bay Window card for today’s hop. It fits perfectly in keeping with the Home for Holidays theme. Please forgive the length of the post. I wanted you to see all of the views.
Stamps and Dies
I used the Tidings & Trimmings Bundle to create the stockings, star, and sentiment. The matching Dies were used to cut the stockings and star. Did you notice the personalization on the stockings? My kitties are honored to share their stockings with you.
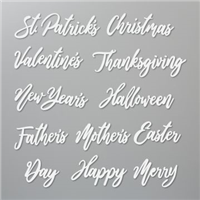
The Merry Christmas is from the Word Wishes Die set. These are a wonderful group of sentiments. Make note if you case this card, and use a similar sentiment, only adhere it to the center panel. It needs to hang over the other panels when open.
Papers and Color
The Tidings of Christmas Designer Series Paper is a favorite and the pattern on the front of the card is the #1! So that paper is what defined my color choices for the rest of the card. The inside DSP is a complimentary piece from the same pack.
The Soft Succulent layer of the right side sentiment as well as the stockings also come from the DSP. To tie in the inside paper, I added the “berries” to the stocking patterns with Cherry Cobbler Stampin’ Blends. The pearls on the side sentiment are also colored with the Cherry Cobbler Stampin’ Blend to match.
Other Views
The inside sentiment layer could be made larger. I chose to have it a bit smaller so it did not show when the card was in display mode.
This is the flat view. As you can see it does fold flat for mailing without damaging the Merry Christmas. And you can see my non professional personalization of the stockings. 🙂
Directions and Measurements
I discovered this Fun Fold from fellow Stampin’ Up! Demonstrator Lisa Cursio.
Card base of Cherry Cobbler is cut 4 1/4 X 11 and scored at 3/8, 1 7/8, 3 5/8 5 1/8 & 5 1/2
The front DSP is cut in portrait mode at 1 3/8 X 4 1/8 (x2 for the 2 outside pieces) and 1 5/8 X 4 1/8 for the center
The right side greeting layers are Soft Succulent cut to 1 5/8 X 1 5/8 and Basic White cut to 1 1/2 X 1 1/2.
The inside DSP is 5 X 4 1/8 (5 is width)
The inside sentiment layer is 2 1/4 X 3 1/4
Fold and burnish the score lines. Add Tear & Tape between the last two score lines and adhere. This makes the hinge on the left side of the card. When adding your right side sentiment ,align it even with the right edge of the inside DSP. Place dimensionals only the right side of the sentiment. This allows the Bay Window to slip under the unattached left side to stay open. I hope you give this fund fold a try!
Thank You!!
More inspiration awaits, so use the lineup below to visit the rest of the Design Team. The Pals are excited to show you what they’ve created! Then, please mark your calendars for our next blog hop on December 8th. Our theme will be “My Favorite Things” with our design team showcasing some of their favorite products from any catalog they choose.
Thank you for stopping by today. I hope you enjoyed today’s project and will come back. I do read and reply to all of the comments individually. They mean a lot to me. Please reach out if you have a question.
Today’s project is an ornament card using leftover bits and pieces to make a great project with wonderful colors. My projects for this month are going to be a happy mix of holidays and any time cards. Let’s begin with a Christmas card.
Bright Baubles Bundle
This ornament from the Delicate Baubles Die set is a leftover from an earlier project. The Glimmer Paper on the Red Foil ornament is from Sale-A-Bration, that shows that it is from earlier. However, you could easily substitute any of the Metallic Specialty Papers that you have on hand or are still available.
For the sentiment, I chose to go with the softness of the Soft Succulent Ink on Basic White cardstock. This sentiment is included in the Bright Baubles stamp set, but is an all on one line setting. I chose to cut it apart and layer a bit haphazardly for a different look.
Paper and Finishes
The base of today’s card is Cherry Cobbler with a narrow border of Soft Succulent behind the gorgeous DSP. My favorite DSP of the Annual Catalog is the Tidings of Christmas Designer Series Paper. It is a 6X6 paper stack and has the addition of Misty Moonlight in it. I love that unexpected color and the freshness it brings. I will add that the layer of DSP behind the top piece is actually two smaller strips. As I said earlier, this was leftover parts! By cutting those and the top piece to the same height, it doesn’t show that it’s two pieces.
The final touch of this card is the Evening Evergreen Open Weave Ribbon. With the bling and shine on the ornament, I didn’t need any additional of my normal blings.
Fabulous Stampin’ Up! Join Promotion
Join my team by purchasing the Starter Kit for $75.00 and receive $125.00 of products totally of your choosing! That is a fabulous deal at a $24.00 discount off of the regular Starter Kit price. This is always the Ultimate Bundle of products, and now it is even better! I would really love to have you on my team and to share my love of Stampin’ Up! with you. For many years I was a Hobby Demonstrator, just to get the discount, and do not regret one minute of that. Now I have a community of Stamping Friends that you could be a part of. You can simply click on the picture below and Join.
HOST CODE
My November Host Code is M4GF9KZ7. Please use this code for orders under $150.00. I will have a small gift for those with orders over $50.00 in addition to the Perk Rewards Program. You can read all of the information at the top of the page in the Menu Bar under SHOP / Perks.
Thank you for stopping by today. I hope you enjoyed today’s project and will come back. I do read and reply to all of the comments individually. They mean a lot to me. Please reach out if you have a question.
The content in this blog is the sole responsibility of Jackie Beers as an Independent Stampin' Up! Demonstrator. The use of and content of classes, services or products offered is not endorsed by Stampin' Up!