It is the time of year for Gift Card holders. They are a favorite of mine to make and share. Today’s card showcases the Poinsettia paper.
And here is the inside view:
Paper
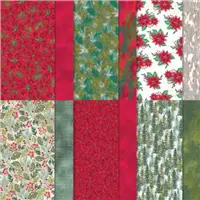
The Boughs of Holly Designer is where I found the beautiful Poinsettias. The two pieces you see when the card is closed I wanted to be the same. They could easily be two different coordinating papers. And for the gift card pocket I opted for a different Poinsettia piece. There are a variety of greens in the paper, but I opted to go with Mossy Meadow as the card base. And I know you are shocked, but I did not add a layer between the DSP and the card base. That is something I almost always do. Since this card, including the gift card, is fairly thick, I did not want to add anymore layers to that.
Stamps
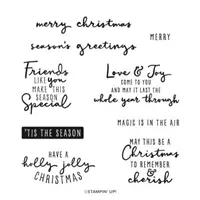
I used two different stamp sets on this card. The two sentiments are from the Christmas To Remember stamp set. And the greenery are from the Christmas Season stamp set. To get the focal layer greenery I simply stamped around the edges and left room in the center for the sentiment. The colors used are ones from the DSP. That made the choices rather easy! For the inside layer I only added a sentiment. That piece is rather small and did not want to take up any more of the writing room.
Measurements:
The card base is cut to 4 1/14 X 11 and scored at 2 1/2 and 5 1/2. Fold and burnish the score lines. The DSP pieces are two at 2 1/4 X 4. These are the gift card pocket and the far right pieces. The front left DSP is 2 3/4 X 4. Adhere all of the DSP pieces and then use a circle punch or die to create the finger notch on the gift card pocket. Then adhere it with Tear & Tape placed very close to the edge on each side. It also helps to place your gift card inside when closing. That insures that the fit is not too tight when you place it afterwards.
The front sentiment layer is a Mossy Meadow cut to 3 X 4 1/4 and a White cut to 2 3/4 X 4. And the final is the inside White at 2 3/4 X 4. I hope you will give this one a try!
Birthday Organizer Kit
DETAILS
Kit includes one 8″ x 10″ (20.3 x 25.4 cm) monthly planner with space to record birthdays each month as well as a pocket sleeve to hold birthday cards.
Includes 12 full-size birthday cards, 6 of 2 designs, and 12 coordinating envelopes.
Includes Glue Dots, Stampin’ Dimensionals, Adhesive-Backed Embellishments, and Tear & Tape Adhesive
Includes die-cut florals and pieces ready for you to use—no prep work required!
Includes sticker sentiments and die-cut labels in Dutch, English, French, and German
My November Host Code is XUE6MDFV. Please use this code for orders under $150.00. I will have a small gift for those with orders over $50.00 in addition to the Perk Rewards Program. You can read all of the information at the top of the page in the Menu Bar under SHOP / Perks.
Thank you for stopping by today. I hope you enjoyed today’s project and will come back. I do read and reply to all of the comments individually. They mean a lot to me. Please reach out if you have a question.
Today’s card is a quick one using the In Color Glimmer Paper paired with the Spruced Up Dies. Counting the Ink and Ribbon this is a four part card. It may be a record for me!
Papers
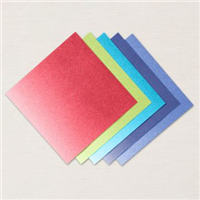
Starting with the paper may seem a bit odd as there does not appear to be a lot of paper! But that is the point. This is a quick card with Thick Basic White, some Glimmer Paper, and a regular Basic White. And that is all it took! The die cut piece is cut to 3 X 5. The three strips of Glimmer Paper are each cut 4 1/4 X 3/4. I believe this technique would work just as well with Designer Series paper scraps, or Washi Tape. I just am in love with this Glimmer Paper.
Focal Layer
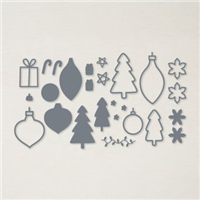
The Focal Layer is the 3 X 5 Basic White piece. I stamped the sentiment, from the Brightest Glow Stamp Set, first and positioned it at the bottom of the card. It is stamped in Parakeet Party Ink. Next was the placement of the ornament die. This is from the Spruced Up Die set. There are a couple of sizes of ornaments and two trees. Any of these dies would work with this technique.
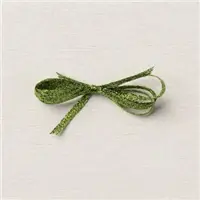
The ornament die was positioned between the top of the layer and the sentiment. After die cutting I added Stampin’ Dimensionals to the back and with the backings still attached, put it on the card. This allowed me to find the perfect location for the Glimmer Paper strips. Once those were in place I adhered the focal layer over them. All that was left was tying a bow using the Parakeet Party Metallic Ribbon.
I hope you will give this technique a try!
Birthday Organizer Kit
DETAILS
Kit includes one 8″ x 10″ (20.3 x 25.4 cm) monthly planner with space to record birthdays each month as well as a pocket sleeve to hold birthday cards.
Includes 12 full-size birthday cards, 6 of 2 designs, and 12 coordinating envelopes.
Includes Glue Dots, Stampin’ Dimensionals, Adhesive-Backed Embellishments, and Tear & Tape Adhesive
Includes die-cut florals and pieces ready for you to use—no prep work required!
Includes sticker sentiments and die-cut labels in Dutch, English, French, and German
My November Host Code is XUE6MDFV. Please use this code for orders under $150.00. I will have a small gift for those with orders over $50.00 in addition to the Perk Rewards Program. You can read all of the information at the top of the page in the Menu Bar under SHOP / Perks.
Thank you for stopping by today. I hope you enjoyed today’s project and will come back. I do read and reply to all of the comments individually. They mean a lot to me. Please reach out if you have a question.
Have you seen the cross stamping on a full sheet of paper to make four cards? It is a new technique spreading quickly and I had to give it a try. I will warn you that it can be addicting!
Stamp Sets
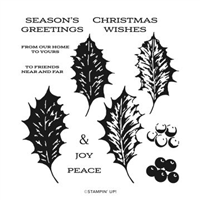
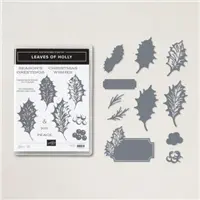
I apologize for the poor picture. Trying to make a good photo from my desk did not work very well. But you can see the “big” picture here. The two stamp sets I used to create this are Forever Fern and Leaves of Holly. The Holly leaves and berries are the star. But I wanted the additional leaves and berries that would be mixed in with a wreath to add extra colors and depth.
Colors
Again I apologize for the poor photography. So I will just list the colors. For the holly I used Evening Evergreen and Soft Succulent. The berries are Sweet Sorbet and Poppy Parade. And for the two leaves and berry stems from the Forever Fern set I used Garden Green and Smoky Slate. To make the four cards I mixed these colors in the card bases and layers.
Cards
I will say that I cut the full sheet down from 8 1/2 X 11 to four of varying sizes for the cards. They all started out at 4 X 5 1/4, and then either stayed that size or were trimmed a little bit more. Here are two of the cards.
Please give this fun technique a try! It is a great way to add some variety to your stamping.
Birthday Organizer Kit
DETAILS
Kit includes one 8″ x 10″ (20.3 x 25.4 cm) monthly planner with space to record birthdays each month as well as a pocket sleeve to hold birthday cards.
Includes 12 full-size birthday cards, 6 of 2 designs, and 12 coordinating envelopes.
Includes Glue Dots, Stampin’ Dimensionals, Adhesive-Backed Embellishments, and Tear & Tape Adhesive
Includes die-cut florals and pieces ready for you to use—no prep work required!
Includes sticker sentiments and die-cut labels in Dutch, English, French, and German
My November Host Code is XUE6MDFV. Please use this code for orders under $150.00. I will have a small gift for those with orders over $50.00 in addition to the Perk Rewards Program. You can read all of the information at the top of the page in the Menu Bar under SHOP / Perks.
Thank you for stopping by today. I hope you enjoyed today’s project and will come back. I do read and reply to all of the comments individually. They mean a lot to me. Please reach out if you have a question.
The Santa’s Delivery stamp set is so stinking cute! Old fashioned Santa’s are my favorite. And especially paired with a simple HoHoHo
Stamp Set
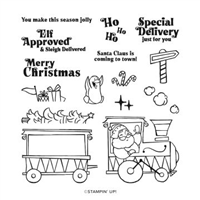
This adorable Santa in the train engine is so cute! I love old fashioned Santa’s and this reminds me of that. There are more images to the stamp set and additional train pieces. But this simple one worked perfectly for my idea. The image is stamped with Memento Tuxedo Black Ink and then colored with Stampin’ Blends. All of the colors are in the Supply List at the bottom of the post. To add the “smoke” coming out of the smoke stack, I used a trio of the Classic Matte Dots in the Basic Gray. They fit perfectly with the room I had left at the top of the stamped image.
Paper
This beautiful DSP was as much a part of my idea as Santa was. This sweet HoHoHo sheet is from the matching Santa Express Designer Series Paper. It is part of the Santa Suite of products. But this adorable piece caught my eye immediately. The colors are both traditional and modern, but the words are just perfect!
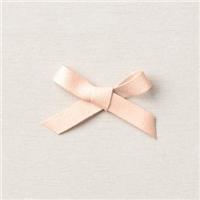
To use the non traditional colors was my choice of the way to lean to begin this card. So the card base is Petal Pink with the layer of Bermuda Bay. Both are from the DSP and fit in great with the more traditional of the train colors I used. Since the paper was the sentiment 🙂 I simply added the Petal Pink Soft Polyester Ribbon as the finishing touch.
Birthday Organizer Kit
DETAILS
Kit includes one 8″ x 10″ (20.3 x 25.4 cm) monthly planner with space to record birthdays each month as well as a pocket sleeve to hold birthday cards.
Includes 12 full-size birthday cards, 6 of 2 designs, and 12 coordinating envelopes.
Includes Glue Dots, Stampin’ Dimensionals, Adhesive-Backed Embellishments, and Tear & Tape Adhesive
Includes die-cut florals and pieces ready for you to use—no prep work required!
Includes sticker sentiments and die-cut labels in Dutch, English, French, and German
Now is the perfect time to Join Stampin’ Up! and my Team. This is a great promotion with a very good “Bang for your Buck ” deal. There is not obligation to ever place another order as a demonstrator. I would love to talk with you if there are questions or concerns.
HOST CODE
My October Host Code is R26UJTTW. Please use this code for orders under $150.00. I will have a small gift for those with orders over $50.00 in addition to the Perk Rewards Program. You can read all of the information at the top of the page in the Menu Bar under SHOP / Perks.
Thank you for stopping by today. I hope you enjoyed today’s project and will come back. I do read and reply to all of the comments individually. They mean a lot to me. Please reach out if you have a question.
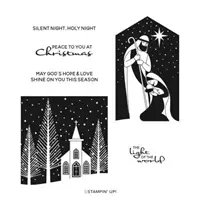
Pretty and simple are great combinations anytime. And today’s card highlights both of those using the Peace To You stamp set.
Stamps
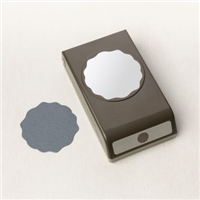
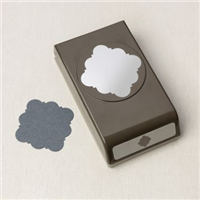
There are two stamp sets used on this card. The first is the fabulous Peace To You stamp set. The image of the church is from that set. It is square shaped with more trees showing when looking at the stamp itself. To change it up a little, I used the Decorative Circle Punch to highlight the church and a couple of partial trees. With the shape of the punch the scene is framed very well.
The second stamp set is for the sentiment. Since I have friends all over the country I take this statement literally. And I love that! Even though they are not close by, they are still friends and in my thoughts. This sentiment is from the Leaves of Holly stamp set. To shape the sentiment I went to the partner to Leaves of Holly, the Holly Berry Dies. These are a bundle in the Mini Catalog. This shape is a little larger than totally necessary for the words. However the extra bit of white sort of mimics all the white of the card against the blue strip.
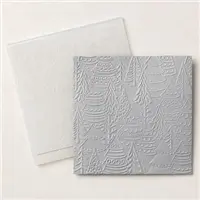
Definition and Finishes
To give the background of white some definition, I used the Whimsical Woodland Embossing Folder. It may be a little more whimsical than the focal image, but the tone on tone of it keeps it more subdued. By using only two colors on the card everything seems to work well together.
The Starry Sky Ink for the focal image is a brighter “night” than Night of Navy ink would be. And by using it as the card base and the strip to ground the sentiment, it gives a brighter look to the card. To add a touch of bling, I simply added two of the Rhinestones to the sentiment. This is a great card for multiples, and may just be in my Christmas cards for this season.
Birthday Organizer Kit
DETAILS
Kit includes one 8″ x 10″ (20.3 x 25.4 cm) monthly planner with space to record birthdays each month as well as a pocket sleeve to hold birthday cards.
Includes 12 full-size birthday cards, 6 of 2 designs, and 12 coordinating envelopes.
Includes Glue Dots, Stampin’ Dimensionals, Adhesive-Backed Embellishments, and Tear & Tape Adhesive
Includes die-cut florals and pieces ready for you to use—no prep work required!
Includes sticker sentiments and die-cut labels in Dutch, English, French, and German
Now is the perfect time to Join Stampin’ Up! and my Team. This is a great promotion with a very good “Bang for your Buck ” deal. There is not obligation to ever place another order as a demonstrator. I would love to talk with you if there are questions or concerns.
HOST CODE
My October Host Code is R26UJTTW. Please use this code for orders under $150.00. I will have a small gift for those with orders over $50.00 in addition to the Perk Rewards Program. You can read all of the information at the top of the page in the Menu Bar under SHOP / Perks.
Thank you for stopping by today. I hope you enjoyed today’s project and will come back. I do read and reply to all of the comments individually. They mean a lot to me. Please reach out if you have a question.
This past week I was together for a stamping day with some of my Stamp Club ladies. We worked on whatever cards we wanted, but most were Christmas cards. To be able to stamp together, laugh, and eat 🙂 is a great day. That put me in the mood to continue with Christmas cards. A variety of cards is what I prefer to send out, so I make groups of six of a design and then move on to another. Today’s card is a fun, bright and quick card that could be adjusted to any occasion. And it is a one stamp bundle card.
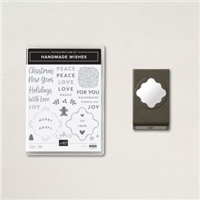
Stamp and Punch Bundle
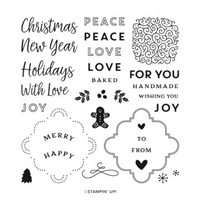
This cute card is made using the Handmade Wishes Bundle. This bundle includes the Handmade Wishes stamp set and the Handmade Tag Punch. Punch bundles are a wonderful “bang for your buck” in my opinion. And this is a uniquely shaped punch. The stamp set includes sentiments for different occasions along with some little images, like the gingerbread man. To match the bright paper, I opted to stamp the different elements of my greeting in different colors. The ability to create the greeting I wanted was an extra bonus!
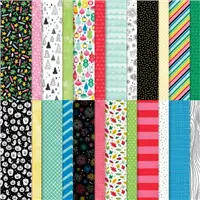
Papers
This fun DSP is from the Celebrate Everything Designer Series Paper. It is a Host Reward from the Mini Catalog. And it is one of the super sized paper packs that is well worth the little cost. Actually both of these pieces are from the same sheet. The pretty pink twinkle is the reverse of the candy side. And that led to the Polished Pink card base. Using non traditional colors is fun and I love the brightness. It is a smile card!
Finishing
To tie this card all together, I added ribbon over the joining of the two DSP patterns. The Polished Pink Open Weave Ribbon works great here. Plus it is very easy to work with on tying the bow. The last step was to stamp, and then fussy cut. the little gingerbread man. He is added at the top of the sentiment layer with Glue Dots and helps tie in all of the colors.
HOST CODE
My October Host Code is R26UJTTW. Please use this code for orders under $150.00. I will have a small gift for those with orders over $50.00 in addition to the Perk Rewards Program. You can read all of the information at the top of the page in the Menu Bar under SHOP / Perks.
Thank you for stopping by today. I hope you enjoyed today’s project and will come back. I do read and reply to all of the comments individually. They mean a lot to me. Please reach out if you have a question.
The content in this blog is the sole responsibility of Jackie Beers as an Independent Stampin' Up! Demonstrator. The use of and content of classes, services or products offered is not endorsed by Stampin' Up!