I cannot find my notes as to where I saw this card recently. It was called a Tuxedo Card by the one I saw. This is a card I have made previously but without the little extra section on the inside. It is great when we can take an older layout and revamp it.
The ribbon layer pulls out to be a bookmark or to simply reveal an additional message or gift card. But wait….there is more!
There is also an inside of the card. And it has a special little spot for whatever you want to add. I would place a gift card here I believe.
Designer Series Paper
This card is simple to create and is perfect to showcase fun patterns from DSP. All of the DSP used is from the Hobby Haven Designer Series Paper. The inside triangle is the reverse of one of the front pieces. This paper has generic patterns on one side and various hobbies on the opposite. I chose the books. But there is sewing, self care, cooking, gardening, etc.
To create the triangles, I finally had a “light bulb moment”! In trying to cut the paper so I had the books orientated properly for where that piece would go. I turned the square several times. Then the light bulb went off. So make note if you are like me and get confused: If you want the piece to fit in the Bottom Left corner, as I did here, then you cut from the Top Left to bottom right. That is so simple, but took me forever to sink in. Duh!! LOL!!!
Stamps and Dies Bundle
The Creative Haven Bundle has great sentiments with fun shapes that fit each one. I love the Deep Breath and the long oval that it fits. Everyone could use that thought occasionally. And I thought it paired well with the books as that is my relax and unwind method.
Paper and Ink
A color I seem to not focus on is Coastal Cabana. So I was thrilled when it was a part of this DSP and seemed to highlight the rest of the colors better than some of the others. Since it is paired with Basic White mostly, it is a bright card.
The stamping is all done using Lost Lagoon Ink. This is , to me anyway, a darker version of Coastal Cabana. This card could be made with any colors of cardstock and DSP to fit an occasion. And I am always looking for new ways to share a gift card.
Measurements
The card begins with a standard side fold A2 card measuring 5 1/2 X 8 1/2, scored at 4 1/4. There is a White layer on the front of the card measuring 4 X 5 1/4. For the pull out card you need a layer cut to 3 X 4, with a White layer at 2 7/8 X 3 7/8. There is an additional White layer on the inside that measures 4 X 5 1/4. The DSP is 3 3/4 X 3 3/4 that are cut on the diagonal. You will need three triangles it you add the inside pocket as I did. All of the triangles are only adhered along the outside and bottom edge with liquid glue and close to the edge so as not to impede the paper being slid inside. *Remember my light bulb moment if you have a directional paper.
Extras
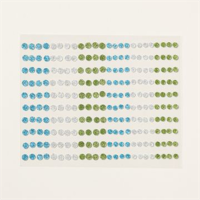
The two extras for today are simple. One is the White Frayed Ribbon, which sadly is retired. I apologize as I did not realize that when I used it. But I am sure you have some white ribbon on hand. And the bling is the Delightful Decorative Dots. They are wonderful and low profile.
STAMPIN’ REWARDS
You will earn rewards on all orders over $20.00 in products The system will track your rewards for you. And they will be available for use on your next order, or you can save up for a larger purchase. All you need to do is on your first order is agree to participate. You will then begin receiving rewards on qualifying orders.
Orders of $50.00 or more you will still receive an appreciation gift from me. I appreciate you choosing me as your demonstrator!
COMMENTS
Please know that I love to hear from you and answer any questions you may have. My responses generally are not done here on the post. They are made using my phone as I have found it is easier to answer a question for you personally. So you will be receiving an email from me if you make a comment.
Thank you for stopping by today. I hope you enjoyed today’s project and will come back. I do read and reply to all of the comments individually. They mean a lot to me. Please reach out if you have a question.
Smile and Keep On Stamping,
Jackie
Online Exclusives
New Online Exclusives drop every other month. These are amazing products and are a supplement to the Annual and Mini Catalogs. This way you have access to even more New and Awesome products!
You can go directly to these in my Online Store by clicking HERE
My favorite colors from Stampin’ Up! are the Brights Collection. The Ocean Friends Suite is full of the Bright colors and feeds my need. Plus these papers just make me Smile!
And this one is a Fun Fold as well.
STAMPS
There are two different stamp sets used on this Fun Fold card. Both of the sentiments are from the Pattern of Friendship stamp set. The front sentiment is a definite favorite of mine. Cards should make us Smile, and this sentiment really does for me. And the inside Bubble looking font of Happy Birthday is from the same set.
To add some additional “sea” or “ocean” to the inside of the card, I added the bubbles around the sentiment. These are from the Ocean Friends stamp set. The bubbles paired with the starfish DSP and did not leave the inside as plain.
PUNCH
The fun sentiment layer on the front is made using the awesome Sweetest Star Punch. I really love this punch and was so happy it carried over. You may remember it from the Fall Mini Catalog. It was a bundle with a Mr. and Mrs. Claus stamp set. To create my focal layer, I stamped two of the stars and layered them on top of each other but spread out. It was easier to stamp the sentiment after punching out the star. Since the stamp set is photopolymer I could see placement perfectly. And much simpler than stamping and then trying to get it positioned where I wanted it when trying to punch.
PAPERS
These bright colors from the Friends of the Ocean Designer Series Paper are what created the card. I love the mix of Brights in the starfish piece. And I am old enough to remember when orange and pink were first paired together back in my younger days. I loved it back then as well as now. Both of these papers are from that DSP.
The card base is pulled from the DSP. I used Pumpkin Pie as the color. Lemon Lime Twist and Summer Splash are the two star colors. The card base is 5 1/2 X 8 1/2 and scored at 1 1/2 and 5 3/4 to make the fun fold. The smallest section is the bottom and I used Tear & Tape to close the edges. A gift card will fit in here as well as the sentiment layer.
The front DSP layers are placed on a Basic White layer that measures 5 X 3 3/4. To add this to the front of the card, I added my glue to the card front. This ensured I would not have too much glue and glue my card shut!
EXTRAS
The bling and ribbon are the two Extras today. It was used to join the two patterns of DSP together after adhering them to the Basic White base. Plus it gives a grounding spot for the star.
I chose the Sunny Day Iridescent Dots for my bling. There are three different colors in two different sizes on the package. I scattered all three colors around the card. These are also part of the Friends of the Ocean Suite of products.
HOST CODE
My FEBRUARY HOST CODE is S2EYAW9N. Orders of $50.00 or more will receive an appreciation gift from me. I appreciate you choosing me as your demonstrator!
Thank you for stopping by today. I hope you enjoyed today’s project and will come back. I do read and reply to all of the comments individually. They mean a lot to me. Please reach out if you have a question.
Smile and Keep On Stamping,
Jackie
New Scrapbooking Catalog
The newest addition to Stampin’ Up! is an Online catalog of Scrapbooking products. You can see the catalog by clicking the photo below and save it to your computer.
Online Exclusives
New Online Exclusives have dropped. There are Halloween, Fall, Christmas, and many that are great year round. Of course the new Designer Series Papers and Embellishments are fabulous as well!
You can go directly to these in my Online Store by clicking HERE
Before I get to today’s project, I want to remind you that Free Shipping begins today. I have been out of town all of last week. And did not have my laptop to get out the information. The Free Shipping begins today and runs thru Wednesday. You can take advantage of any of our products. So it is a great time to get some of the Last Chance items that you may have been looking at. I love the easy way to look up those Last Chance items now. Please let me know if you have any questions or need assistance.
Today’s project is one I made for a Shoebox Swap my Up-Upline put together. It was great to see some of our group that is local. This project has a bit of a retro look to it. The best part is how really easy it is to put together.
This looks very retro to me. A simple gift box from my childhood. Now it is a simple card! I created this from several different versions I have seen. The first version was very similar to this one. However it was only a photo with a couple of measurements. I made that version larger. This fits an A2 envelope almost as a regular card would. I made a few more tweaks regarding how things fit together.
The top pulls out to allow you to see the inside “card”. This card is large enough for you to use a Removable Glue Dot and adhere a gift card. Here is the open view.
STAMPS
To keep this fairly plane and simple, I only used one stamp set. That is an unusual thing for me of late. This stamp set is the Sentimental Wishes stamp set. The sentiments are simple and have a different font than those we normally see. Almost like they are retro as well. The front sentiment layer also includes the bow. I felt it needed a bit of an extra touch.
PAPERS
The card base, both top and bottom are from Real Red cardstock The only additional cardstock is the bit for the Granny Apple Green layer with the sentiment. And the sentiment is on Basic White. the fun “bow” wrapped around the card is from the Take A Bow Designer Series Paper. All of the sheets from this 6X6 paper pack would work wonderfully on this card. There are three main colors, the ones you see in the dots, and these are included on all of the papers in the pack.
EXTRAS
The card itself is fairly straightforward. But I am including the measurements. The only extras are the Circle Punches, which are the 1 3/4″ and the 2″ Circle Punches. For the bling I added a single Rhinestone. This time I used a larger one to stand out a bit better.
MEASUREMENTS
The Real Red card base is cut to 5 X 7 and scored on the 7″ side at 3 1/4. When folded, the shorter section is the card front. Fold the card and add adhesive on the shorter front sides right up against the edge. Tear & Tape is the width to consider.
The Real Red card top measures 5 1/2 X 3 and is scored on the 3″ side at 1 1/2. Fold and burnish. The inside Basic White is cut to 3 3/4 X 4. The 3 3/4 is the width to make sliding in and out easy. I suggest placing the White piece inside of the top, up to the score line, and then stamp the sentiment. This insures it is not up to high. Then center the White and add adhesive of your choice, but only at the very top of the White. Do not add adhesive all the way down the red. Again, think of the width of Tear & Tape. Once that is dry, turn this section over and adhere the back in the same way.
The DSP is from the Take A Bow DSP and measures one at 1 3/8 X 3 1/4, that is for the front. And 5 3/8 X 1 3/8 for the front of the top section. Now slide your top, with the White attached, down into the pocket. It should easily slide in and the top folded red goes down over the bottom part just a bit. This helps the illusion of a box. Add the sentiment on the front and you are completed.
HOST CODE
My DECEMBER Host Code is SAQE7VYU. Please use this code for orders under $150.00. I will have a small gift for those with orders over $50.00 in addition to the Perk Rewards Program. You can read all of the information at the top of the page in the Menu Bar under SHOP / Perks.
Thank you for stopping by today. I hope you enjoyed today’s project and will come back. I do read and reply to all of the comments individually. They mean a lot to me. Please reach out if you have a question.
Smile and Keep On Stamping,
Jackie
New Scrapbooking Catalog
The newest addition to Stampin’ Up! is an Online catalog of Scrapbooking products. You can see the catalog by clicking the photo below and save it to your computer.
Online Exclusives
New Online Exclusives have dropped. There are Halloween, Fall, Christmas, and many that are great year round. Of course the new Designer Series Papers and Embellishments are fabulous as well!
You can go directly to these in my Online Store by clicking HERE
Today is the last card from the One Sheet Technique of last week. This one is a gift card holder. These are my favorites as I give a lot of gift cards.
Products
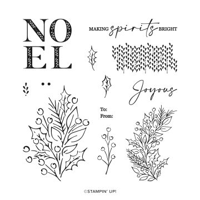
The card looks the same as the other three on the front. And it should! The Joy of Noel for the greenery, and the Rocking Horse for the sentiment are a great pair. Both are still available in the Last Chance Products! And here is a look at the open card.
The inside sentiment is the same as well. It is from the Very Best Occasions set in the Annual Catalog. This is a set you should definitely check out!
Fold
This card begins as a 11 X 4 1/4 card that is scored at 2 and 5 1/2. Simply fold the 2″ score to the inside and use Tear & Tape on each side right at the edge. I used a retired small circle punch to make a finger groove as well. After the pocket is made, add your layers to the front and the inside greeting layer. This is such a versatile layout. You can make the Z fold card from Friday or fold the small score to the inside and have a gift card holder. If you missed Friday’s card you can see it HERE
Thank you for visiting today!! I promise to have a different card tomorrow. This completed my four card technique.
Online exclusives are here to stay! Click on the photo and be taken directly to them in my online store. If you place an order, please use my Host Code listed just below.
HOST CODE
My DECEMBER Host Code is YJUB2G6X. Please use this code for orders under $150.00. I will have a small gift for those with orders over $50.00 in addition to the Perk Rewards Program. You can read all of the information at the top of the page in the Menu Bar under SHOP / Perks.
Thank you for stopping by today. I hope you enjoyed today’s project and will come back. I do read and reply to all of the comments individually. They mean a lot to me. Please reach out if you have a question.
The papers used are the largest part of this card. It began with Night of Navy card stock that is 11 X 4 1/4 and scored at 1 1/2 and 5 1/2. Those are the important measurements. After that you can decorate as you see fit. I added the lovely Beary Christmas Designer Series Paper. Those packages on the front are a tad busy, but makes me think of anticipation of what is inside!! I am a kid at heart with gifts!!
The inside green paper is also from the same Beary Christmas DSP. As is the little bear on the inside by the sentiment. It is fussy cut from a scrap piece. To add some contrast to the front, and match the inside, I used Old Olive for the tag.
Stamps
All of the stamped images are from the Beary Cute stamp set. The bear is not the one that matches the Punch, which is part of the Beary Cute Bundle. So I fussy cut him as well. It is an easy cut. And I do not mind fussy cutting. The sentiment is included in the set also. It was intended as a straight line, like it stamps. But it just would not work that way. So I improvised and cut it in half.
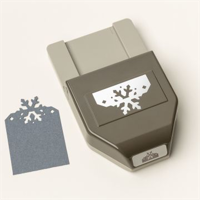
Tag
This perfectly sized tag is the new Sparkling Snowflake Tag Topper punch. I love the little snowflake at the top. But this could be used as other than a Winter tag I think. It is a bit difficult to see, but I ran the red ribbon through the lower opening of the snowflake and down the front of the tag. Then it comes up the back and meets again at the top. The bow is separate and added with a glue dot. I did not realize that the bear and sentiment would almost totally cover the ribbon. It does look really cute wrapped around that way.
To finish the tag and the card, I added a touch of bling. This is my normal, but I was very restrained today. The paper is so busy that I knew bling would get lost on the DSP. So I ended with a single Adhesive Glitter Sequin in matching blue for the bear’s scarf. The size and glitter adds just the right amount of bling!
Thank you for stopping by today!!
Online exclusives are here to stay! Click on the photo and be taken directly to them in my online store. If you place an order, please use my Host Code listed just below.
HOST CODE
My DECEMBER Host Code is YJUB2G6X. Please use this code for orders under $150.00. I will have a small gift for those with orders over $50.00 in addition to the Perk Rewards Program. You can read all of the information at the top of the page in the Menu Bar under SHOP / Perks.
Thank you for stopping by today. I hope you enjoyed today’s project and will come back. I do read and reply to all of the comments individually. They mean a lot to me. Please reach out if you have a question.
The Beary Christmas DSP is such beautiful paper that it is the star of today’s card. I have made one of my favorite things, a gift card holder to share with you.
Papers
The star of this card is for sure the paper. I used the Beary Christmas Designer Series Paper. The softer colors and all of the animal print in this larger piece make me feel all warm and cozy. Although the prints are in snow and that is not warm and cozy. But making Christmas cards definitely is. And this one is a gift card holder.
To create this card I used two different pieces from the Beary Christmas DSP pack. This snow scene was cut to continue to the inside. Here is an open view.
The gift shares both the left and right side of the open view. Just a bit of fun there. And the little Christmas tree is cut from the same piece that the focal point on the front is from. I fussy cut the tree but it was really quick.
Dies
The two Deckled Rectangles Dies used on the front of the card are a different take on a “spotlight”. At least that is what I am calling it. I loved the little scene with the two bears and wanted a way to showcase them and their gifts. The two sizes of the Dies worked perfectly and fit on the front well. It is hard to believe that there is not stamping on the front of my card again today!
Stamp set
The only stamping on the entire card is the inside sentiment. It is from the Beary Cute stamp set. I love the cursive and simple Merry Christmas. My first plan had been for it to be on the front of the card. So I embossed it in White with that in mind. After building the front panel I realized that there was not a good spot to place a sentiment. So I fussy cut it a little bit and then added it to the inside. The Night of Navy with White embossing really pops as the sentiment and plays with the Night of Navy card base.
Measurements
card base of Night of Navy is 11 X 4 1/4 and scored at 1 1/2 and 5 1/2.
The front layers are Very Vanilla cut to 3 3/4 X 4 and DSP cut to 3 5/8 X 3 7/8
The gift card slot is covered with Very Vanilla at 1 1/4 X 4 and DSP at 1 1/8 X 3 7/8
The inside has a Very Vanilla that is 5 1/4 X 4
The right side DSP is evenly spaced on the end of large Very Vanilla and is 1 1/8 X 3 7/8.
Thank you for visiting with me today!!
Online exclusives are here to stay! Click on the photo and be taken directly to them in my online store. If you place an order, please use my Host Code listed just below.
HOST CODE
My NOVEMBER Host Code is 626NJVKN. Please use this code for orders under $150.00. I will have a small gift for those with orders over $50.00 in addition to the Perk Rewards Program. You can read all of the information at the top of the page in the Menu Bar under SHOP / Perks.
Thank you for stopping by today. I hope you enjoyed today’s project and will come back. I do read and reply to all of the comments individually. They mean a lot to me. Please reach out if you have a question.
The content in this blog is the sole responsibility of Jackie Beers as an Independent Stampin' Up! Demonstrator. The use of and content of classes, services or products offered is not endorsed by Stampin' Up!