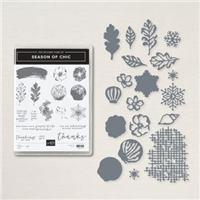
I have been looking through stamp sets from the Annual Catalog to see what I have not been using. The Season of Chick jumped out at me. The paper has always been a favorite, but I haven’t really used the stamp set as much. And with both the Mini and the Annual getting ready to retire, it seemed the perfect time to break it out. Plus I have a fun use for the paper.
Stamp and Die Bundle
It is difficult to pick a favorite part of this card. I love the papers, but also the flower and the Die cut layer. The bundle is the Season of Chic with the matching Chic Dies. That open weave layer is from the Die set. It really adds a lot to the card. The flower and sentiment are from the stamp set. The flower is a two step that is done in Smoky Slate and Petal Pink.
Papers
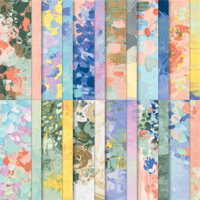
The Texture Chic Designer Series Paper is part of the Season of Chic Suite of products. So of course it was the perfect choice to pair with the bundle products. I love the soft and shine together. The fun pleating is done with a piece of the DSP. I found several versions of how to do the pleating on Pinterest and YouTube. Mine is sort of a mixture of a few.
To compliment the gold in the papers, and to cover the top of the pleating, I used the Gold and Rose Gold Specialty paper from the Annual Catalog. Just a strip was all that I needed. The open weave Die cut layer is also a scrap piece of the Textured Chic paper. The gold seems to pop even more after being Die cut!
Finishes
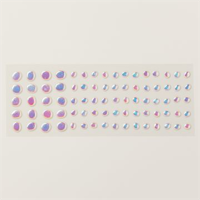
To complete the card I used the Banners Pick A Punch to flag the end of the sentiment strip. Then it is tucked under the flower. Of course there has to be bling! So I scattered some of the Flat Adhesive Pearls around the card and for the flower center. These remind me of Fresh Water Pearls with the different shapes and luster.
Thank you for stopping by!!
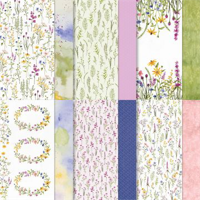
Click on the photo to see all of the Online Exclusives Products…….
HOST CODE
My March Host Code is ZF27VSFC. Please use this code for orders under $150.00. I will have a small gift for those with orders over $50.00 in addition to the Perk Rewards Program. You can read all of the information at the top of the page in the Menu Bar under SHOP / Perks.
Thank you for stopping by today. I hope you enjoyed today’s project and will come back. I do read and reply to all of the comments individually. They mean a lot to me. Please reach out if you have a question.
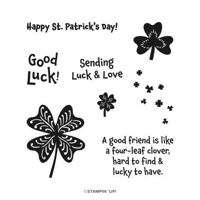
I am late getting my St. Patrick’s Day card out, but the day is not over yet! This has always been one of my favorite holidays. I am half Irish and love everything about it. So I had to share a card with the Lucky Clover set.
Stamps
The Lucky Clover stamp set is one that is simply fun! I love the shamrocks / clovers, the sentiments, along with the little extras that are included. It is part of a Punch Bundle, but sadly the Clover Punch was seriously popular. And it was not able to be restocked in a timely manner to be back before today. However, these clovers are really quite easy to cut out. I did both he large and the small one with no trouble.
The front sentiment is from the set as is the inside sentiment. I really love the inside one, as it is a perfect friend statement. And I added the little clover to go along with it. Here is the inside view.
Papers
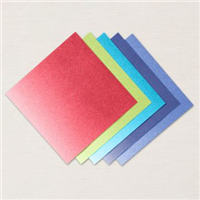
To get all of the green I wanted, I went a bit wacky with my choice of papers. Both of the DSP are from the Flowers & More Designer Series Paper from the Mini Catalog Host rewards. I love this paper and I know you can tell since I have used it quite a lot! But I found two different bright greens that I love, and then pulled the Shaded Spruce from the darker one. I believe Shaded Spruce is a perfect Irish Green. And I love the Parakeet Party also.
Dies and Embellishments
To add some extra to my bold DSP choices, I used the Scalloped Contours Dies to add the scallops to the striped piece. For the sentiment, I used the larger of the Double Oval Punch for some additional scallops. The Balmy Blue Ink may seem a bit out of place. It is pulled from the darker of the DSP and breaks up the greens a bit.
As a way to add some brightness, I added the Parakeet Party Metallic Ribbon to the card. And gave it a double bow. For some more Parakeet Party, I colored a few of the Pearls Basic Jewels with the Dark Parakeet Party Stampin’ Blends and spread them around the card. Actually I added more than I normally do. But hey, this is a holiday!!
Thank you for stopping in today!!!
Remember to check out the online exclusives….. Click on the photo to be taken directly to them in the Online Store.
HOST CODE
My March Host Code is ZF27VSFC. Please use this code for orders under $150.00. I will have a small gift for those with orders over $50.00 in addition to the Perk Rewards Program. You can read all of the information at the top of the page in the Menu Bar under SHOP / Perks.
Thank you for stopping by today. I hope you enjoyed today’s project and will come back. I do read and reply to all of the comments individually. They mean a lot to me. Please reach out if you have a question.
Welcome to InKing Royalty’s March Blog Hop! Despite the occasional cold spell or snowfall in some areas, we are well into Spring – and we are ready for the flowers to bloom. We are excited to share our flower-filled creations with you and hope you love them! After you read my post, I hope you’ll hop over to the next person on the list at the base of this post
It is currently below freezing here in Georgia! But as I came through one of the cities near me yesterday I saw all of the Wisteria blooming. There are several large trees covered in it in the downtown area. That was the answer for my “flower” !!
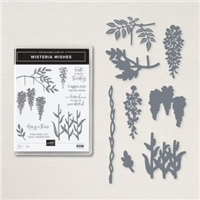
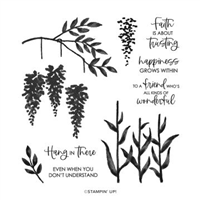
Stamp Bundle
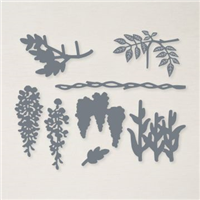
This gorgeous Wisteria is from the Wisteria Wishes Bundle. The matching Dies make it so easy to create a fun layout. I stamped the flowers using Highland Heather. The branch used is not the one that actually has the three hang down attachments for the wisteria. But I liked the leaves detail on this one and simply tucked the flowers underneath for a more realistic look. The branch is cut from Evening Evergreen card stock to pull the darkest section from the DSP.
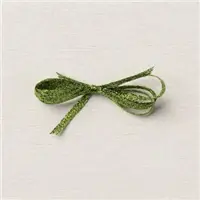
The sweet and simple sentiment is included in this stamp set. I wanted something fairly simple to not distract from the Wisteria or the DSP. Using the Label Me Fancy Punch and a small leaf stamp was perfect. The sentiment is stamped using Orchid Oasis Ink and the little leaf with Evening Evergreen. To tie these together I added just a strip of the Evening Evergreen Open Weave Ribbon.
Papers
My paper choices all came from wanting a purple for the Wisteria. I found this fun sheet of the Fancy Flora Designer Series Paper that has a variety of purples, as well as a couple of different greens. With the different purples I opted to go with Orchid Oasis for the card base. And with the darker Evening Evergreen branch, I opted for the softer Soft Succulent as the layer between the card base and DSP. All it took to finish this card was a few scattering of the Pearls.
Thank you for stopping by today. I hope you’ll hop along to the next stop on the blog hop, Pam Morris at Tap Tap Stamp. There’s lots of inspiration to be found in this group – and you don’t want to miss it!
Thank you for hopping along with us. If you get stuck during the Blog Hop, please use this line-up as a guide:
Click on the photo to be taken to all of the Online Exclusives…….
HOST CODE
My March Host Code is ZF27VSFC. Please use this code for orders under $150.00. I will have a small gift for those with orders over $50.00 in addition to the Perk Rewards Program. You can read all of the information at the top of the page in the Menu Bar under SHOP / Perks.
Thank you for stopping by today. I hope you enjoyed today’s project and will come back. I do read and reply to all of the comments individually. They mean a lot to me. Please reach out if you have a question.
Spring is definitely here in the South! Colors are popping out everywhere, along with the dreaded pollen. But the colors and new life are beautiful. The Make My Monday Challenge Blog is on the nose with the theme this time. It is Spring Colors. And my card is all about the bright colors.
You too can join in on the Make My Monday Challenge. Click on the link below and you will be taken to the challenge page. There you can see what the other designers have created for Spring Colors, and can also add your own card.
Papers
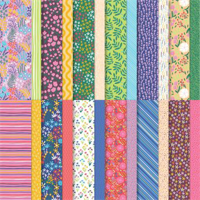
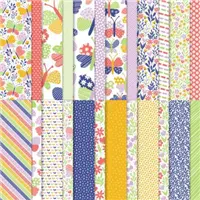
These bright papers were what I chose as my Spring Colors. They are both from the Butterfly Kisses Designer Series Paper in the Annual Catalog. These definitely gave me a few color choices to make. I decided on Highland Heather as the card base, with the fun mix of DSP for the other layers.
Circles
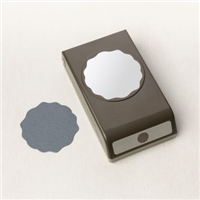
I have to comment on the two circles of the sentiment layer. These are the two New / Returning Circle Punches in the Online Exclusives available now. They are the 1 3/4″ and 2″ Circle Punches. I really love punches and these are actually two that I never got rid of. These were so popular that they were out of stock for a bit, but are back in inventory now.
Stamps and Dies
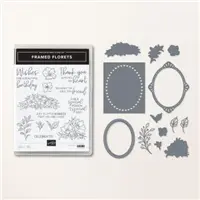
The papers did not have quite enough flowers for my theme. LOL!!!! I really just wanted to add something nice to the circle layers. So I chose the Framed Florets Bundle. The flowers are stamped with Memento Tuxedo Black Ink and colored to somewhat match the floral paper. The flowers are Fresh Freesia, with a Calypso Coral center, Mint Macaron leaves, and Parakeet Party for the fun balls. This was die cut using the matching dies from the Framed Florets Dies.
To finish the card, I added the simple sentiment of Celebrate at the top of the White circle. Then gave it some added definition with the 2022-2024 Matte Dots. Adding some Starry Sky and Parakeet Party dots goes along with the prominant colors.
Thank you for stopping by today!
Here is where you will find the Circle Punches……. Just click on this image.
HOST CODE
My March Host Code is ZF27VSFC. Please use this code for orders under $150.00. I will have a small gift for those with orders over $50.00 in addition to the Perk Rewards Program. You can read all of the information at the top of the page in the Menu Bar under SHOP / Perks.
Thank you for stopping by today. I hope you enjoyed today’s project and will come back. I do read and reply to all of the comments individually. They mean a lot to me. Please reach out if you have a question.
Bright and happy with a Cherry on top is the theme of today’s card. I have mixed fun designer paper with the Sweetest Cherry Bundle for you. It is definitely a Smile card!
Papers
I have to begin with the papers used on this card. The DSP is so pretty and seems like confetti raining down to me. This sheet is from the Flowers & More Designer Series paper from the Mini Catalog Host Rewards. I love all of the colors. And even though they do not totally match the cherry’s colors, they are all bright. For this card, that is all that matters.
But that is not the star of the show. I have a close up of the cherry for you. It is definitely the star! I am not sure where the idea came from, but I used the In Color Glimmer paper for the cherry and the leaves. That is the best idea I have had in quite a while. Here is the close up…..
The glimmer is just enough to add a perfect shade to the Sweet Sorbet red for the cherry. And the Parakeet Party is equally as bright for the leaves. A perfect pairing in my book. Plus the little strip of the Parakeet Party gives just a bit more glimmer and ties the DSP and White piece together perfectly.
Stamps and Punches
The sentiment is from the Sweetest Cherry stamp set. I stamped it using both of the cherry colors, Sweet Sorbet and Parakeet Party. The brightness almost makes you think they are embossed.
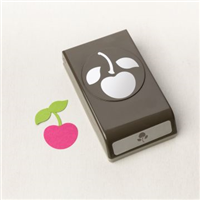
The Cherry punch used is part of the Sweetest Cherry Bundle. Because of using the Glimmer Paper I did not stamp the cherry. I did however add a layer of vellum behind the cherry just as something for it to hang on to. That is punched using the Decorative Circle Punch. For the final touch, I added one single Pearl to the cherry for the extra bit of highlight it deserves.
Thank you for stopping in today!
HOST CODE
My March Host Code is ZF27VSFC. Please use this code for orders under $150.00. I will have a small gift for those with orders over $50.00 in addition to the Perk Rewards Program. You can read all of the information at the top of the page in the Menu Bar under SHOP / Perks.
Thank you for stopping by today. I hope you enjoyed today’s project and will come back. I do read and reply to all of the comments individually. They mean a lot to me. Please reach out if you have a question.
Book Fold cards just seem to add a little extra to our creations. I love any Fun Fold, but this is a quick and easy one to do. There is a mixture of products on today’s card. That shows the flexibility of card making I believe.
Papers
I will admit that this paper is from Sale-A-Bration. However, all of Stampin’ Up!’s papers are coordinated to where this card could be easily exchanged for different colors.
My card base is Fresh Freesia. It is odd that now that it is time for it to retire I have discovered how flexible it is and how much I love it! I paired it with Rich Razzleberry to pull the colors from the paper. These shades of purple are very different but work well together. I added to the pairing by using both the polka dot paper and the Rich Razzleberry as tags for the sentiment layer.
Stamps
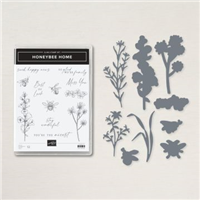
The sentiment and the stamped florals are from the Honeybee Home stamp set. Using colors from the papers, I colored both of the floral images with Stampin’ Blends. Since this is a fairly generic sentiment, and great for a lot of card giving reasons, I left the inside blank. Except that I added the flower again there. And I colored it the same as the one by the sentiment.
Dies and Punches
The flowers on the front of the card are cut using the matching Dies to the Honeybee Home Bundle. They are called Honeybee Blooms Dies. And the sentiment, which is from the stamp set, is cut using the Double Oval Punch. It seems a rare occasion that I do not use that punch!
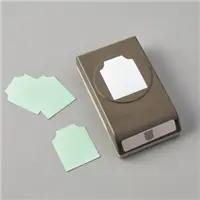
The tags anchoring the sentiment are both punched using the Essential Tag Punch. One is from the polka dot DSP and the other is the Rich Razzleberry card stock. They are overlapped and then finished with a bow from the Essential Baker’s Twine Pack in White. The last addition is one of the Brushed Brass Butterflies on the “book” spine.
Thank you for stopping by today!!
HOST CODE
My March Host Code is ZF27VSFC. Please use this code for orders under $150.00. I will have a small gift for those with orders over $50.00 in addition to the Perk Rewards Program. You can read all of the information at the top of the page in the Menu Bar under SHOP / Perks.
Thank you for stopping by today. I hope you enjoyed today’s project and will come back. I do read and reply to all of the comments individually. They mean a lot to me. Please reach out if you have a question.
The content in this blog is the sole responsibility of Jackie Beers as an Independent Stampin' Up! Demonstrator. The use of and content of classes, services or products offered is not endorsed by Stampin' Up!