Today I have a second card utilizing the Sending Cheer Bundle. This one features the sweet Gingerbread Man, or I supposed it could be a Ms. Gingerbread. Either way, it is adorable.
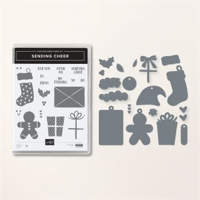
Stamp Bundle
The images from Sending Cheer Bundle definitely bring a Smile to anyone. This gingerbread popping out of the envelope is sure to do that. He, along with the envelope and sentiment are all part of the Bundle. And it is on the Last Chance List!! The fact there are matching dies and even some extra dies, like a Santa Hat, make this a must have.
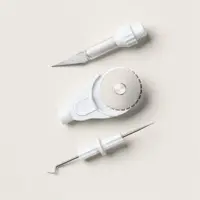
The gingerbread is stamped using Pecan Pie Ink, with Real Red Stampin’ Blends for the hearts. His facial features are stamped with Early Espresso Ink. For the sentiment I went with Real Red again to brighten up some of the darker colors. My idea for the envelope came from a card on Pinterest. It is stamped using Wild Wheat Ink. I then took the Take Your Pick Craft Knife and cut a slit in the top V shape where he is popping out.
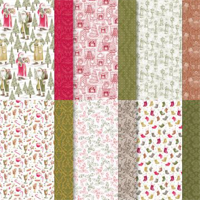
Papers
The card base is Copper Clay which is a touch darker than the Pecan Pie Ink of the gingerbread. Since the DSP is a white background, I used Mossy Meadow for the layer between the two. The gorgeous and fun DSP is from the Traditions of St. Nick Designer Series Paper. I really love all of the images in this paper pack. To finish the papers, I used Mossy Meadow again as the backing of the sentiment layers.
Finishes
To ground the different pieces, I opted to use the Sweet Sorbet Bordered Ribbon. I really like the white trim around the edges. And it is an easy ribbon to work with. The envelope is placed just a little right of center This allows room for the bow to the left and the sentiment layer overlapping a bit on the right. The shapes for the sentiment are one of my favorite punches. It is the Double Oval Punch. The final touch is a scattering of some of the darker Adhesive Backed Solid Gems.
Thank you for stopping by today!! I hope you have a great weekend.
Online exclusives are here to stay! Click on the photo and be taken directly to them in my online store. If you place an order, please use my Host Code listed just below.
HOST CODE
My DECEMBER Host Code is YJUB2G6X. Please use this code for orders under $150.00. I will have a small gift for those with orders over $50.00 in addition to the Perk Rewards Program. You can read all of the information at the top of the page in the Menu Bar under SHOP / Perks.
Thank you for stopping by today. I hope you enjoyed today’s project and will come back. I do read and reply to all of the comments individually. They mean a lot to me. Please reach out if you have a question.
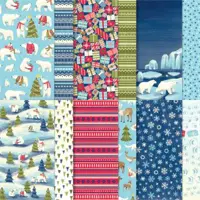
The papers used are the largest part of this card. It began with Night of Navy card stock that is 11 X 4 1/4 and scored at 1 1/2 and 5 1/2. Those are the important measurements. After that you can decorate as you see fit. I added the lovely Beary Christmas Designer Series Paper. Those packages on the front are a tad busy, but makes me think of anticipation of what is inside!! I am a kid at heart with gifts!!
The inside green paper is also from the same Beary Christmas DSP. As is the little bear on the inside by the sentiment. It is fussy cut from a scrap piece. To add some contrast to the front, and match the inside, I used Old Olive for the tag.
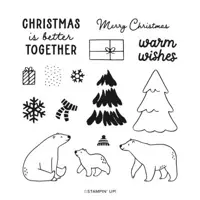
Stamps
All of the stamped images are from the Beary Cute stamp set. The bear is not the one that matches the Punch, which is part of the Beary Cute Bundle. So I fussy cut him as well. It is an easy cut. And I do not mind fussy cutting. The sentiment is included in the set also. It was intended as a straight line, like it stamps. But it just would not work that way. So I improvised and cut it in half.
Tag
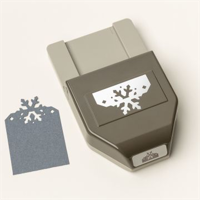
This perfectly sized tag is the new Sparkling Snowflake Tag Topper punch. I love the little snowflake at the top. But this could be used as other than a Winter tag I think. It is a bit difficult to see, but I ran the red ribbon through the lower opening of the snowflake and down the front of the tag. Then it comes up the back and meets again at the top. The bow is separate and added with a glue dot. I did not realize that the bear and sentiment would almost totally cover the ribbon. It does look really cute wrapped around that way.
To finish the tag and the card, I added a touch of bling. This is my normal, but I was very restrained today. The paper is so busy that I knew bling would get lost on the DSP. So I ended with a single Adhesive Glitter Sequin in matching blue for the bear’s scarf. The size and glitter adds just the right amount of bling!
Thank you for stopping by today!!
Online exclusives are here to stay! Click on the photo and be taken directly to them in my online store. If you place an order, please use my Host Code listed just below.
HOST CODE
My DECEMBER Host Code is YJUB2G6X. Please use this code for orders under $150.00. I will have a small gift for those with orders over $50.00 in addition to the Perk Rewards Program. You can read all of the information at the top of the page in the Menu Bar under SHOP / Perks.
Thank you for stopping by today. I hope you enjoyed today’s project and will come back. I do read and reply to all of the comments individually. They mean a lot to me. Please reach out if you have a question.
Today’s card features the Sending Cheer Bundle. These fun images are great for tags or cards. My project is a card featuring the lovely stocking.
Bundle
The Sending Cheer Bundle is one that is a bit of whimsy, really pretty, and versatile. As I said at the top, these images are great for making gift tags or cards. This card is really quick and easy. The matching dies for Sending Cheer cut the stocking in two parts. This makes it so easy to add the white cuff. I opted to use just card stock instead of stamping or using DSP for the stocking body.
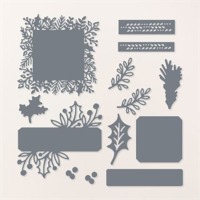
The holly leaves and berries are stamps included in the set. They are then die cut with matching dies. The sentiment is also included in the stamp set. I really love this one. The mix of fonts is great as is the sweet sentiment. It is embossed with White Embossing powder to help it pop against the Cherry Cobbler card stock.
Paper
The card base is Cherry Cobbler card stock with a layer of Basic White. This helps the DSP to really stand out. The lovely plaid is from the Joyful Designer Series Paper. It says Christmas to me. (Sadly this paper is sold out, however there are several others still available that will work perfectly. You may have some in your stash.) I went a bit out of the norm on the “mantle” . The wood look gold piece is from the same Joyful DSP. I saw it and immediately thought it would be perfect for the mantel to hang the stocking. It is simply a 1/2″ tall strip.
Finishes
There are not a lot of extras needed on this card. Of course I had to have bling. So I added some of the Iridescent Pearls scattered around. The sentiment is die cut, it is very subtle, with a die from the Christmas Classics Dies. It was the perfect length and has rounded corners. I think it makes the sentiment look a little more classy.
Thank you for stopping by today!!! Remember to check out the Clearance Rack Refresh from yesterday, and the Last Chance list below.
Online exclusives are here to stay! Click on the photo and be taken directly to them in my online store. If you place an order, please use my Host Code listed just below.
HOST CODE
My DECEMBER Host Code is YJUB2G6X. Please use this code for orders under $150.00. I will have a small gift for those with orders over $50.00 in addition to the Perk Rewards Program. You can read all of the information at the top of the page in the Menu Bar under SHOP / Perks.
Thank you for stopping by today. I hope you enjoyed today’s project and will come back. I do read and reply to all of the comments individually. They mean a lot to me. Please reach out if you have a question.
The first thing I want to say is to CHECK OUT THE CLEARANCE RACK! It has been updated again with some great discounts.
Today’s card is a Festive & Fun one. That is the set used and a favorite with the adorable animals. This one is To You From Me!
Stamps
The Festive & Fun stamp set is one I have used a few times. The animals in this set are precious. And you know I love the cute animal images. This one I call Mr. Moose. There was a large moose several years ago that I adored. This one is a much smaller version but just as cute. And him serving cake is so sweet.
The sentiment is from the stamp set also. There is more to it than what is shown. I cut off the first part to make it fit better and it did not alter the sound of the sentiment.
Note: I have been embossing recently and am loving it. Previously I would never get a good image. Well……my Versamark Ink was really old and did not improve with re-inking. So I bought a new one. And it is a world of difference. The pads last a long time, but this was one I bought maybe 20 years ago. Sometimes it is not me and actually is a problem with the tool. Now I am loving embossing again. The bolder and brighter sentiment is always a good thing.
Papers
The fun plaid papers are from the Joy of Christmas Designer series Paper. I love plaid and being able to pair both the Shaded Spruce and Real Red plaid together was a good thing. Sadly this DSP is sold out. I apologize, but if you have it then you are good to go. And if not then there are tons of other papers that will work just as well. And I know everyone is not a fan of plaid.
The card base is Shaded Spruce and I added a Real Red tag behind the Shaded Spruce Plaid tag. To help the colors separate and to compliment Mr. Moose, I added a layer of Wild Wheat. This is such a versatile color in my opinion.
Finishes
The layers for this card are normal layers so I added the circle for Mr. Moose. He is cut using the 2 3/8″ Circle Punch. It is a tiny bit smaller than him. But the bottom is covered by the sentiment anyway. My favorite parts are the tags! I love this tag. It is a perfect size for gift tags or layers like this. The Merriest Trees Dies is where it is from. And I have said it before, but I am so thrilled that this bundle is carrying over. I love those trees, but the tag is my favorite.
The sentiment I mentioned earlier. It is simply fussy cut and raised with Stampin’ Dimensionals over the bottom of the circle. Since I cut off the first couple of words it was simpler to just cut a rectangle and leave it at that. The embossing makes it pop.
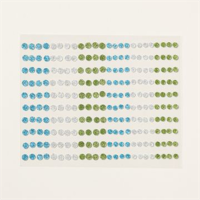
The final touch is the bling! These are the Blooming Pearls embellishments. There are a variety of colors but I chose the greenish ones. They are scattered on the tag and a third one on the sentiment.
Thank you for visiting today!!!
Online exclusives are here to stay! Click on the photo and be taken directly to them in my online store. If you place an order, please use my Host Code listed just below.
HOST CODE
My DECEMBER Host Code is YJUB2G6X. Please use this code for orders under $150.00. I will have a small gift for those with orders over $50.00 in addition to the Perk Rewards Program. You can read all of the information at the top of the page in the Menu Bar under SHOP / Perks.
Thank you for stopping by today. I hope you enjoyed today’s project and will come back. I do read and reply to all of the comments individually. They mean a lot to me. Please reach out if you have a question.
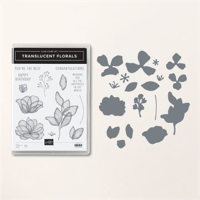
Today’s card showcases the Translucent Florals Bundle. This bundle is really fabulous and I am thrilled to say that it is carrying over!
Bundle
The Translucent Florals Bundle is really beautiful images with well scripted common sentiments. It is going to carrying over , however the bundled price will not carry over. So if this is on your Wish List, it is 10% less now as a bundle.
To create this card, I stamped the two flowers and the large leaves image using Soft Sea Foam Ink. And it is stamped on Vellum card stock. Sadly, this is not really clear in the photo. At least it does not stand out well. In person, it is much more apparent. But I still love the look this created. And I failed to mention that it is a Fun Fold. 🙂
Sentiment
There is not a front sentiment on this card which I have done a couple of times recently. This is really shocking and I did not even realize it. LOL!!! However the inside sentiment is from the Sending Smiles stamp set. It’s simplicity goes well with the card.
Papers
The card base is Lost Lagoon with layers of different pages of the Hello Irresistible Designer Series Paper. I still love this paper and the patterns and shading it has. Here is the open view of the card.
The Fun Fold opens to show the three different patterns of the DSP. And the simple sentiment. The Basic White layer is a full 4 X 5 1/4 and I simply added the far right DSP piece flush with the top, bottom , and right side. You can see the Vellum card stock a little better from the open view. I will caution you to be careful when stamping on Vellum. It is slick, so carefully stamp and hold the block steady. And it does not dry quickly at all! I let it sit for a few minutes and still used my Heat Tool to make sure it was dry before I did the die cutting. Better safe than sorry!
Finishes
The vellum pieces are attached to the edge of the front fold with Glue Dots strategically placed. Vellum is a bit difficult to adhere since you can see through it. I was careful to hide the glue dot behind the next layer as I added the images. And for the flowers, I added the Glue Dot to the center. Then I finished with a trio of the smallest Blooming Pearls for the flower centers.
Measurements
card base of Lost Lagoon is 5 1/2 X 8 1/2 and scored at 2 1/8 and 4 1/4. Fold and burnish to create the folds.
DSP layers are all three cut to 2 X 5 1/4
Inside Basic White is 4 X 5 1/4 with the DSP adhered over the right half. * You could cut the Basic White to fit without the DSP over top.
Thank you for stopping in today!!
Online exclusives are here to stay! Click on the photo and be taken directly to them in my online store. If you place an order, please use my Host Code listed just below.
HOST CODE
My DECEMBER Host Code is YJUB2G6X. Please use this code for orders under $150.00. I will have a small gift for those with orders over $50.00 in addition to the Perk Rewards Program. You can read all of the information at the top of the page in the Menu Bar under SHOP / Perks.
Thank you for stopping by today. I hope you enjoyed today’s project and will come back. I do read and reply to all of the comments individually. They mean a lot to me. Please reach out if you have a question.
The content in this blog is the sole responsibility of Jackie Beers as an Independent Stampin' Up! Demonstrator. The use of and content of classes, services or products offered is not endorsed by Stampin' Up!