I hope you have been enjoying flipping through the new Annual Catalog and adding to your Wish List, or purchasing these awesome new products. Each time I go through the catalog, see someone else’s projects, or just play with my new items, I fall more in love!
Simply Elegant
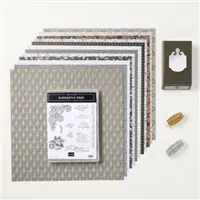
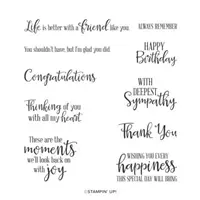
Today I am sharing the Simply Elegant Suite of products. Oh My!!! My first pass or two through the catalog I did not even slow down for page 68 – 69. On the second pass I decided I loved the paper and the punch. Punches are a favorite of mine because they are so quick and easy to do multiples. And the paper is fabulous with both Gold and Silver Foil highlights.
After having seen a few demonstrations with this Suite, I had to look at it again. And then I purchased it. As they say….The rest is History!! I am in love, as usual. LOL!! The sentiments in the stamp set are beautifully scripted and so sweet. The flower reminds me of one from many years ago. I would color it in a variety of colors with Markers direct to rubber. It would always be a simple card that allowed the flower to shine. This flower is going to be another one of those! Although I did not use it on this card.
Today’s Project
Even in the photograph you can see the bronze, gold and silver foil details in this piece of the Simply Elegant Designer Series Paper. The paper and the detail of the Elegant Tag Punch both draw you in. I do have to say that I did not complete my plan on the punched tag. This tag punch is designed to be made any length you wish. The width needs to be 1 3/4″ (actually a smidge narrower) but the length is up to you.
I stamped the sentiment and was so excited that it fit perfectly with the width of the tag. For me the easiest way to feed the paper into the punch was from the top, as you normally would. I then used my Take Your Pick Tool with the piercer end and pulled the bottom edge out as it began emerging into the open area. I then punched, which only punched the top part. The plan was to add a stamped image to the bottom part and then punch the rounded bottom. Well Duh!!! I was so excited about the top that I totally forgot my plan and went ahead and adhered it to the card!! It does not look bad, just not what my plan was. Playing with new products is so exciting! And I have been a demonstrator for 15 years! The fun never diminishes.
One thing I have to point out about this Simply Elegant Suite is the price. The price for Stamps, Punch, Designer Series Paper, Gold & Silver Trim is less than a lot of Bundles where you get stamps and dies. This entire Suite is 59.25. This price would also qualify you for my monthly Free gift for orders over $50.00, as well as a Blue Star Rewards star for more Free products from me.
Measurements and Directions
The card base is Daffodil Delight cut 4 1/4 X 11
The Basic Black layer is cut 4 X 5 1/4
The Smoky Slate layer is cut 3 7/8 X 5 1/8. It is stamped on using Smoky Slate Ink.
The DSP is cut 2 X 5 1/8 and is adhered even with the top , bottom, and left side of the Smoky Slate layer.
The ribbon is retired Bumblebee In Color Ribbon.
The punched tag is adhered with Stampin’ Dimensionals and has the addition of the Elegant Faceted Gem.
Thank you for stopping by today. I hope you enjoyed today’s project and will come back. I do read and reply to all of the comments individually. They mean a lot to me. Please reach out if you have a question.
Keep Calm and Keep On Stamping,
Jackie
Now Is A Great Time To Join My Team!
It’s a fabulous time to JOIN MY STAMPIN’ UP! TEAM. You get even MORE FREE products in the customizable Starter Kit. From 4–31 May, new team members can get $125 USD $155 USD worth of products for only $99 USD + free business supplies + free shipping + all the fun being a part of Stampin’ Up! If you have an interest I would LOVE to talk with you about all of the Fun!!
HOST CODE
My May Host Code is SGHBX62J Please use this code for orders under $150.00. I will have a small perk for those with orders over $50.00
I have another Fun Fold to share with you today. I received a wonderful card using this Fun Fold in a swap a few months ago from fellow demonstrator Gina Wheeler. I knew as soon as I saw it that it would be a favorite fold.
Pansy Petals Suite
Stampin’ Up! has kept the Suites of Products, but has lessened the number of items in a suite. This also lowers the price (Yay!) The Pansy Petals Suite was one of my first choices in the Annual Catalog. I once read a book that mentioned pansies as being Happy Flowers. I love that and think of it every time I see this Bundle and Paper.
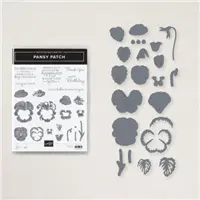
The sentiment on my card is from the Pansy Patch stamp set. It is so simple and just right! The set has a variety of pansies and layers as well as great sentiments. The sentiments are a mix of different fonts, which is always a favorite of mine. There are matching dies for cutting the stamped images and some of the DSP.
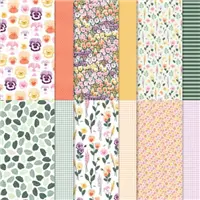
The Pansy Petals Designer Series Paper is so vibrant and has such wonderful colors. I believe this is going to lead me to try a variety of different color combinations. I used two different sheets of the paper for this project. The smaller pansies are so pretty in the patterned paper. But I also used one with larger pansies that match one of the dies in the Bundle. You can stamp and then die cut the pansy, I just opted for the easy choice of die cutting the paper.
Fun Fold
Now for the Fun Fold part of the card. It is a few quick cuts that make a great end product. Isn’t that the best kind? The next photo shows the two outer sides open with the center still closed. You can see the cross piece that holds the sentiment layer. This view also highlights the different DSP piece for when the card is opened.
And here is the card totally open to the inside. I added a third of the die cut pansies to the inside layer.
Measurements and Directions
The base layer of Fresh Freesia is cut 8 1/2 X 5 1/2, scored and folded at 4 1/4.
With the card in landscape mode, place the front section of the card on the Paper Trimmer so the scored fold is horizontal on the trimmer.
Measure over 1 1/4″ and cut just down to the score line.
Slide the card over and repeat this cut at 4 1/4″. This gives you the two side sections.
Cut 4 pieces of Soft Sea Foam to 4 1/8 X 1 1/8
Cut 1 piece of Soft Sea Foam to 4 1/8 X 2 7/8
Cut 4 pieces of DSP (2 each of 2 different patterns) 4 X 1
Cut 1 piece of DSP 4 X 2 3/4
Cut 1 White to 4 1/8 X 2 3/4 for inside
Adhere the layers of cardstock and DSP to the appropriate section
Cut a Fresh Freesia scrap to 5 1/2 X 1, this is the cross bar where the sentiment goes.
Adhere that cross piece only to the front of the two outside sections. It Does Not adhere to the center section.
Decorate as you wish.
Finishing
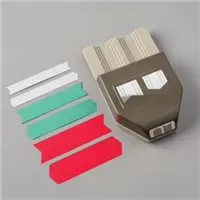
To finish this card I added the sentiment by stamping on White cardstock and using the Banner Pick A Punch to make the flagged end. I also added a single rhinestone to the top pansy flower. As I mentioned earlier I also glued one of the die cut pansies to the inside sentiment section.
Thank you so much for stopping by here today. I hope you enjoyed this Fun Fold project and will stop by again. I do read and reply personally to all comments and questions. So feel free to reach out.
Keep Calm and Keep On Stamping,
Jackie
It’s A Great Time To Join My Team!
It’s a fabulous time to JOIN MY STAMPIN’ UP! TEAM. You get even MORE FREE products in the customizable Starter Kit. From 4–31 May, new team members can get $125 USD $155 USD worth of products for only $99 USD + free business supplies + free shipping + all the fun being a part of Stampin’ Up! If you have an interest I would LOVE to talk with you about all of the Fun!!
HOST CODE
My May Host Code is SGHBX62J Please use this code for orders under $150.00. I will have a small perk for those with orders over $50.00
Welcome to InKing Royalty’s May Blog Hop! During this year’s blog hops, we are having fun with our stamping favorites – our favorite themes for seasonal cards and projects. This month’s projects are centered around Travel & Transportation, so prepare yourself for a fun journey. We are excited to share our creations with you today! After you read my post, I hope you’ll hop over to the next person on the list at the base of this post.
Last week I was “chillin’ on the beach”. So I decided that would become the theme for my card. For me at least there are two relaxing places, the mountains and the beach. I hope you get the Relaxing feeling from this card.
Visualize
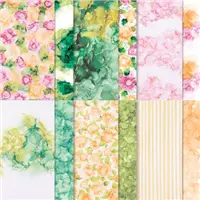
Can you see the water in this fabulous paper? This piece is from the Expressions In Ink Designer Series Paper. The patterns and colors truly are beautiful. This is a back side, you know how I love to use the opposite sides, of one with gold highlighting a similar pattern as this. The swirly colors of the Gulf water is what I see here.
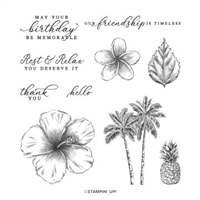
To create the sandy beach, I tore a piece of Sahara Sand cardstock in a rough and rounded direction. The palm trees and other stamps are from the Timeless Tropical stamp set. I used Markers to Red Rubber technique to color the palm trees. After stamping, I did touch up the bark area with a Light Crumb Cake Stampin’ Blend. There are three different greens used for the leaves. They are Just Jade, Soft Succulent, and Evening Evergreen Stampin’ Write Markers. Sadly the Stampin’ Write Markers are not sold individually. They are available in Color Families however.
Highlights
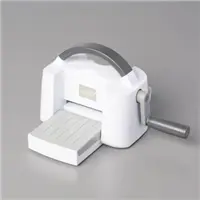
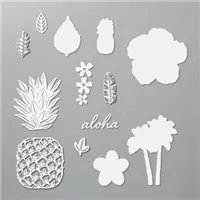
To finish off the beachy scene, I die cut everything using the matching dies named In The Tropics Dies. The flowers are one die that cuts three different flowers. The tiny pieces you see on the beach are the centers of the flowers. They look like miniature flowers and were too cute to discard.
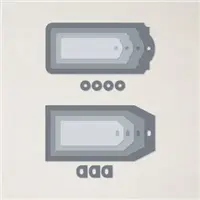
The sentiment is from the Timeless Tropical, as well as all of the stamped images. The tag is from the stand alone dies called Tailor Made Tags Dies. I love these tags. Please check them out if you have not noticed them before. They are so handy!
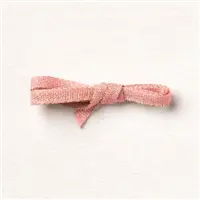
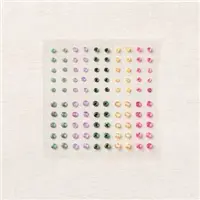
The finishing touches are the flowers on the beach and the tag. I added the new 2021-2023 In Color Jewels for the flower centers. The ribbon pull on the “luggage tag” is the shimmery Flirty Flamingo Metallic Ribbon. Sometimes having the metallic threads makes the ribbon a bit stiff. This one is very soft and pliable.
Thank you for stopping by today. I hope you’ll hop along to the next stop on the blog hop, Candy Ford at Stamp Candy. There’s lots of inspiration to be found in this group – and you don’t want to miss it!
Thank you for hopping along with us. If you get stuck during the Blog Hop, please use this line-up as a guide:
It’s a fabulous time to JOIN MY STAMPIN’ UP! TEAM. You get even MORE FREE products in the customizable Starter Kit. From 4–31 May, new team members can get $125 USD $155 USD worth of products for only $99 USD + free business supplies + free shipping + all the fun being a part of Stampin’ Up! If you have an interest I would LOVE to talk with you about all of the Fun!!
HOST CODE
My May Host Code is SGHBX62J Please use this code for orders under $150.00. I will have a small perk for those with orders over $50.00
A young lady that I think of as a God-Daughter, and her Fiance, have just graduated from Nursing School. She was even Summa Cum Laude !! WooHoo!!! I made them each a card using the Suit & Tie Dies which makes an awesome Nurse’s Uniform . Although some of the products have retired, I still wanted to share the cards with you. They had to see the cards before anyone else!
Female Version
I made the cards a bit early, and was not thinking about this color now being retired. Purple is her favorite color which made my color choice quite simple.
Male Version
It is the same card, just Misty Moonlight in place of Purple Posy cardstock.
Products
I will apologize again regarding using now retired products. But I could not post the cards until I gave them to the awesome couple. The color and the center of the stethoscope can be easily duplicated with other products if you do not have the retired ones.
The same products were used on each card. I just changed the colors a bit. The cute heart pattern inside each of the stethoscopes is from the newly retired Heartfelt stamp set. The Congratulations at the bottom of each card is from the Peaceful Moments stamp set. The sentiment fit perfectly across there. It is stamped using Memento Tuxedo Black Ink.
The stethoscope is made using two of the Layering Circles Dies. One is Silver Foil and the other White cardstock. For the black rubber part, I took a scrap of Basic Black and just rough cut with my Paper Snips an arch. Then it was easy to trim to fit.
Measurements:
The base of each card is 4 1/4 X 11, scored and folded at 5 1/2.
The White layer is 4 X 5 1/4
The Misty Moonlight and Purple Posy layers are 3 7/8 X 5 1/8
The pocket is from a scrap of each color.
I would Love for you to Join My Team !!!
It’s a fabulous time to JOIN MY STAMPIN’ UP! TEAM. You get even MORE FREE products in the customizable Starter Kit. From 4–31 May, new team members can get $125 USD $155 USD worth of products for only $99 USD + free business supplies + free shipping + all the fun being a part of Stampin’ Up! If you have an interest I would LOVE to talk with you about all of the Fun!!
HOST CODE
My May Host Code is SGHBX62J Please use this code for orders under $150.00. I will have a small perk for those with orders over $50.00
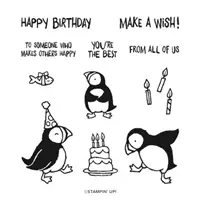
Today’s card is a Slim Line card starring the Party Puffins. I could not decide if the card needed MORE. Do you ever have those thoughts? For this time I decided to ignore that thought and go with it as is.
Also, I have a couple of pictures to share with you from my beach vacation. The weather was better than expected and a wonderful, relaxing, few days were enjoyed by all.
Make A Wish
I believe these little guys are just adorable! Stampin’ Up! and their extremely talented artists do amazing animals with movement and adorable faces. There is quite a lot of white space on this card. Slim cards sort of lean that way for me, but I decided not to compete with the cute guys and left them to shine alone.
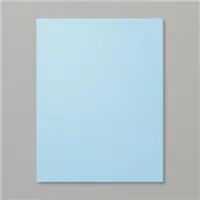
I paired the adorable Party Puffins with the stand alone die set of Tailor Made Tags. These are two different styles of tags that have multiple layers for each. I used the same tag for each layer here. This was mostly due to limited space as I did not want to crowd in on that right side Puffin too much. The partial showing of the Balmy Blue tag underneath works pretty well.
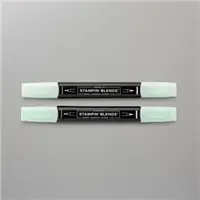
The too cute little fish is part of the Party Puffin stamp set. I colored him with Stampin’ Blends and then fussy cut him. Even though he is small, it is pretty easy to cut out. Plus layering him over white helps the edges of white left behind to blend into the background. He really draws your eye to the tags.
Measurements:
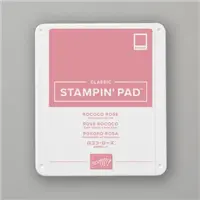
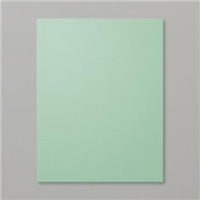
Base of Mint Macarron is 7 1/2 X 8 1/2, scored at 3 3/4
Balmy Blue is cut to 3 1/2 X 8 1/4
White is cut to 3 1/4 X 8
God’s Artwork at the Beach
Ok. Here are a couple of beach and sunset shots to show why I was not thinking of posting this past week.
Thank you for coming back to see me after my vacation. I have posts ready for all week long, so please stop by tomorrow for another new project.
Join My Team
It’s a fabulous time to JOIN MY STAMPIN’ UP! TEAM. You get even MORE FREE products in the customizable Starter Kit. From 4–31 May, new team members can get $125 USD $155 USD worth of products for only $99 USD + free business supplies + free shipping + all the fun being a part of Stampin’ Up! If you have an interest I would LOVE to talk with you about all of the Fun!!
HOST CODE
My May Host Code is SGHBX62J Please use this code for orders under $150.00. I will have a small perk for those with orders over $50.00
The content in this blog is the sole responsibility of Jackie Beers as an Independent Stampin' Up! Demonstrator. The use of and content of classes, services or products offered is not endorsed by Stampin' Up!