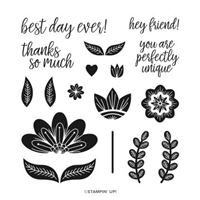
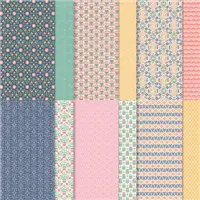
I have made this same Interlocking Gate Fold card previously. Today is simply using different DSP and a different stamp set. This version is using the Sweet Symmetry Designer Series Paper along with the In Symmetry stamp set.
Here is a view of how it opens.
Fun Fold
The Interlocking Gate Fold, that is what I call it, is a fun and easy card to make. The only difficulty is aligning the bars across the front to be equal distance apart. The top and bottom bars are connected by one that is hidden. The flower is attached to the hidden bar. These two are attached to the card on the left side. The center bar is by itself and is attached on the right side.
Products
The In Symmetry stamp set and the Sweet Symmetry Designer Series paper are two of the four products in the Sweet Symmetry Suite of products. I did not use the punch which Bundles with the stamp set, or the matching Flirty Flamingo ribbon.
To make the flower, I stamped the large flower stamp twice. It is a photopolymer stamp set. I inked and stamped onto a square of Basic White cardstock. The first time I had the flower in the straight up, normal position. For the second stamping, I re-inked and turned it upside down. Because it is photopolymer, I could see pretty clearly the bottom of the first stamping. So lining them up was pretty simple. Then all I needed were my handy Paper Snips to fussy cut the flower out. The final touch was adding a Blue Adhesive Gem to the center of the flower.
Previous version with directions
Click HEREfor the link to the previous version of this card. I have all of the sizing and directions in that post. If you have any questions, please do not hesitate to contact me. I am happy to help you.
Designer Series Paper Sale
The picture below shows the Designer Series Papers that are included in the Sale. There are 9 to choose from!!
HOST CODE
My July Host Code is 2GKGF4Q7. Please use this code for orders under $150.00. I will have a small gift for those with orders over $50.00 in addition to the Perk Rewards Program. You can read all of the information at the top of the page in the Menu Bar under SHOP / Perks.
Thank you for stopping by today. I hope you enjoyed today’s project and will come back. I do read and reply to all of the comments individually. They mean a lot to me. Please reach out if you have a question.
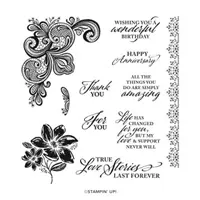
Today I am using a stamp from the Elegantly Said stamp set. Except the card is not at all elegant! It is fun and sort of loud. And that is okay with me!!
Color
Doesn’t the Magenta Madness sort of shout out for you to “look here”? I love the brightness! It is softened quite a bit with the DSP and the Gray Granite. Not everyone is into really bright and I think this would be acceptable to most folks.
I chose the bright Magenta Madness and Polished Pink for the flowers first. And yes that is different because I usually get the color from the DSP. But since this piece of the Bloom Where You’re Planted Designer Series Paper sheet doesn’t have much in the way of color, I had to come up with my own. The Evening Evergreen for the stem and leaves also keeps the pinks from all running together.
Technique
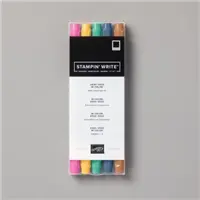
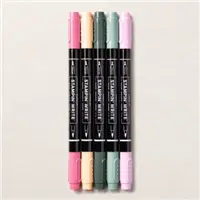
This is an old technique that I often wonder if it is used very much anymore. I colored the red rubber stamp with Stampin’ Write Markers. It doesn’t seem that as many people purchase the Markers any longer. They now come in the Color Families and that makes it a bit more of a purchase . The In Color Families are 5 markers for 15.00 and the Color Family markers are 10 markers for 30.00. Since they seem to last forever, I think these are still a very good price point.
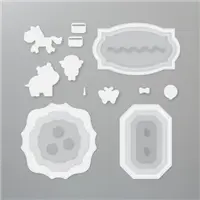
Before I stamped the flowers, I die cut the shape using the Hippo & Friends Die set. I adore the shapes that this set has for layering. I die cut first to make sure I had enough space since I was using a scrap of paper. Then it was just color the red rubber stamp with the markers, give it a little huff (or as a fellow demonstrator once said “the breath of life”!) This is to moisten the ink well in case it is beginning to dry on the stamp. Same idea as using the water and the Simply Shammy to clean the stamps.
Finishing Touches
I glued all of the layers onto the Magenta Madness base card. With Stampin’ Dimensionals added to the back of my stamped image, But with the backings still attached. it was easy to play with the ribbon and decide how I wanted it to look.
After making a final decision, I added just a couple of short lines of Stampin’ Seal beneath where the image would be placed. Weaving the ribbon back and forth was a fun minute of play time trying to get it to stick where I wanted it to be and not where it wanted to be! With the stamped image set into place you could not see the mess of ribbon underneath. That is my secret!
Once again, I have used DSP that is part of the Designer Series paper Sale! You still have a bit more time to stock up on this gorgeous paper.
The picture below shows the Designer Series Papers that are included in the Sale. There are 9 to choose from!!
HOST CODE
My July Host Code is 2GKGF4Q7. Please use this code for orders under $150.00. I will have a small gift for those with orders over $50.00 in addition to the Perk Rewards Program. You can read all of the information at the top of the page in the Menu Bar under SHOP / Perks.
Thank you for stopping by today. I hope you enjoyed today’s project and will come back. I do read and reply to all of the comments individually. They mean a lot to me. Please reach out if you have a question.
Welcome to InKing Royalty’s July Blog Hop! During this year’s blog hops, we are having fun with our stamping favorites – our favorite themes for seasonal cards and projects. This month’s projects feature Christmas! I hope you are in a Holiday mood because there is a lot of Christmas fun headed your way. We are excited to share our creations with you today! After you read my post, I hope you’ll hop over to the next person on the list at the base of this post.
Christmas is my favorite time of year for card making. I am very excited to share with you a card using two of the Christmas sets in the upcoming Mini Catalog.
Stockings
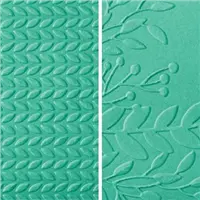
The stockings are so darn cute!! They are from the Stockings Dies as part of the Sweet Stockings Suite of products. For this card I only used the stockings from the suite. I wanted them to be the star of the show. Instead of stamping the design stocking, I used the Greenery Embossing Folder to give them the knitted looking texture. The toe layer is part of the dies as is the front banner looking lever holding the stockings.
I added just a simple sentiment of “Joy” by going with a third stocking. This one is cut from the Tidings of Christmas Designer Series Paper. I then used Cherry Cobbler Ink to stamp the Joy. The Joy and the inside sentiment are both from the Whimsical Trees stamp set. That is another great set!
Colors
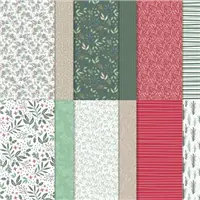
The color choices all came from the gorgeous DSP. As mentioned above, it is the Tidings of Christmas Designer Series Paper from the Annual Catalog. I fell in love with this piece immediately. For a different look to my card, I went with Pool Party as the base color. It is not a listed color of the paper stack but works perfectly.
The Sahara Sand also works perfectly with this sheet of paper. I used it to separate the base and DSP. The lever on the front has a little strip of another sheet from the DSP pack. To bring out the Real Red / Cherry Cobbler of the paper, I added that strip to hang the stockings from. And to also stamp the Joy on the center stocking.
Layout and Measurements
This card is one I have seen several times lately. I think of it as an offset gate fold card. I have already played with a variety of different sizes of the folds. Here are the measurements for this one.
Base of Pool Party is cut to 4 1/4 X 11 and scored at 4 & 9 1/2
Sahara Sand is cut to 4 X 3 3/4 and 4 X 1 1/4
DSP is cut to 3 7/8 X 3 5/8 and 3 7/8 X 1 18
Inside White layer is 4 X 5 1/4
Here is a view of the open card. I added an extra stocking there as well.
Reminder that the stockings and sentiments are from the Stockings Dies and the Whimsical Trees (sentiments) stamp set. These products are in the Mini Catalog that goes live on August 3rd.
Thank you for stopping by today. I hope you’ll hop along to the next stop on the blog hop, Marylin Jones at Stamp With MJ. There’s lots of inspiration to be found in this group – and you don’t want to miss it!
Thank you for hopping along with us. If you get stuck during the Blog Hop, please use this line-up as a guide:
The picture below shows the Designer Series Papers that are included in the Sale. There are 9 to choose from!!
HOST CODE
My July Host Code is 2GKGF4Q7. Please use this code for orders under $150.00. I will have a small gift for those with orders over $50.00 in addition to the Perk Rewards Program. You can read all of the information at the top of the page in the Menu Bar under SHOP / Perks.
Thank you for stopping by today. I hope you enjoyed today’s project and will come back. I do read and reply to all of the comments individually. They mean a lot to me. Please reach out if you have a question.
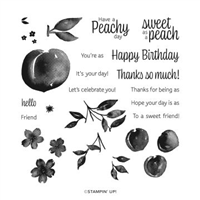
I know I have used the Sweet As A Peach stamp set a few times. It is just so darn cute!!! For today’s version I have added a little bit of a fun fold / layout. It is still super sweet!
And here is a view of the inside
Layout / Fun Fold
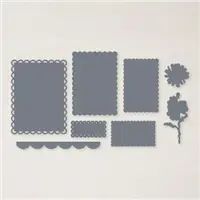
This is another simple fun fold that looks very nice. The base card is 5 1/2 X 8 1/2, scored at 4 1/2. Then I cut off 2 1/4 from the right edge of the front section. (Save that piece for another project) I used the second largest of the Scalloped Contours Dies for the top layer. It is centered and only adhered to the left section. The front focal layer is the next smaller of the Scalloped Contours Dies. I cut two pieces of Basic White with this. One is used on the inside.
Colors
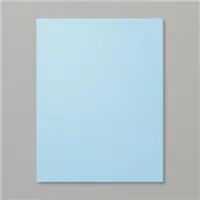
As always, the DSP helps with color choices. The Balmy Blue is from the little blue flower in the You’re A Peach Designer Series Paper. I chose the softer striped blue DSP as a complimenting piece to the flower sheet.
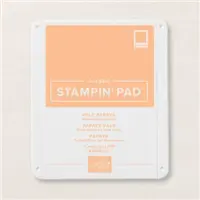
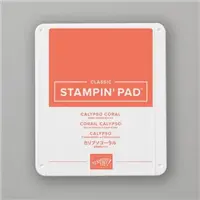
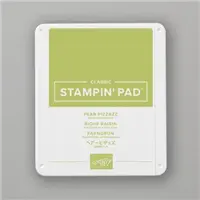
The peach is inked using the Pale Papaya Ink pad. I then used a sponge to add a light touch of Calypso Coral to the side and top of the stamp. (Note: when doing this technique, get a little ink on your sponge and then tap it onto the stamp. Do not rub.) The leaf is stamped with Pear Pizzaz Ink. Both sentiments are stamped using Calypso Coral Ink.
Designer Series Paper Sale
The paper sale is in the last 2 weeks. I have once again used one of the papers included in the sale. You can see how gorgeous this paper is!
The picture below shows the Designer Series Papers that are included in the Sale. There are 9 to choose from!!
HOST CODE
My July Host Code is 2GKGF4Q7. Please use this code for orders under $150.00. I will have a small gift for those with orders over $50.00 in addition to the Perk Rewards Program. You can read all of the information at the top of the page in the Menu Bar under SHOP / Perks.
Thank you for stopping by today. I hope you enjoyed today’s project and will come back. I do read and reply to all of the comments individually. They mean a lot to me. Please reach out if you have a question.
For the first time I am doing a Paper Share for the upcoming Mini Catalog. It is the New paper only. None of the Returning Favorites are included.
You will receive 146 sheets of 6X6 Designer Series Paper. If a paper is double sided, you receive two pieces. That way you have both sides of the sheet to use.
The picture below shows the Designer Series Papers that are included in the Sale. There are 9 to choose from!!
HOST CODE
My July Host Code is 2GKGF4Q7. Please use this code for orders under $150.00. I will have a small gift for those with orders over $50.00 in addition to the Perk Rewards Program. You can read all of the information at the top of the page in the Menu Bar under SHOP / Perks.
Thank you for stopping by today. I hope you enjoyed today’s project and will come back. I do read and reply to all of the comments individually. They mean a lot to me. Please reach out if you have a question.
The content in this blog is the sole responsibility of Jackie Beers as an Independent Stampin' Up! Demonstrator. The use of and content of classes, services or products offered is not endorsed by Stampin' Up!