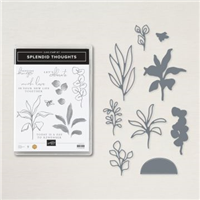
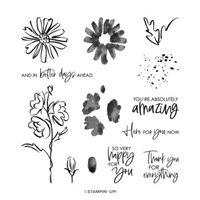
From the New Mini Catalog comes wonderful new products. Today’s card is a quick one using the Splendid Thoughts stamp set paired with the Sale-A-Bration cards and envelopes.
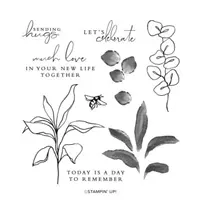
This fun card was a CASE of a card I made from one of our Stampin’ Up! online events for demonstrators. It is a bit different from my normal card layers. And if was fun to step outside of my box. So I decided to CASE my own card. Here is the card i made during the event, which was made along with the presenter.
Bundle
Both cards were made using the same stamp set. It is the Splendid Thoughts set. There are dies included which are the Splendid Stems Dies. These can be purchased as a Bundle for a 10% discount!
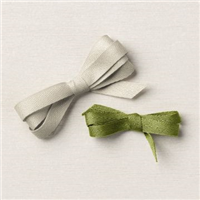
Looking at the second card, you will see a Soft Sea Foam Ribbon. It is included in the Splendid Day Suite of products. The Suite includes the Bundle, Ribbon, Trinkets, and gorgeous Splendid Day Designer Series Paper.
On the first card, I stamped the leafy stem and it’s filler stamp using Old Olive Ink and Soft Sea Foam Ink. There is a die for this, but I didn’t think about it??? Duh! I just grabbed my Paper Snips and snipped away.
Punch
The Sending Hugs sentiment is a treasure. And I wanted it to stand out, but not cover all of the background. This was accomplished by using the Rectangle Postage Stamp Punch. It is a perfect size for a smaller layer and still has some definition to it.
Background
To begin with the card base, it is a FREE Sale-A-Bration item. Instead of me using cardstock, I went with these cards and envelopes. They are the Pool Party & Soft Sea Foam Cards & Envelopes. The best part is the price! They are FREE with a $50.00 order during this SAB. Here is a picture of the card and the matching envelope.
Don’t you just love the white detail on the envelope? Plus there are 20 cards and 20 envelopes! That is an awesome deal for such pretty cards.
The second part of the background is the White layer. It is colored using the Pool Party and Soft Sea Foam Stampin’ Blends. Simply take the light of one and “squiggle” it from the top to the center. Then do the same with the light of the other color going from bottom up to the center. For a bit more color, take the dark of each and from the center go a little bit into the lighter of the same color. When they are dry they blend together and create a pretty and quick background. It is more noticeable on the second card due to brighter colors.
Sale-A-Bration
As mentioned SAB is ongoing now through August 31st. If you place an order through me that reaches the SAB requirement of $50.00 pre tax, you receive one of my Blue Star Rewards. There is a Host Code listed below. If your order is below $150.00, please use my host code. Do not hesitate to reach out to me if you have any questions.
HOST CODE
My July Host Code is ZMG9Q7EX. Please use this code for orders under $150.00. I will have a small gift for those with orders over $50.00 in addition to the Perk Rewards Program. You can read all of the information at the top of the page in the Menu Bar under SHOP / Perks.
Thank you for stopping by today. I hope you enjoyed today’s project and will come back. I do read and reply to all of the comments individually. They mean a lot to me. Please reach out if you have a question.
Today’s card is a fun birthday card using a Christmas set from the new Mini Catalog. Using it for a different occasion is a great bonus!
Stamps
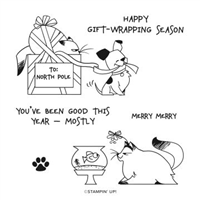
Since I love most animal stamps, and especially cats, it was a surprise to No One that I would purchase this stamp set as soon as possible. A mischief cat is just a fact! So when I needed a birthday card for someone who loves cats as well, I was ready to give this stamp set a try. The name is appropriate as it is North Pole Mischief. It will be such fun to make Christmas cards with these stamps, but this was the first use.
Sentiment
At first glance in looking at the stamp set, this sentiment is for Christmas and the good or naughty list. But I looked at it for a birthday and feel that it fits there as well. Plus the recipient is an adult and would get a kick out of those words! And with the lighter color of the DSP, I took a scrap and used it to stamp the sentiment.
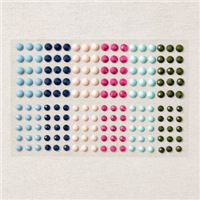
To finish the front sentiment I added a couple of the Solid Faceted Dots. Grounding the little banner was a necessity I thought.
The inside birthday wishes are from the Peaceful Moments stamp set. Here is a look at the inside of the card. It is a gift card holder which adds to fun.
There is still plenty of room to write underneath the card. No worries for you there.
Paper
This gorgeous DSP is from the Sun Prints Designer Series paper. Both the stripes and the distressed looking gray work perfectly together and are pretty to boot. Plus they highlight the stamped images. It always surprises me when I think to stamp on the DSP. When the paper is a light enough color it works for images, but this paper was perfect for the sentiment and helps tie everything together.
Measurements
This gift card layout is a good one for multiples. It only requires a half sheet of cardstock cut to 4 1/4 X 11, and then scored at 3 1/2 and 8 3/4. Fold up the smaller scored end for the gift card pocket. There is a White layer under the DSP pieces. It is 4 X 3 1/4 beneath the stripe and 4 X 2 beneath the gray. The Sun Prints striped paper is cut to 3 7/8 X 3 1/8 and the gray is 3 7/8 X 1 7/8.
For the stamped area, the Starry Sky cardstock is cut to 3 1/2 X 2 1/8 with the White at 3 3/8 X 2 1/16. Sorry for the funky measurement there, you can adjust the size to fit your image of course. On the inside of the card, the stamped White is 4 X 2 3/4 with the piece beneath the gray at 4 X 2. And the gray is cut to 3 7/8 X 1 7/8.
HOST CODE
My July Host Code is ZMG9Q7EX. Please use this code for orders under $150.00. I will have a small gift for those with orders over $50.00 in addition to the Perk Rewards Program. You can read all of the information at the top of the page in the Menu Bar under SHOP / Perks.
Thank you for stopping by today. I hope you enjoyed today’s project and will come back. I do read and reply to all of the comments individually. They mean a lot to me. Please reach out if you have a question.
Happy 4th of July everyone! The card today is made to be a celebration with sparklers. It is also a Challenge card to use “Splatter”. Hopefully both come through on the card.
Make My Monday Challenge
This card is for the Make My Monday Challenge. The theme for this challenge is Splatter. As you can see, I used quite a lot of Splatter! Please join in the fun with your own creation. Click on the link and it will take you to the blog. Look at the cards made by myself and the other Design Team members and then create your own version.
A close up of the Splatter!
Background Splatter
As mentioned above, this challenge is to use Splatter. The method for Splatter that I chose to use is Stampin’ Write Markers. Simply take the brush end of the marker, and flick it against the inside edge of the cap. Start with just a little bit of pressure and then build up. Starting lightly allows you to get a feel for it and to not damage your marker. It really does not take a lot of pressure. This card is Red, White, and Blue so the splatter is Real Red and Starry Sky. The Starry Sky is a bit brighter than Nigh of Navy would be. Stampin’ Write Markers are only available as a Color Family unfortunately. They are great tools to have on hand however.
Dies
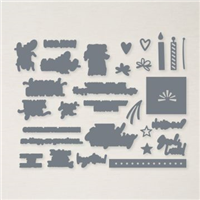
There are quite a few different punches plus a couple of Dies used on this card. The need for different pieces to get the look required searching through quite a lot of my products! To begin, the “sparklers” are actually the candle from the Sentiment Silhouettes Dies. It pairs with the Charming Sentiments set. The “sparkle” tip is another of the dies. The same splatter was done on a scrap of paper large enough to die cut four of the tops.
Punches
The Decorative Circle Punch was utilized as the background layer for the sparklers. And surprisingly, the Vintage Bottle Punch is the base for the “4”. It needed a platform and by cutting the bottle in half, the bottom half was a perfect size to highlight the 4.
Besides the candle sparklers, the July 4 is the second focal point. The punch Bundle is a favorite of mine. Best Label Punch is the name of it and is a great size. There are outlines that can be punched as well. However the plain on this works perfectly as there are a lot of things going on already.
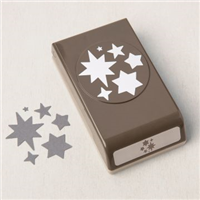
The final punch is the Starlit Punch. There are three stars at the top of the card that are punched from the White and Red Glimmer Paper in the Mini Catalog that just debuted. Paired with the Resin Stars, which sadly just retired, helps them stand out a bit. Some red stars were tried, but they did not make the cut!
Stamps
The Alphabest stamp set is what pairs with the Best Label Punch. As mentioned they are a great bundle to have on hand for quick words, initials, numbers, etc. Due to the overwhelming Blue and Red theme, I opted for the July 4 to be stamped in Memento Tuxedo Black as a different color .
HOST CODE
My July Host Code is ZMG9Q7EX. Please use this code for orders under $150.00. I will have a small gift for those with orders over $50.00 in addition to the Perk Rewards Program. You can read all of the information at the top of the page in the Menu Bar under SHOP / Perks.
Thank you for stopping by today. I hope you enjoyed today’s project and will come back. I do read and reply to all of the comments individually. They mean a lot to me. Please reach out if you have a question.
Today begins the July – December Mini Catalog PLUS Sale-a-bration. Do you have your lists ready to go? Even after doing the preorder, which is available for demonstrators, I still have a lengthy wish list.
The project I am sharing today is a mix of Die, Fussy Cutting, Coloring, and one little Stamp. That is not the normal card I share. But I hope you love it.
Dies
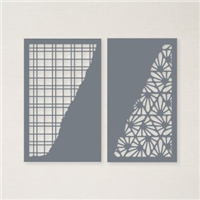
It is really difficult for me to pick the main point on this card. But I have decided to go with the Die. It is the Split Card Textures Dies. There are two different dies in the set. And they are stand alone dies in the Annual Catalog. They do not pair with a stamp set. Plus they can be used in a variety of ways.
The sample in the catalog on page 86 shows a “layer” piece of probably 4 X 5 1/4 with the right side cut using the die. For my card, and because I was using a Specialty Paper, I cut an angled piece and then only die cut that piece. Either works and gives totally different looks. Additionally, the little squares can all be pushed out I simply opted to keep most of them to show off the Specialty Paper.
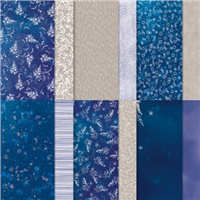
Paper
As mentioned above, I used a Specialty Paper for the Die cut piece. It is the Gold & Rose Gold 6X6 Metallic Specialty Paper. The one I used is the Rose Gold as it pairs with the rose in the colored floral arrangement.
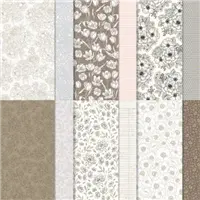
Speaking of the floral part, it may look familiar to you. This is a section of the Abigail Rose Designer Series Paper. Cutting a 6X6 piece of one of the patterns, I colored each of the floral arrangements using Stampin’ Blends. One of those was used about two weeks ago. You can see that card HERE. As with the first card, I fussy cut the flowers and then applied it to the edge of the cardstock. On this version I left the part of the flowers which overlap the Rose Gold loose for a bit of dimension.
Stamps & Finishes
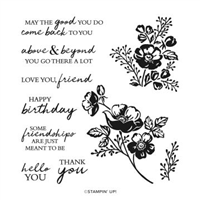
The lone stamp on this card is the sentiment. It is from the Color & Contours stamp set. With the boldness of the Rose Gold die cut layer and the pretty floral, the sentiment was left a little simpler. Since it is an Amazing sentiment (LOL) it is fine by itself.
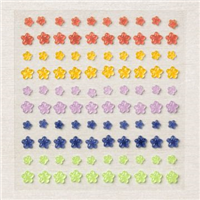
For the finishing touch there needs to be a bit of bling. In this case I used a single bling. The 2021-2023 In Color Opal Rounds fit the bill. Just a bit of sparkly pink to finish everything off.
HOST CODE
My July Host Code is ZMG9Q7EX. Please use this code for orders under $150.00. I will have a small gift for those with orders over $50.00 in addition to the Perk Rewards Program. You can read all of the information at the top of the page in the Menu Bar under SHOP / Perks.
Thank you for stopping by today. I hope you enjoyed today’s project and will come back. I do read and reply to all of the comments individually. They mean a lot to me. Please reach out if you have a question.
Having a card ready to go when needed is one of the great things about making a lot of cards. And some stamp sets are a perfect fit for making multiples. Today’s card fits both of those criteria.
Stamps
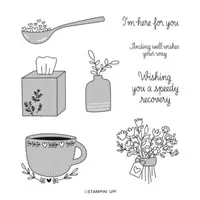
This sweet card uses two different stamp sets. Surprisingly the flowers come from the Speedy Recovery stamp set. This was one I used a few weeks ago with the tissue box. You can see that post by clicking HERE. It was said then how versatile this set really is. These flowers could be for any occasion. Especially with that sweet little tag attached.
For the sentiment, I went to the Shaded Summer stamp set. Just the simplicity of that sentiment made it a great one for a “just in case” type card. And I love having these type cards on hand.
Paper
This pretty DSP is from the Hues of Happiness Designer Series Paper. It pairs perfectly with the flowers and allows the brighter colors to pop. Since the strip of DSP is only 2 X 4 7/8, it covers half of the front White layer, a lot of cards could come from one piece of DSP. You get more bang for your buck as well as having sweet cards on hand.
Layers
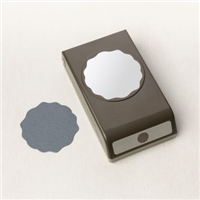
The focal layer is one that made me happy. The flower is punched out using the Decorative Label Punch. And a wonderful discovery was that the roughly 2 1/2″ Layering Circle Die fits it perfectly. For the final touch I used the Fun Flower Resin Shapes next to the sentiment. The little flower mimics the small flowers in the DSP.
Today is the Last Chance on Retiring Mini Catalog Products
Click on the photo to get the complete PDF of retiring products. Pay close attention to discounted items. It may be less expensive to purchase some items that are part of a bundle separately, than at the bundle price! I want you to get the most for your dollars.
HOST CODE
My June Host Code is B4ZVQK6D. Please use this code for orders under $150.00. I will have a small gift for those with orders over $50.00 in addition to the Perk Rewards Program. You can read all of the information at the top of the page in the Menu Bar under SHOP / Perks.
Thank you for stopping by today. I hope you enjoyed today’s project and will come back. I do read and reply to all of the comments individually. They mean a lot to me. Please reach out if you have a question.
The content in this blog is the sole responsibility of Jackie Beers as an Independent Stampin' Up! Demonstrator. The use of and content of classes, services or products offered is not endorsed by Stampin' Up!