The card I am sharing today is one my downline, Karen Szczepkowski, made as a swap for OnStage. I fell in love with it immediately. And I bet you will as well.

The Card
Above is the card laying flat for mailing. Now for the stamp up view.

And the other side

I should have taken a view from the top. The column is square and shows off the three panels of DSP, plus the additional one that is on the right edge. I did not add an inside sentiment in my recreation. However the card folds flat for mailing but also will fold flat to the left so you could easily stamp, write, or add a thin layer with your inside sentiment.
Papers and Directions
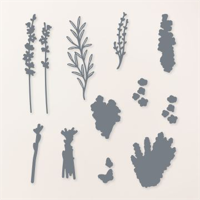
The gorgeous DSP are all pieces from the Perennial Lavender Designer Series Paper. Each of the three column strips measure 1 3/8 X 5 3/8. And the right side back panel one is 1 1/8 X 5 3/8. The card base is Basic White that measures 5 1/2 X 10 1/8. It is scored at 4 1/4, 5 3/4, 7 1/4, and 8 3/4. Fold and burnish all of the folds with all going in the same direction. As you fold them all you will see that the column almost creates itself as they curl in. To dry fit and square up the column. Lay the card with the “back of the card” to the right and all of the scores to the left. Fold at the 4 1/4 score line and then on each score line making a square of those folds. The last and smallest one does not quite meet the 4 1/4 score line. Now you are ready to secure the column
Before gluing, add all of the DSP panels in place as shown. Next, fold the top sections at the third score line ( the one closest to the 4 1/4 score) and press the others flat. Lift the last, and smallest section, add adhesive to it and tuck under. Press it flat and when you open it up you should have a column. To fold for mailing, simply fold on the 4 1/4 score line and you will have the card laying like the first photo above. Make sure to try this before adding adhesive!!
Sentiment layer
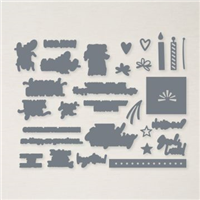
The simple sentiment layer is perfect to not cover the beauty of the paper. This lovely Happy Birthday is from the Charming Sentiments set. And the matching Die cuts it perfectly. The dies are named Sentiment Silhouette Dies. I stamped in Shaded Spruce to bring out the dark green of the DSP. To give some added texture, I added a faux bow from the 2022-2024 In Color Orchid Oasis Bakers Twine. And of course some bling! One of the Fine Purple Shimmer Dots fit that bill perfectly.
Both of the Last Chance Lists are listed below. Click on either the Mini or Annual Catalog list and you will get a PDF of the full list.


HOST CODE
My MARCH Host Code is GBUE3X7H. Please use this code for orders under $150.00. I will have a small gift for those with orders over $50.00 in addition to the Perk Rewards Program. You can read all of the information at the top of the page in the Menu Bar under SHOP / Perks.
Thank you for stopping by today. I hope you enjoyed today’s project and will come back. I do read and reply to all of the comments individually. They mean a lot to me. Please reach out if you have a question.
Smile and Keep On Stamping,
Jackie

SUPPLIES: