I hope you have taken advantage of the Clearance Rack Refresh as well as the Last Chance Sale for the Mini Catalog. There are some amazing deals in both places.
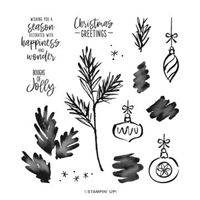
My project today is a package of Gift Tags, or Random Act of Kindness cards, using one of the Retiring products. It is the Decorated With Happiness set. This is a wonderful Bundle, and one that is less expensive purchased separately with the sale pricing.

Stamps
All of the stamps used on this project are from the Decorated With Happiness set. There are matching dies as I mentioned at the top of the post. However, I wanted to keep this as flat as possible. The bough is stamped and then the shadow stamped added. As is the two ornaments. For the sentiment I used the Layering Circles Dies and then turned it into the look of an ornament. To do that I drew a straight line for the hanger using the Sweet Sorbet Stampin’ Write Marker. And to finish that look I tied a bow using the In Color Baker’s Twine in Sweet Sorbet and White.

Cards
The 3 X 3 cards are made the same way as the front of the gift holder. Here is a view of one of those. They do not have the added layers of the sentiment though. I made a few with different ornaments but all done the same way. They each received a Festive Pearl in the center of the ornament for a touch of bling.
Directions for Card Holder
The front stamped layer is 4 X 3 3/4 to begin with. After doing the stamping I cut 1 1/8 off the top to fit over the flap. When adhering this layer, place the bottom section first and allow equal measures on the bottom and sides. Do this with the holder closed and the bottom section you are adhering will be flush against the bottom of the flap. Then add the top piece with it being flush with the bottom of the flap and equal on sides and top.
Here is an open view of the card holder.

This is a very simple card holder. It is another oldy but goody that I found when looking for something! That seems to happen fairly often. The holder begins with a piece of Garden Green card stock cut to 4 1/4 X 11. It is then scored at 1 1/4, 5 1/4, 6 1/4, and 7 1/4. Fold and burnish the score lines to create the mountain in the center .
For a closure, I used clear velcro dots. They were added after the front layer is adhered. You may have your own method for adding these. But I add the one under the flap first. I can place it towards the bottom of the flap and then with the second half attached simply close the flap on to the closed box. This ensures perfect placement.
I included 4 cards and envelopes and there is plenty of room.


HOST CODE
My December Host Code is Y7T7EMTC. Please use this code for orders under $150.00. I will have a small gift for those with orders over $50.00 in addition to the Perk Rewards Program. You can read all of the information at the top of the page in the Menu Bar under SHOP / Perks.
Thank you for stopping by today. I hope you enjoyed today’s project and will come back. I do read and reply to all of the comments individually. They mean a lot to me. Please reach out if you have a question.
Smile and Keep On Stamping,
Jackie

SUPPLIES: