Today begins the Designer Series Paper Sale!!!! 15% off is a great time to stock up on this beautiful paper. Check out the list of select packages towards the bottom of the post.
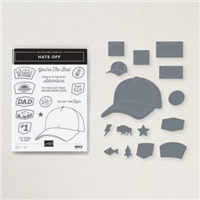
My card I have to share today is for a little guy’s First Birthday. I am not very good about children’s cards. Looking through the stamp sets, once I saw the Hats Off Bundle, I knew that was the one. His Dad wears a hat all the time. I thought a hat would be perfect.

Details
I love the detailed stitching on the hat! That is such a great touch and makes the hat much more realistic. I couldn’t really decide how I was going to add the “1” that I wanted on the card. The Hats Off stamp set came to the rescue with the “#1” stamp. It is intended for a #1 Dad type meaning. But I think it is just as great for my purpose.
The die used to cut the #1 is included in the set, as are several others for different emblems which match. To add a little more realism, I used the negative of the hat die cut and sponged the area beneath the bill. I placed the hat where I wanted it, layed the negative over top, and removed the hat. Then I simple slid the negative down a touch and began blending some Soft Suede Ink. It did not take very much.
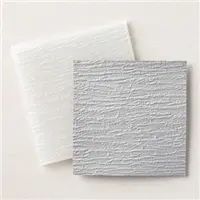
The final of the details is the Old Olive background. I used the Bark Embossing Folder. It gives a great image that works for so many designs. I also die cut the Very Vanilla layer with the Stitched Rectangle Dies. This stitching matches the stitching of the hat.
Colors and Finishes
For once I have not used any Designer Series Paper! I know, it is very hard to believe. But I wanted a little guy card and grass and dirt were my thoughts. LOL! The base of the card is Crumb Cake, with a layer of Old Olive embossed with the Bark Embossing Folder. The focal layer is Very Vanilla cut using the Stitched Rectangles Dies. I used the 3rd largest die.
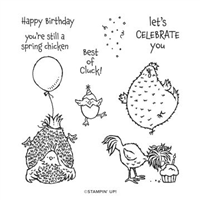
To finish the card, I used the Happy Birthday from the Hey Birthday Chick stamp set. I love the not quite even letters in the words. I stamped the sentiment and then punched each end using the flag end of the Banner Pick A Punch. To give that a little color to stand away from the focal layer of the same color, I used the Old Olive Stampin’ Write Marker. I used the brush end and just layed the middle of the brush touching the edge of the sentiment. By using the center of the brush end, it does not bend over on the cardstock to give more color than I want. This gives a more outline look to the edge of the banner.
Below is the information on the DSP Sale. It begins today and ends on August 2nd. I hope you love the DSP as much as I do and can take advantage of this.

The picture below shows the Designer Series Papers that are included in the Sale. There are 9 to choose from!!

HOST CODE
My July Host Code is 2GKGF4Q7. Please use this code for orders under $150.00. I will have a small gift for those with orders over $50.00 in addition to the Perk Rewards Program. You can read all of the information at the top of the page in the Menu Bar under SHOP / Perks.
Thank you for stopping by today. I hope you enjoyed today’s project and will come back. I do read and reply to all of the comments individually. They mean a lot to me. Please reach out if you have a question.
Smile and Keep On Stamping,
Jackie

SUPPLIES: