I have been cleaning, sorting, etc in my craft space a bit lately. One of the best parts of this is I find old projects that I saved because of the layout, folds, etc. Today I have a gift card holder that is an “Oldie but a Goodie”. This is one that is very quick and simple in terms of cutting and scoring. And it it super flexible so that different stamping or DSP makes it appropriate for anyone at any time of year. I know I need gift card holders year round!

As I started working on this post, I realized I did not add the touch of bling that I had planned on. So imagine that there is some bling next to the sentiment! LOL!!! Sometimes I would forget my head. I was running out of time, so did not go back down to my room to fix it. Sorry!!
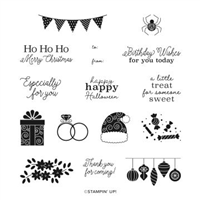
Besides the Plaid Tidings Designer Series Paper, I used the Little Treats stamp set. This little set has decorations and sentiments for a variety of occasions. Plus the Little Treat Box is adorable.
Here is the inside of the card.

As you can see , the gift card sort of stands up in the center fold. You can decorate this card as much, or as little as you want. I opted to just show the pretty DSP. It is from the Plaid Tidings Designer Series Paper. As I have this one done, which is DSP on every panel on both sides, it takes 2 sheets of the 6X6, with just a bit left over. I have the measurements for you below.
Here is a close up of the slit that the gift card fits in.

I cut the slit just after I have made all of the score lines. Go back to the 6″ score line. It is the center one of the three that are close together. Using the Paper Trimmer, lay that score line on the cutting track. Come in 3/8″ and slice down the score line, and stop at 3/8″ from the other end. To make the little stand up holder, use Tear & Tape and place it against the cut edge on one of the panels above or below the cut line. You do not need to do it on both of those sections. But the tape does need to be against the edge so you don’t close up the opening you made.
Thank you for stopping by today. I will add the instructions and measurements just below. If you have any questions, don’t hesitate to contact me. I would love to help you out.
MEASUREMENTS:
- Card base is 4 1/4 X 10
- Score along the 10″ side at 2, 5, 6, & 7.
- Place the 6″ slit on the Paper Trimmer and cut , leaving 3/8″ from each end solid
- Fold and burnish on all score lines. Make a “mountain, Valley ” fold with the three short lines. The slit for the gift card should be at the top.
- Place Tear & Tape along the edge on each end of one of the 5-6 or 6-7 scored sections.
- Cut DSP to: 2 pieces cut 1 3/4 X 4, and 4 pieces cut 2 3/4 X 4
- After adhering the paper, remove the Tear & Tape and make the mountain with the slot at the top.
- Decorate the front as you see fit. I did use a velcro dot to hold the card closed due to the thickness.

HOST CODE
My August Host Code is 6M4NU6C2 Please use this code for orders under $150.00. I will have a small perk for those with orders over $50.00
SUPPLIES: